Manual Build and Deploy (Angular)
You created your Radzen application. Congratulations! Now it is time to deploy it on your server.
Build and deploy the Angular application
Install Node.js
In order to build your Radzen application for production you need Node.js v6 or newer. If you don’t have Node.js installed on your machine you can get it from the official web site or via nvm (Node Version Manager).
Build your app for production
Before you deploying your application you need to create a production build.
- Open a terminal window and go to the directory of your Radzen application. That directory was specified when you created your app.
- Change the current directory to
client. Radzen outputs the Angular application in aclientsub directory. - Run
npm install. This will install all dependencies required to build and run your Radzen application. Relax. It will take a while. - When the dependencies install you can build your application with Angular CLI.
- Windows: run
.\node_modules\.bin\ng build --prod - macOS or Linux: run
./node_modules/.bin/ng build --prod
- Windows: run
If you won’t deploy your app at root level you need to specify the path via the --base-href option.
For example if you plan to deploy your app to http://example.com/foo/bar/ you must
run ng build --prod --base-href /foo/bar/.
Build your with Internationalization (i18n) support
If you have Angular Internationalization (i18n) enabled you can:
- Run
ng xi18n --output-path ./src/i18n --locale en-USto generate XLF file for default culture (in this case en-US) - Create
client/xliffmerge.jsonfile with the following content:{ "xliffmergeOptions": { "srcDir": "src/i18n", "genDir": "src/i18n" } } - Run
xliffmerge --profile xliffmerge.json en-US fr-FRto generate XLF files for all cultures (in this case en-US and fr-FR). Refferxliffmergesimilar to Angular CLI.- Windows:
.\node_modules\.bin\xliffmerge - macOS or Linux:
./node_modules/.bin/xliffmerge
- Windows:
- Translate your strings and mark them as translated as shown at the end of Angular Internationalization (i18n) article.
- Run
ng serve --aot --i18n-file=src/i18n/messages.en-US.xlf --locale en-US --i18n-format=xlfto run the application for default culture - Run
ng build --prod --aot ----base-href /foo/bar/en-US --output-path=dist/en-US --i18n-file=src/i18n/messages.en-US.xlf --locale en-US --i18n-format=xlfto build the application for every culture
Change production endpoints
Sometimes you would like to use a different REST/OData service URL in production.
To do so update src/environments/environment.prod.ts - replace the URL of your services with the new ones.
Deploy
After the build finishes the output will be available in the dist directory of the app.
Deployment is as simple as copying the dist directory to your server.
You can also test the production build by running ng serve --prod and
then opening http://localhost:4200 in your browser.
Build and deploy the ASP.NET Core application
Radzen creates a ASP.NET Core application if you use a MS SQL Server, MySQL, Oracle, PostgreSQL data sources. Here is how to deploy it.
Deploy to IIS
- Follow the official Publishing to IIS instructions to prepare IIS for ASP.NET Core support.
- Build the ASP.NET Core application.
- Open a terminal window and go to the directory of your Radzen application.
- Change the current directory to
server. - Run
dotnet publish -c Releaseto package the application inReleasemode. - Copy the contents of the
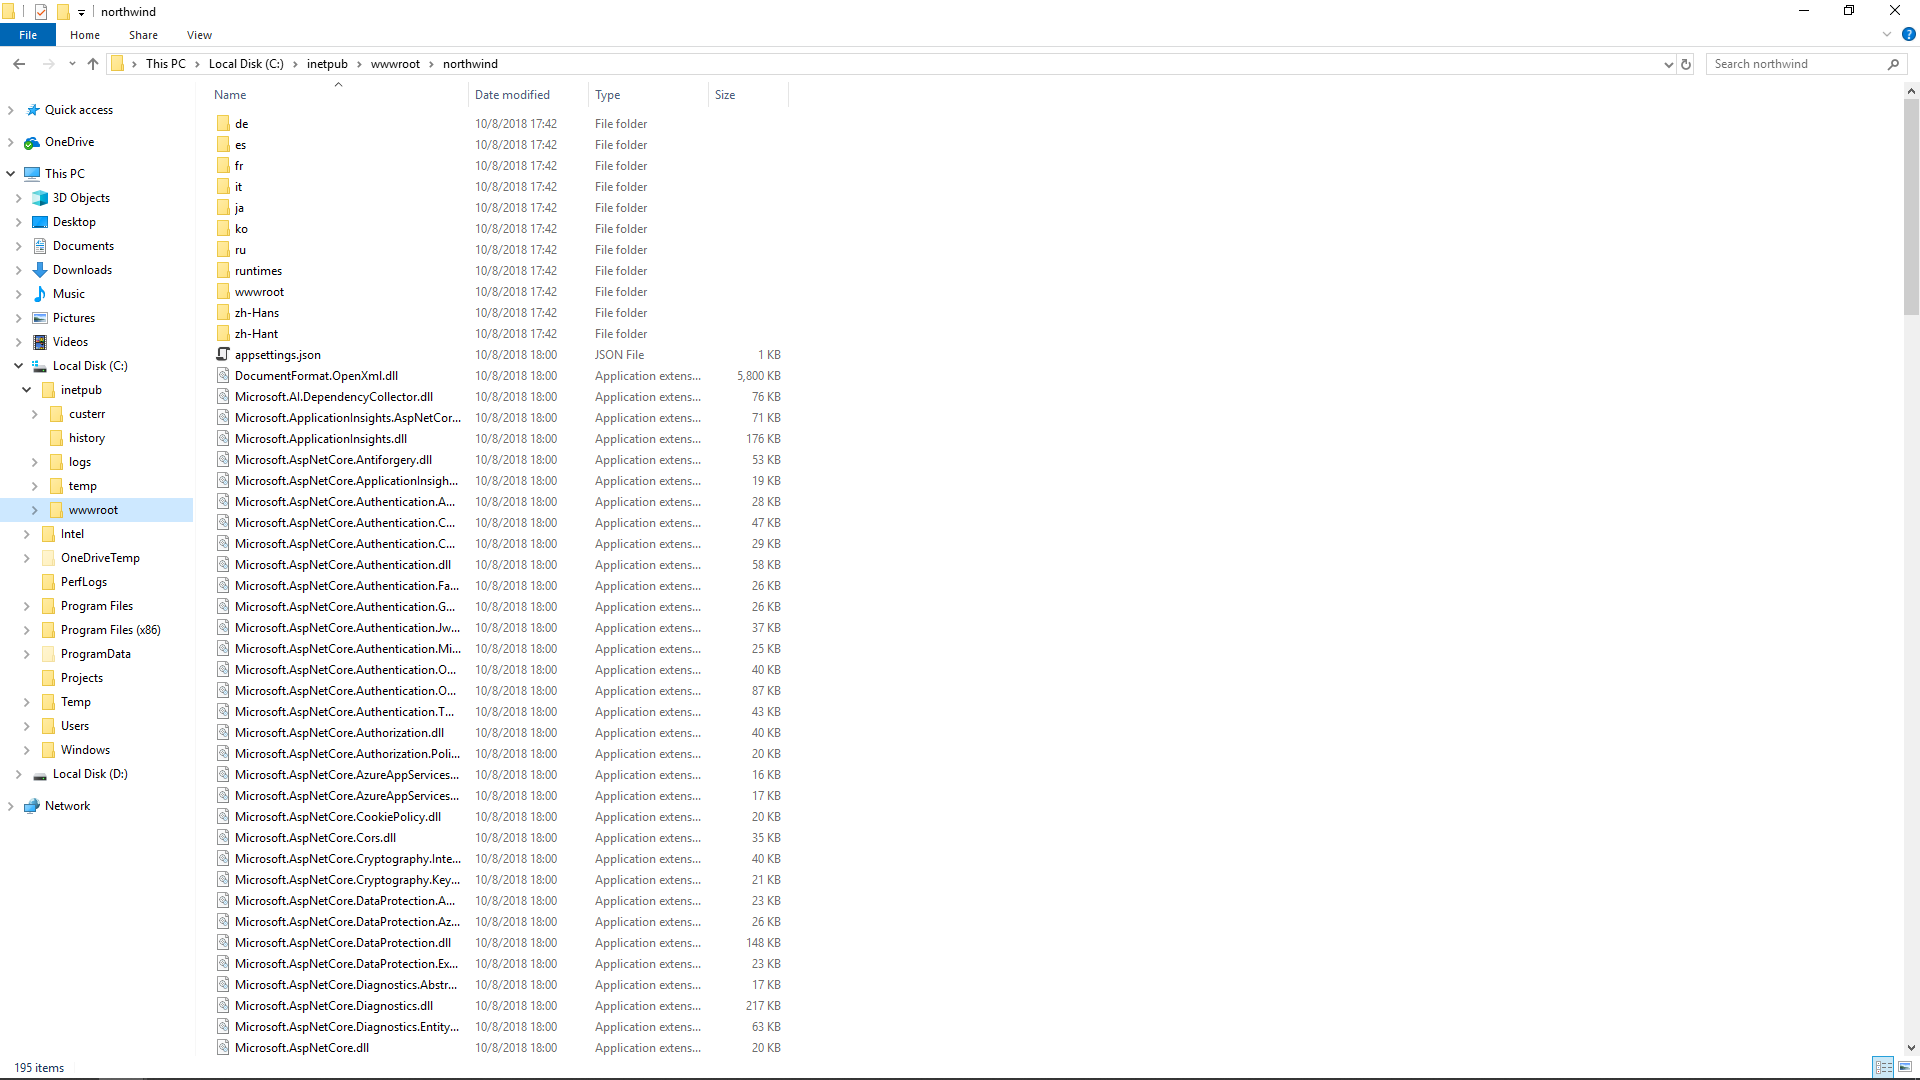
server\bin\Release\netcoreapp3.1\publishdirectory to your server.
- Add a web site or an application from the IIS Manager pointing to the location from the previous step.
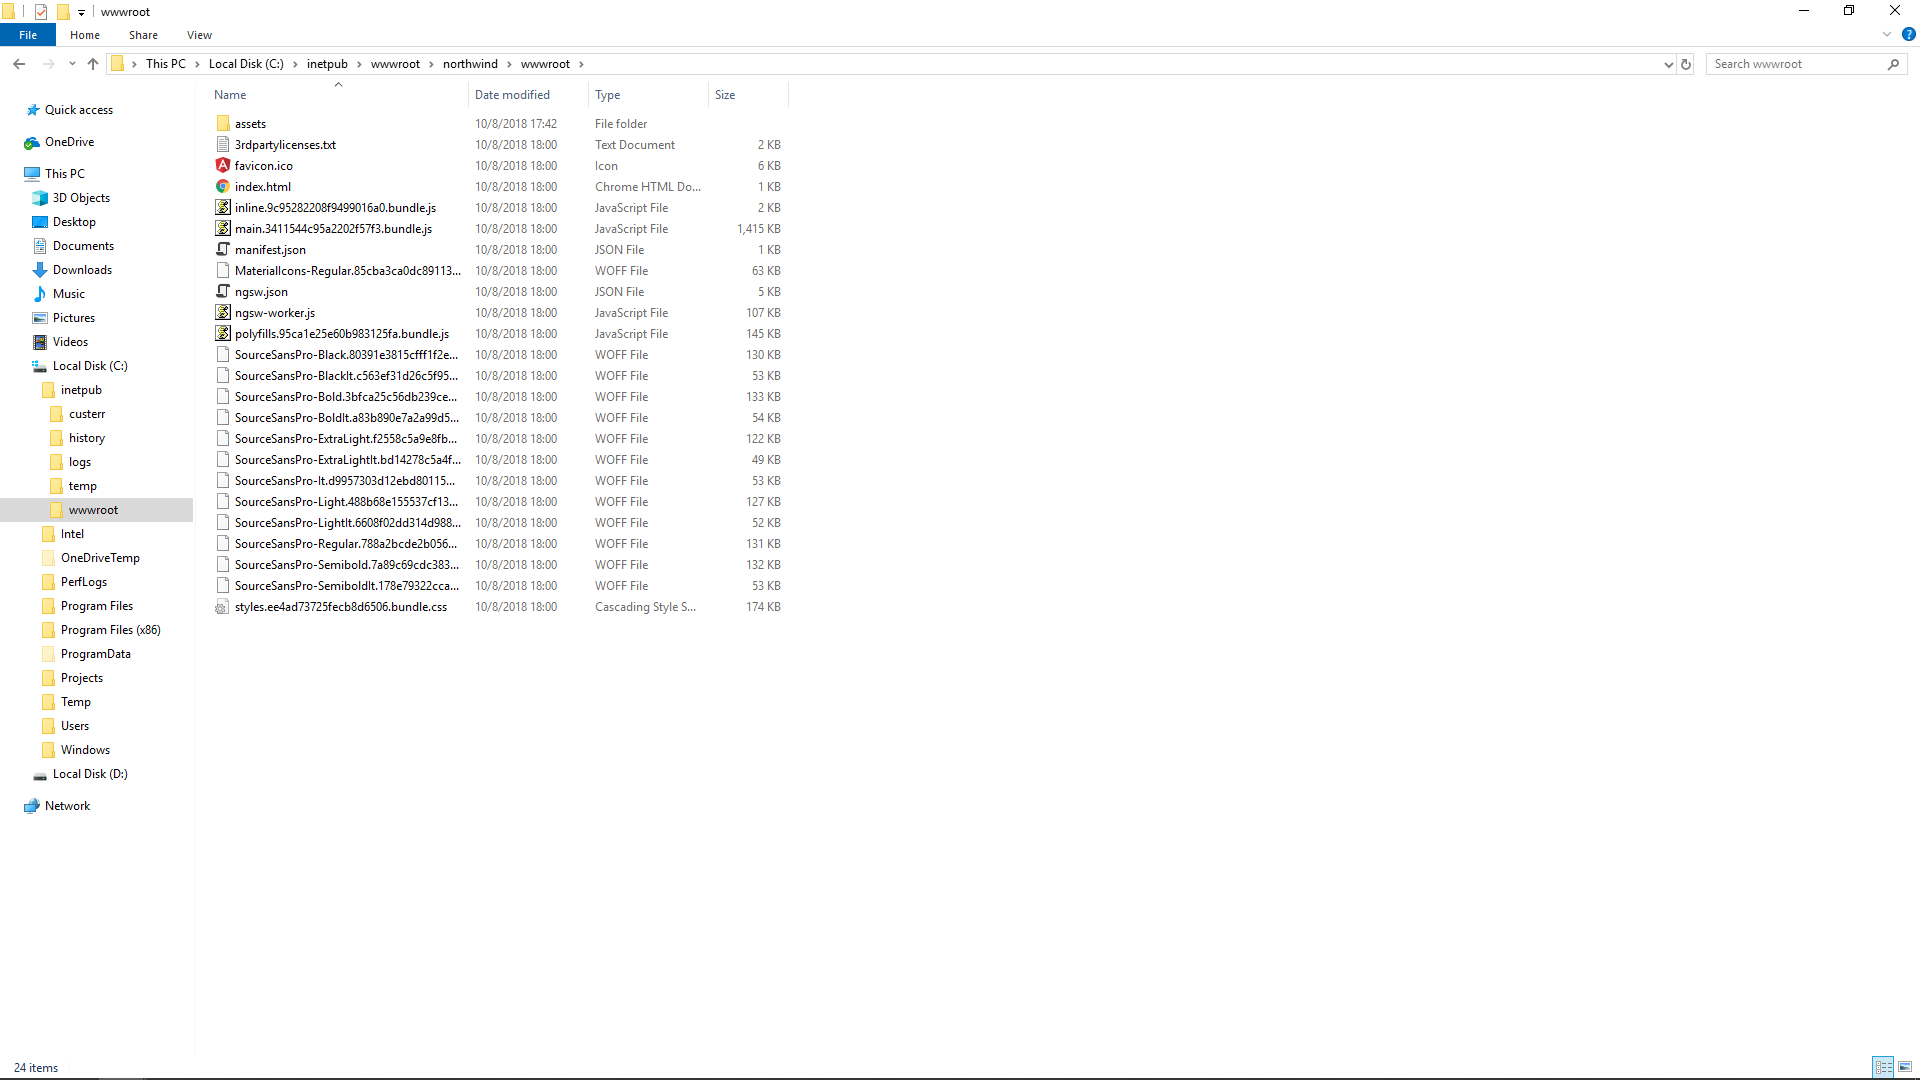
- Add the Angular app in
wwwrootsub-folder of your .NET Core app.
Now we need to specify the connection string to your production MS SQL Server. We will do this by defining an environment variable with the Radzen application will read at runtime.
- Open IIS Manager.
- Select the Radzen web site/application created in the previous step and click Configuration Editor.

- Open the Section dropdown and select system.webServer/aspNetCore.
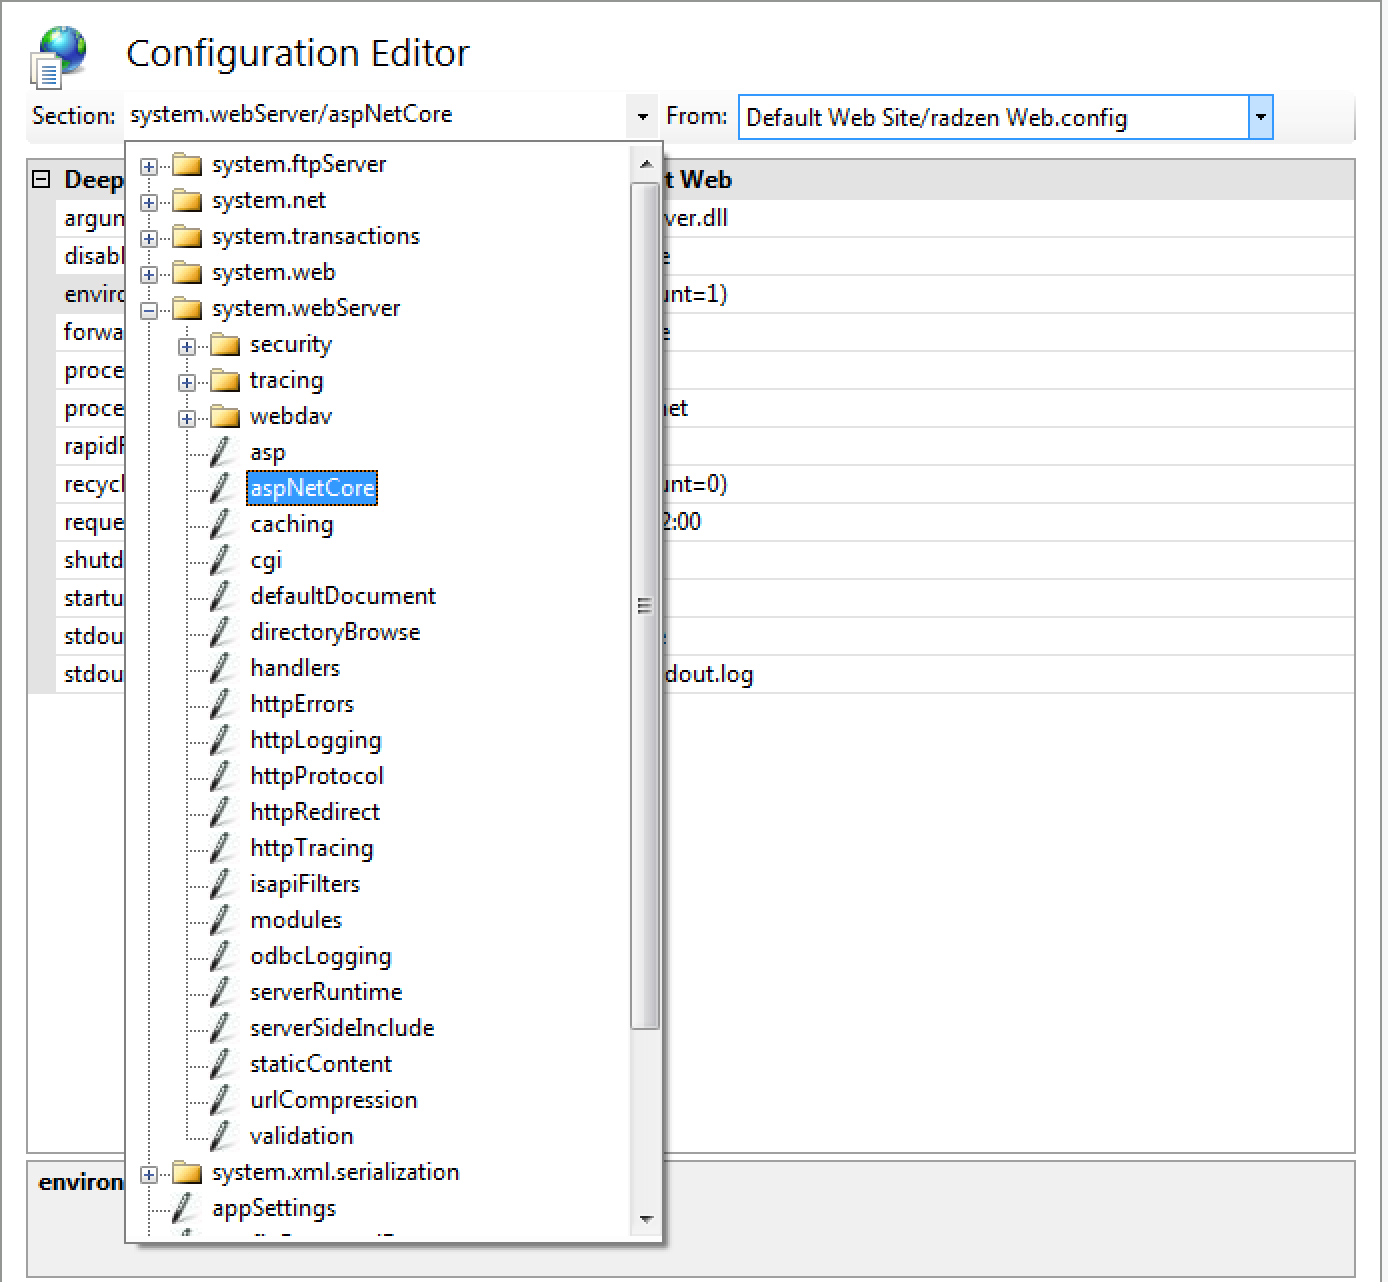
- Open the From dropdown and select ApplicationHost.config.
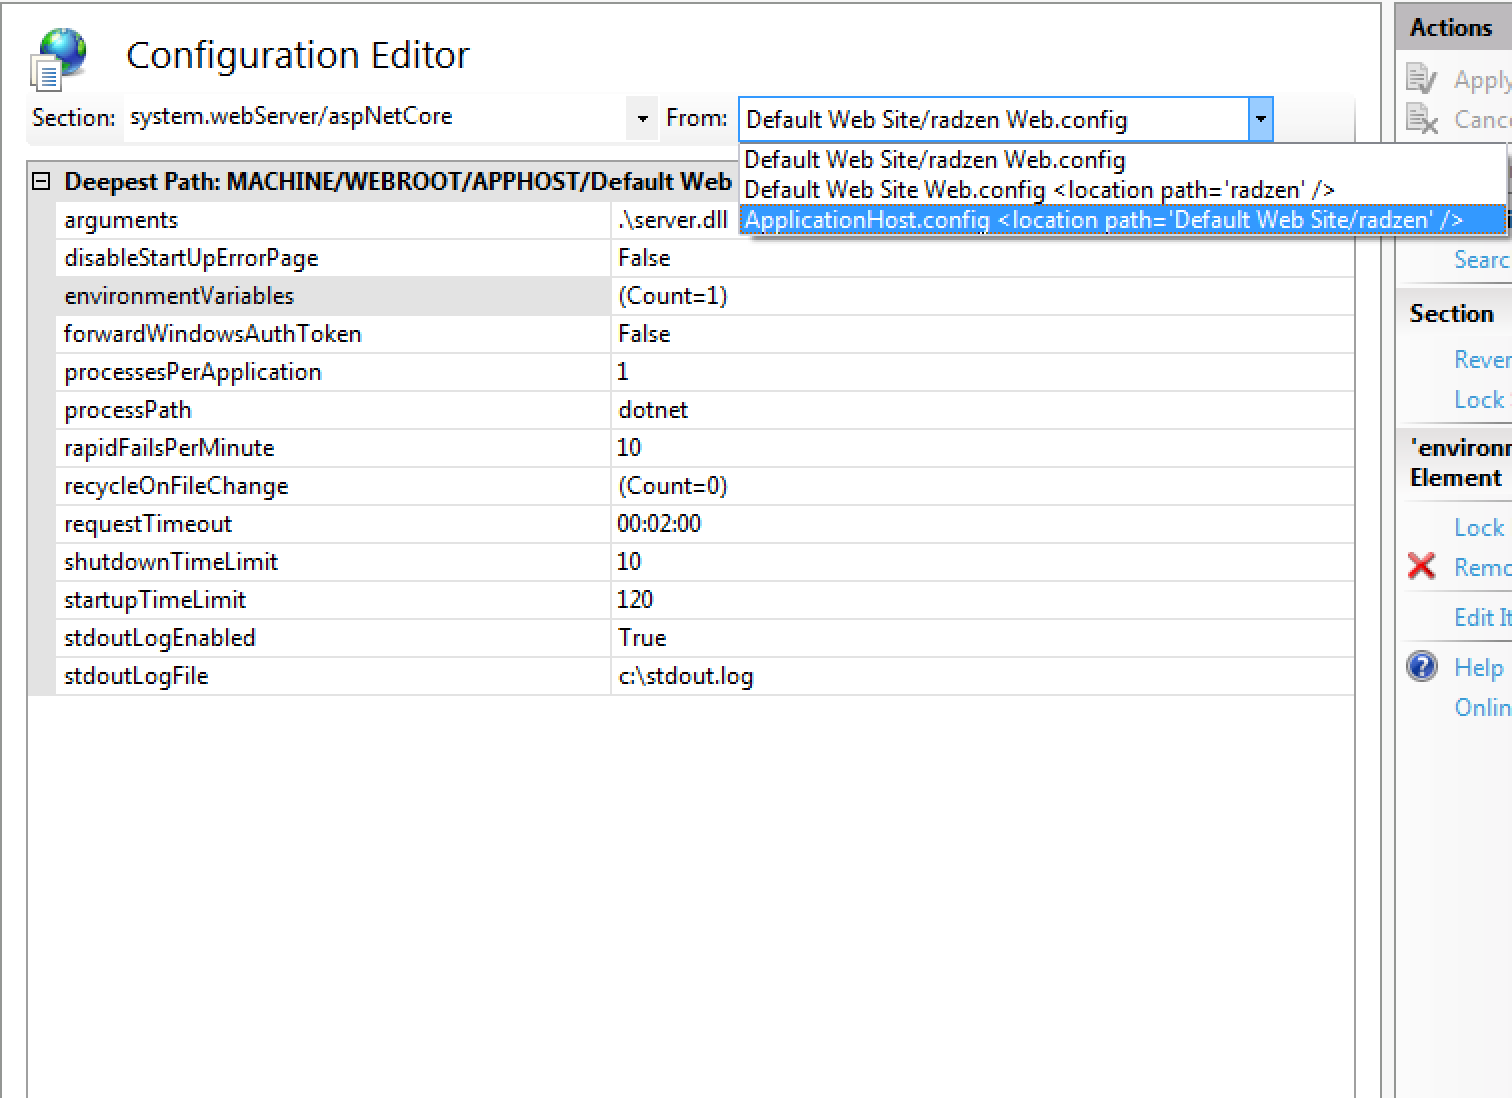
- Click the … button next to environmentVariables.
- Add a new environment variable with name
ConnectionStrings:<DataSourceName>ConnectionwhereDataSourceNameis the name of your MS SQL data source as defined in Radzen e.g.ConnectionStrings:NorthwindConnection. Set the value to the actual connection string to your production MS SQL Server.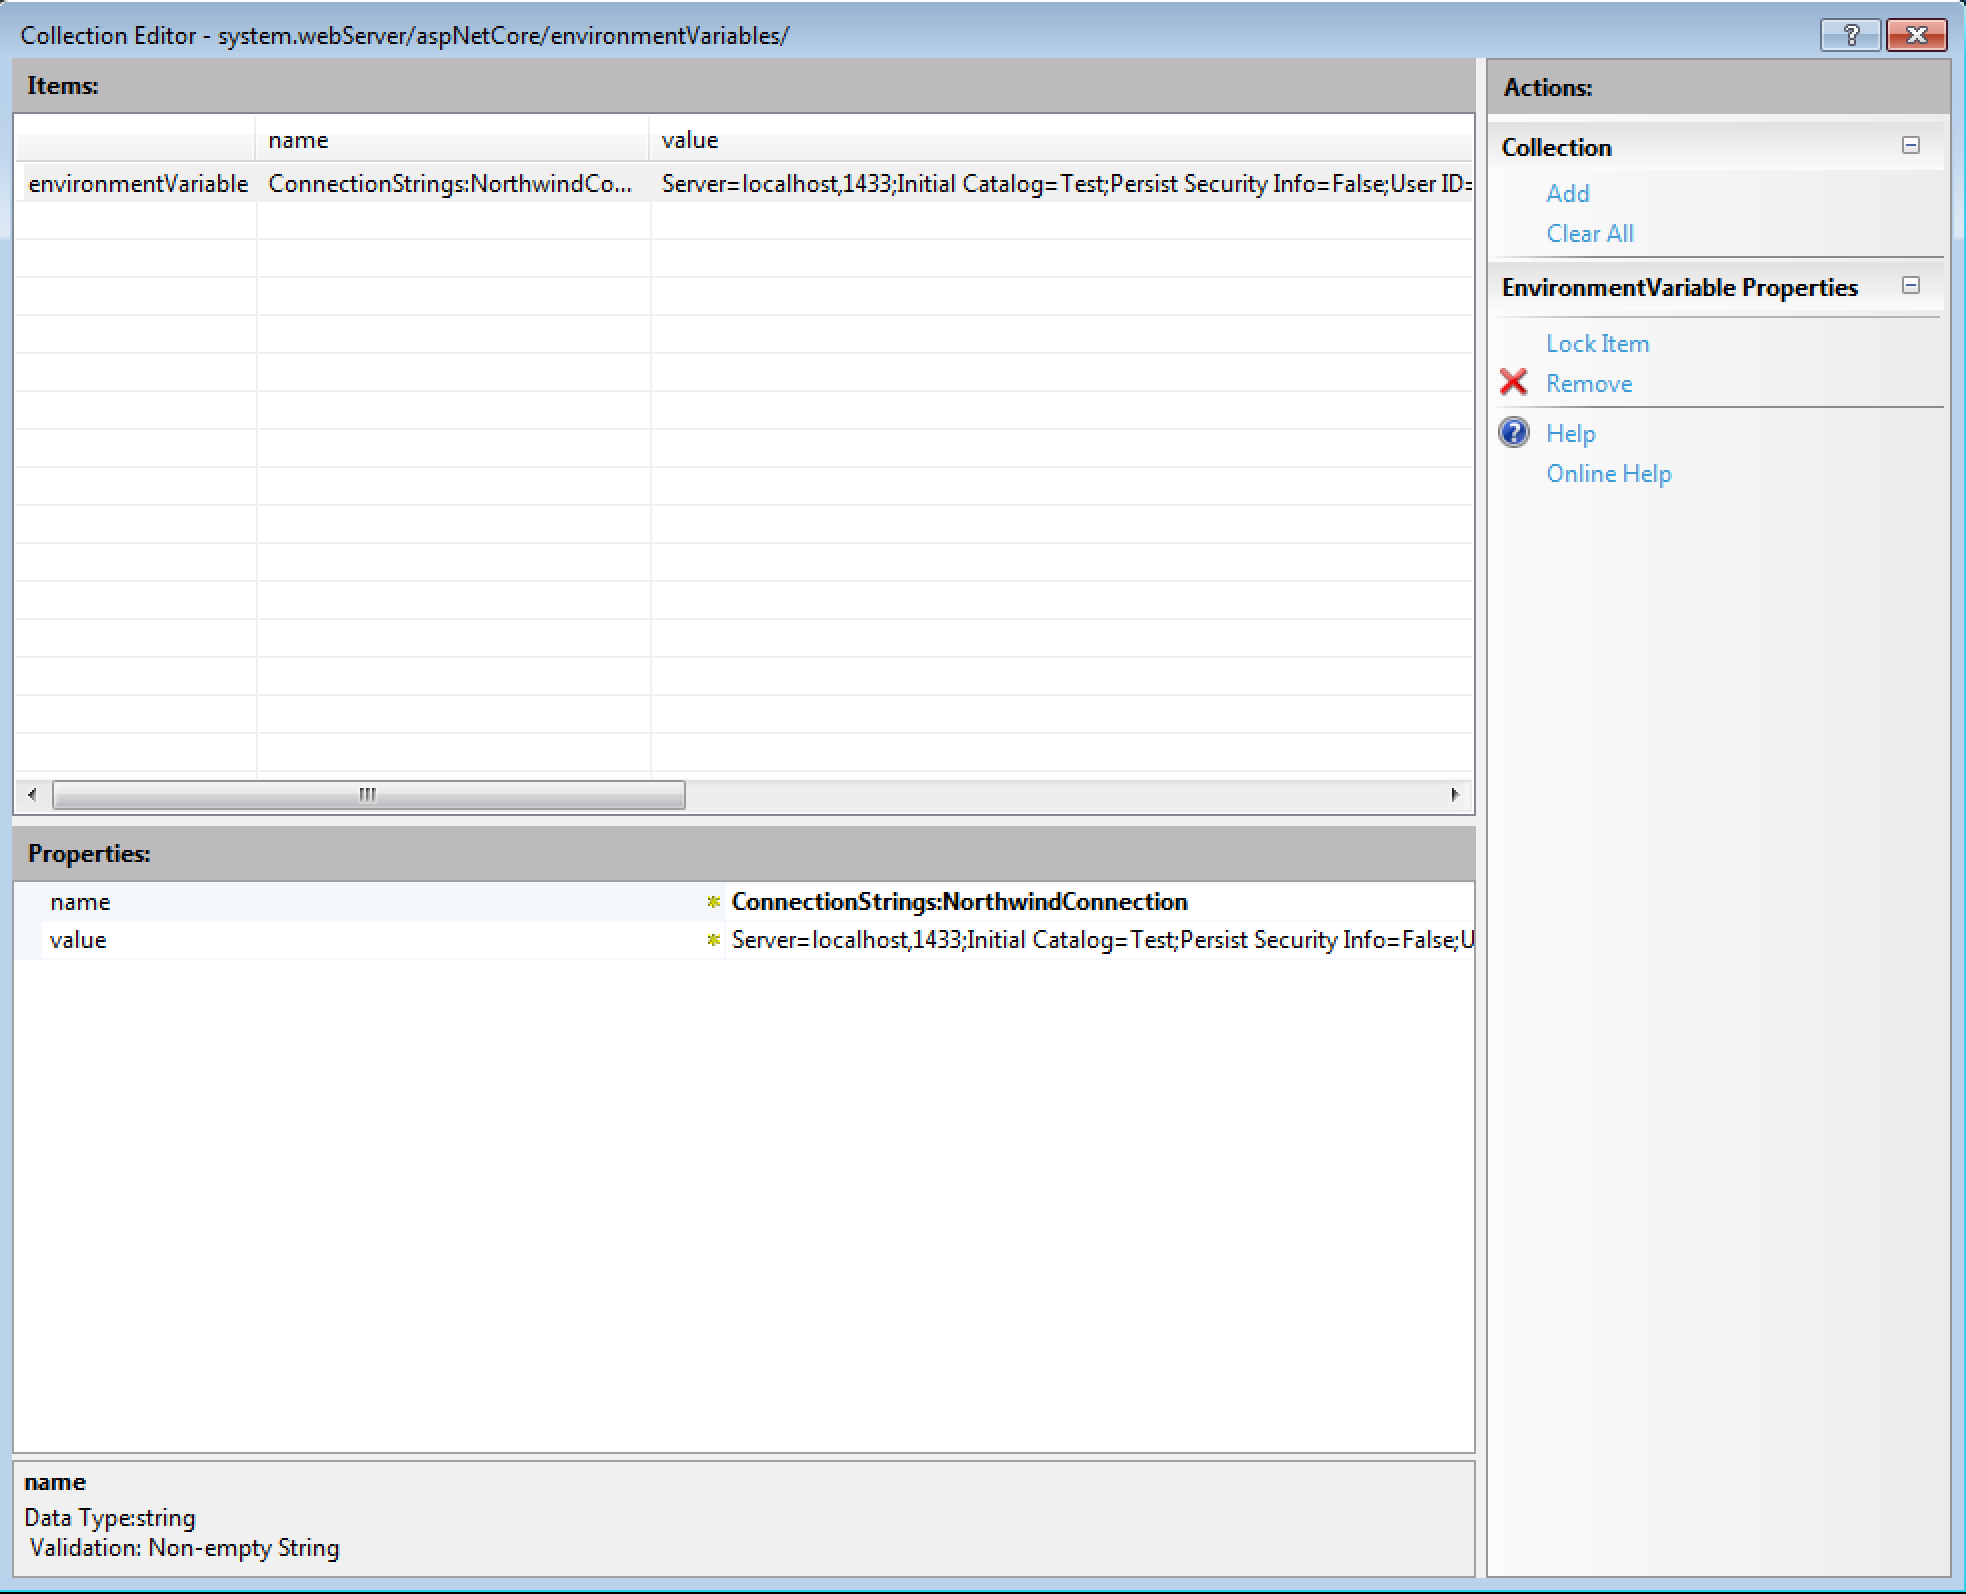
- Close the environment variable editor and click the Apply button in the top right corner of the Configuration Editor.