Database setup | Create a Blazor CRM application with Radzen Blazor Studio
Radzen Blazor Studio applications typically start from the data. In this case we will use a MS SQL database that we will create from scratch.
Create the database
First you have to create the tables that will store the CRM data: Contacts, Opportunities and tasks.
Fire up SQL Management Studio (or your other favorite DB management tool) create a database called RadzenCRM and add the following tables and foreign key relationships.
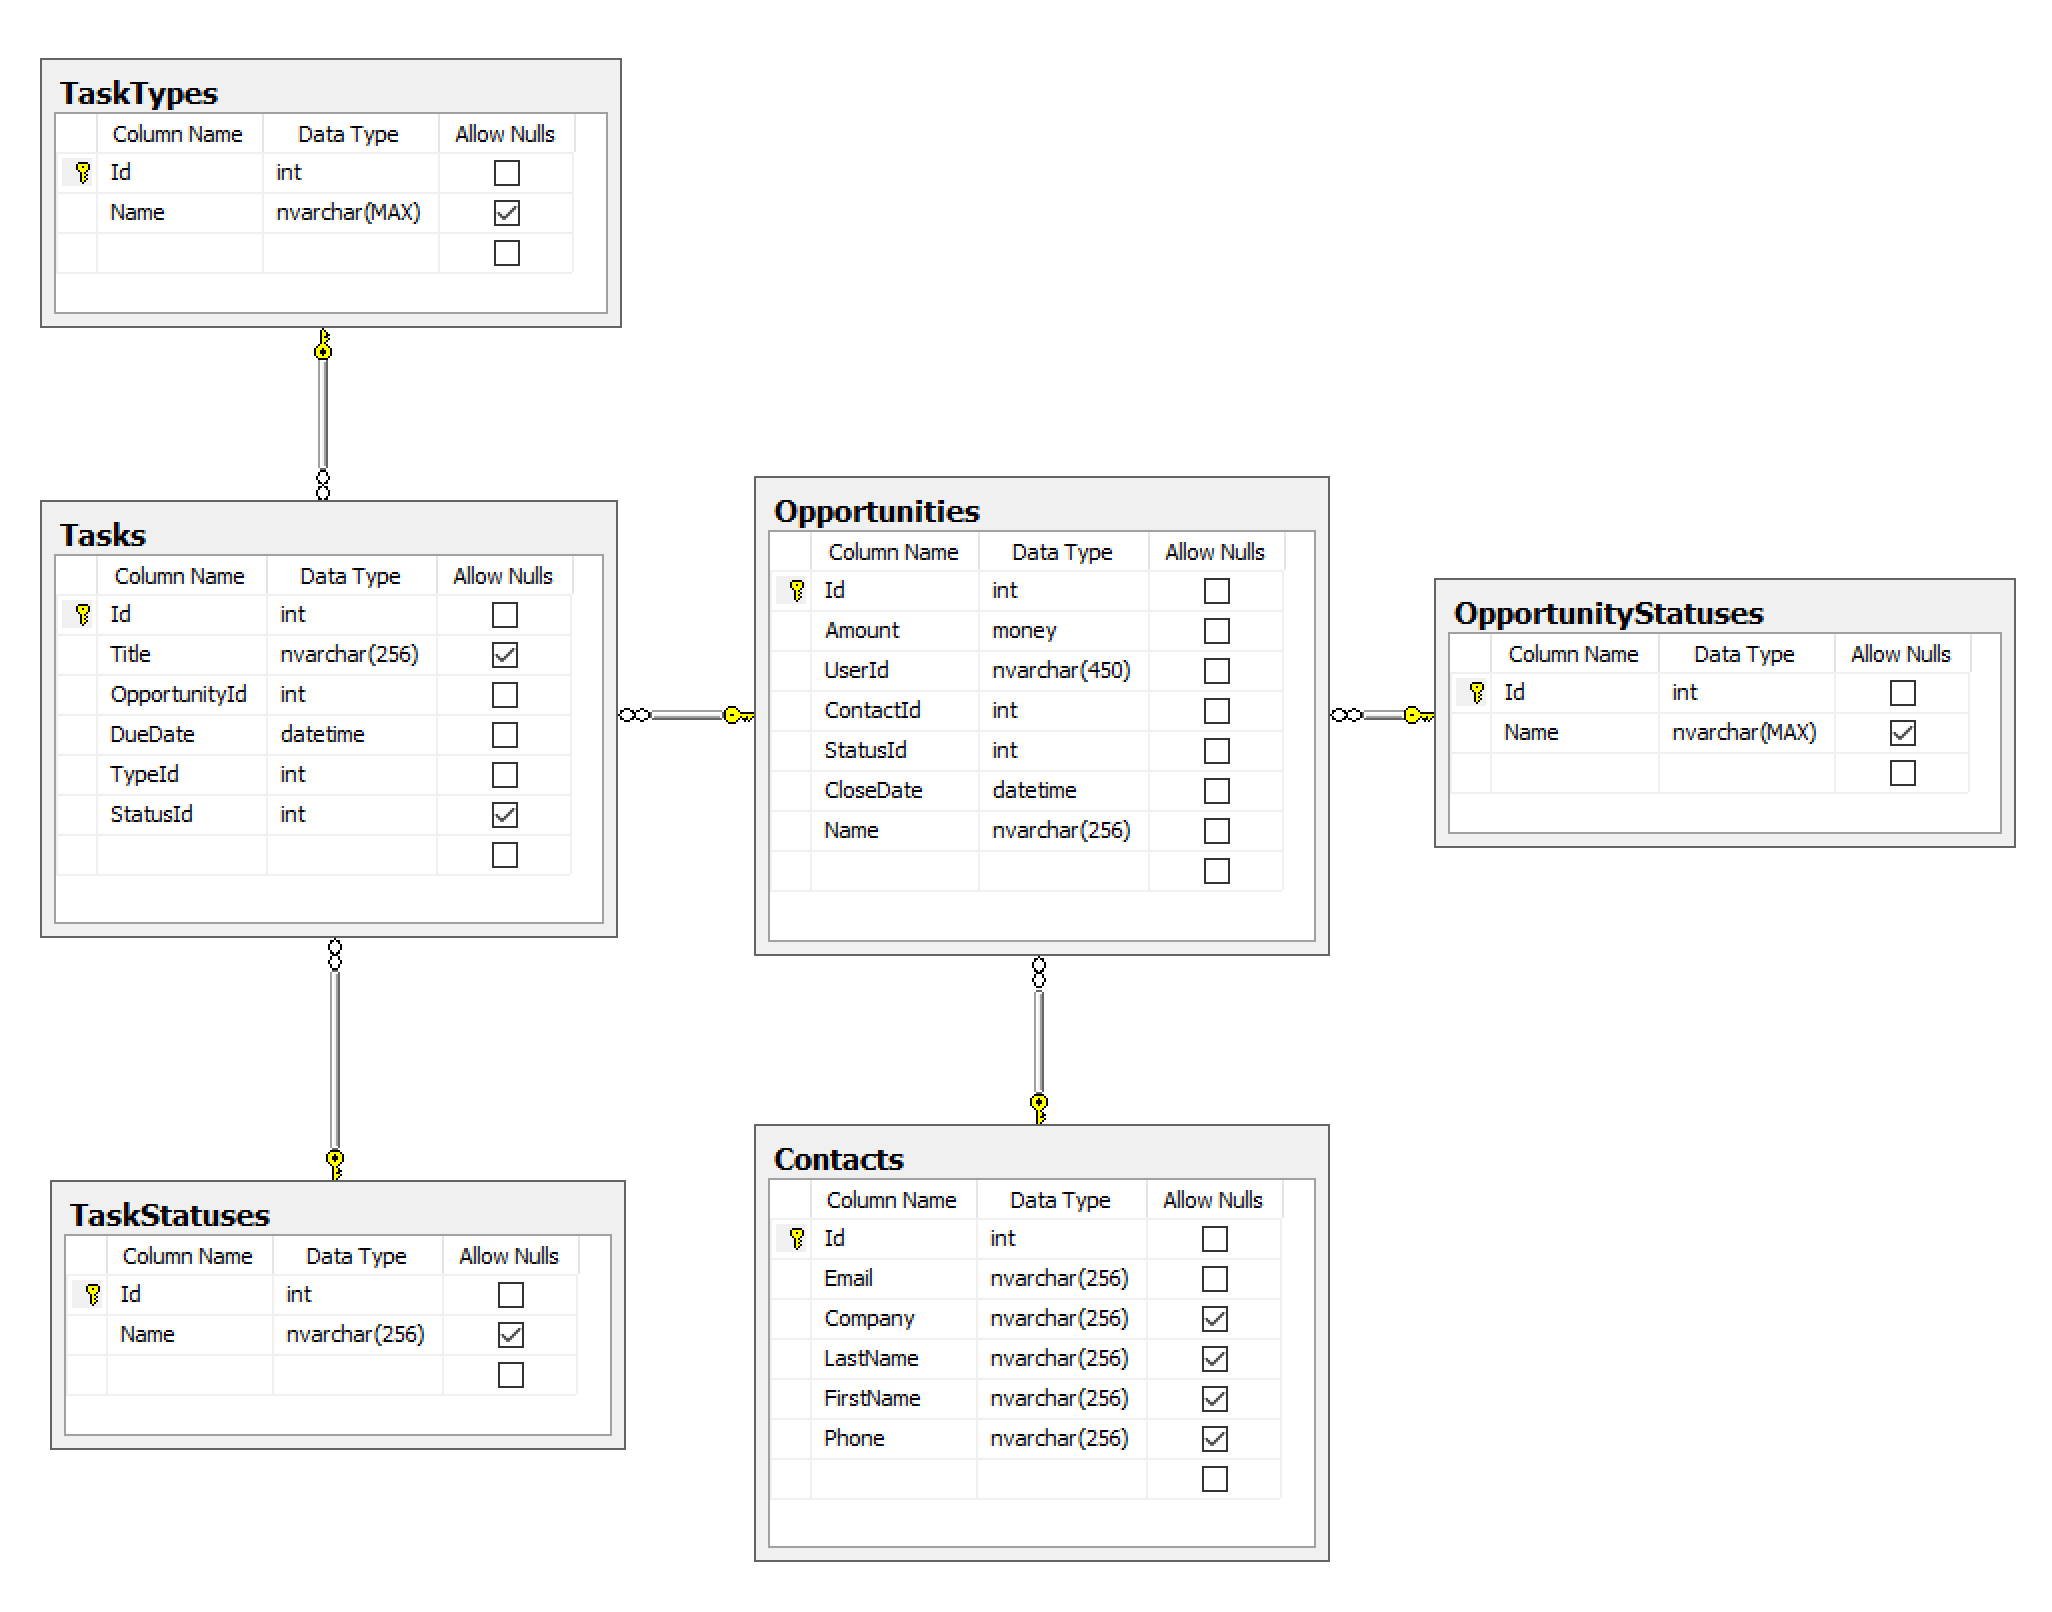
You can either create those visually or run this SQL script.
Create a Radzen Blazor Studio application
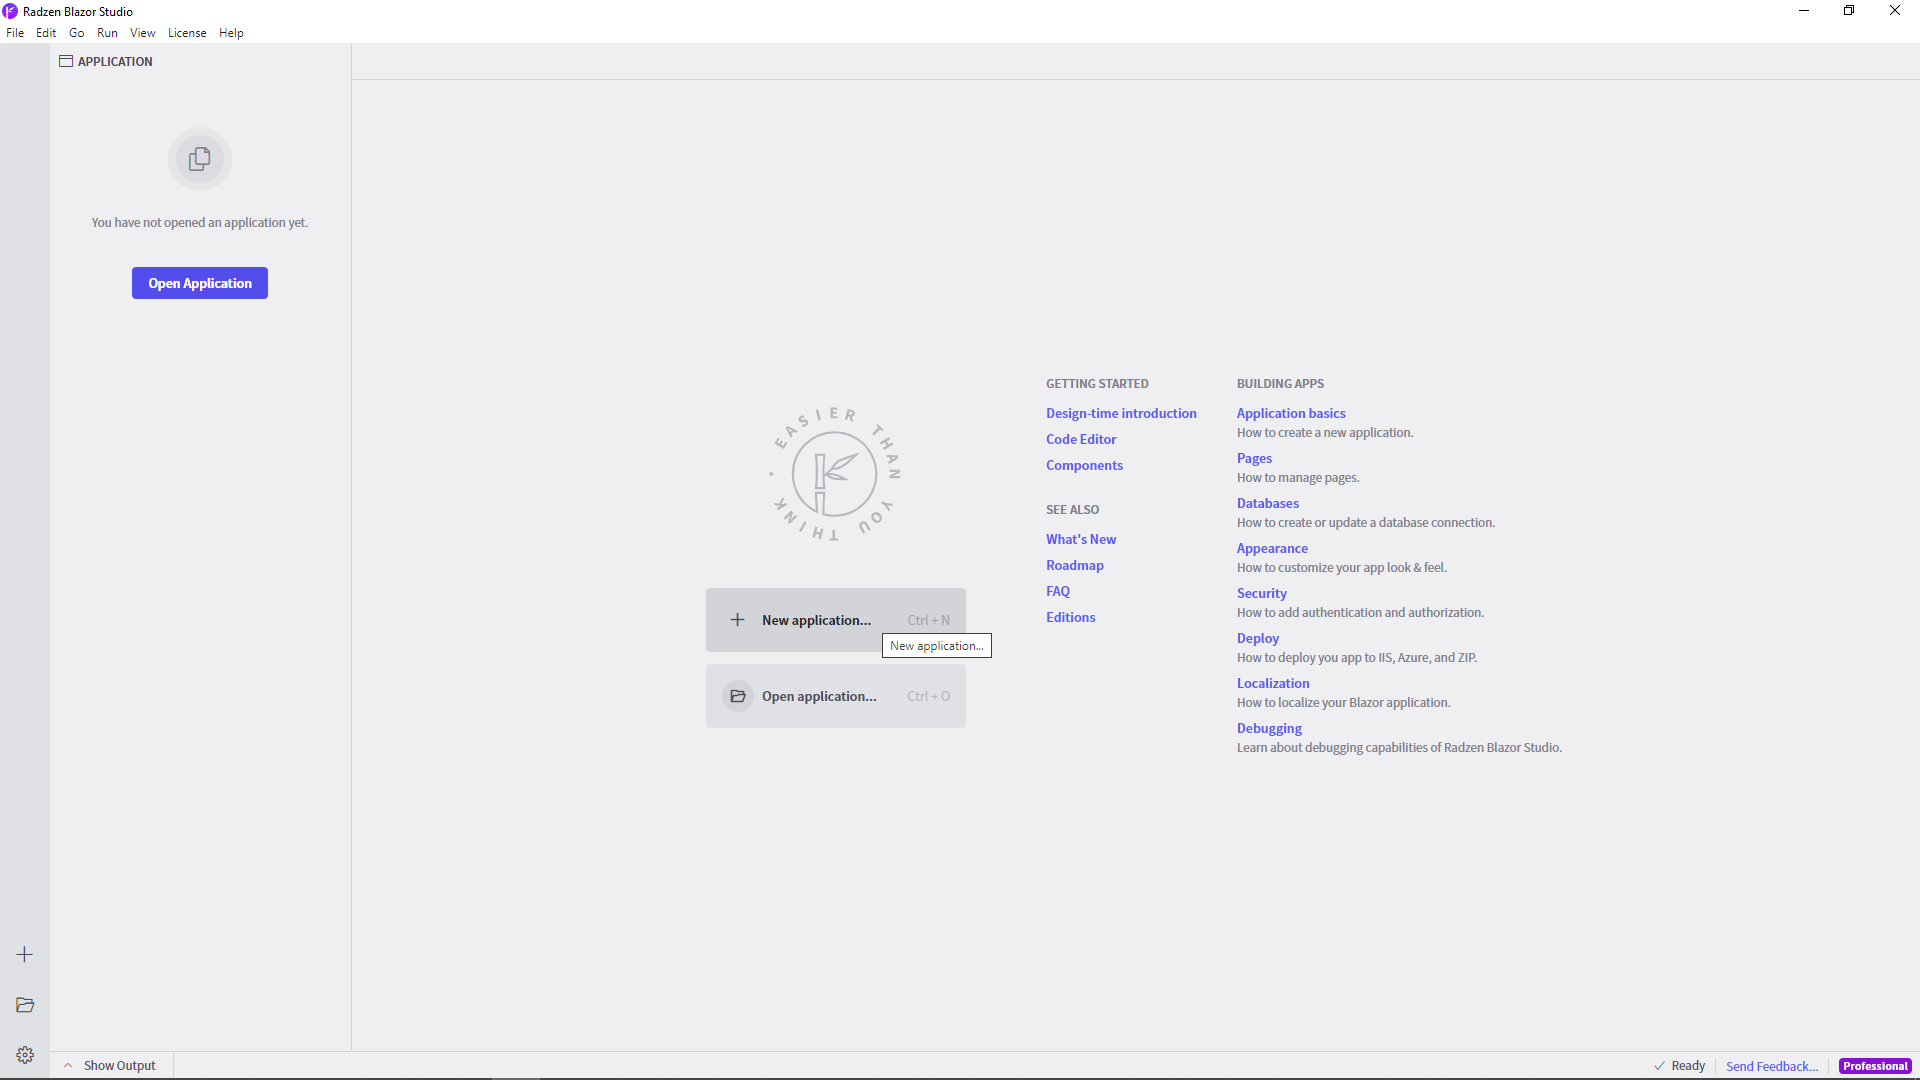
Now that we have a database for the CRM application it is time to start working in Radzen Blazor Studio.
- Start Radzen Blazor Studio and click New Application.
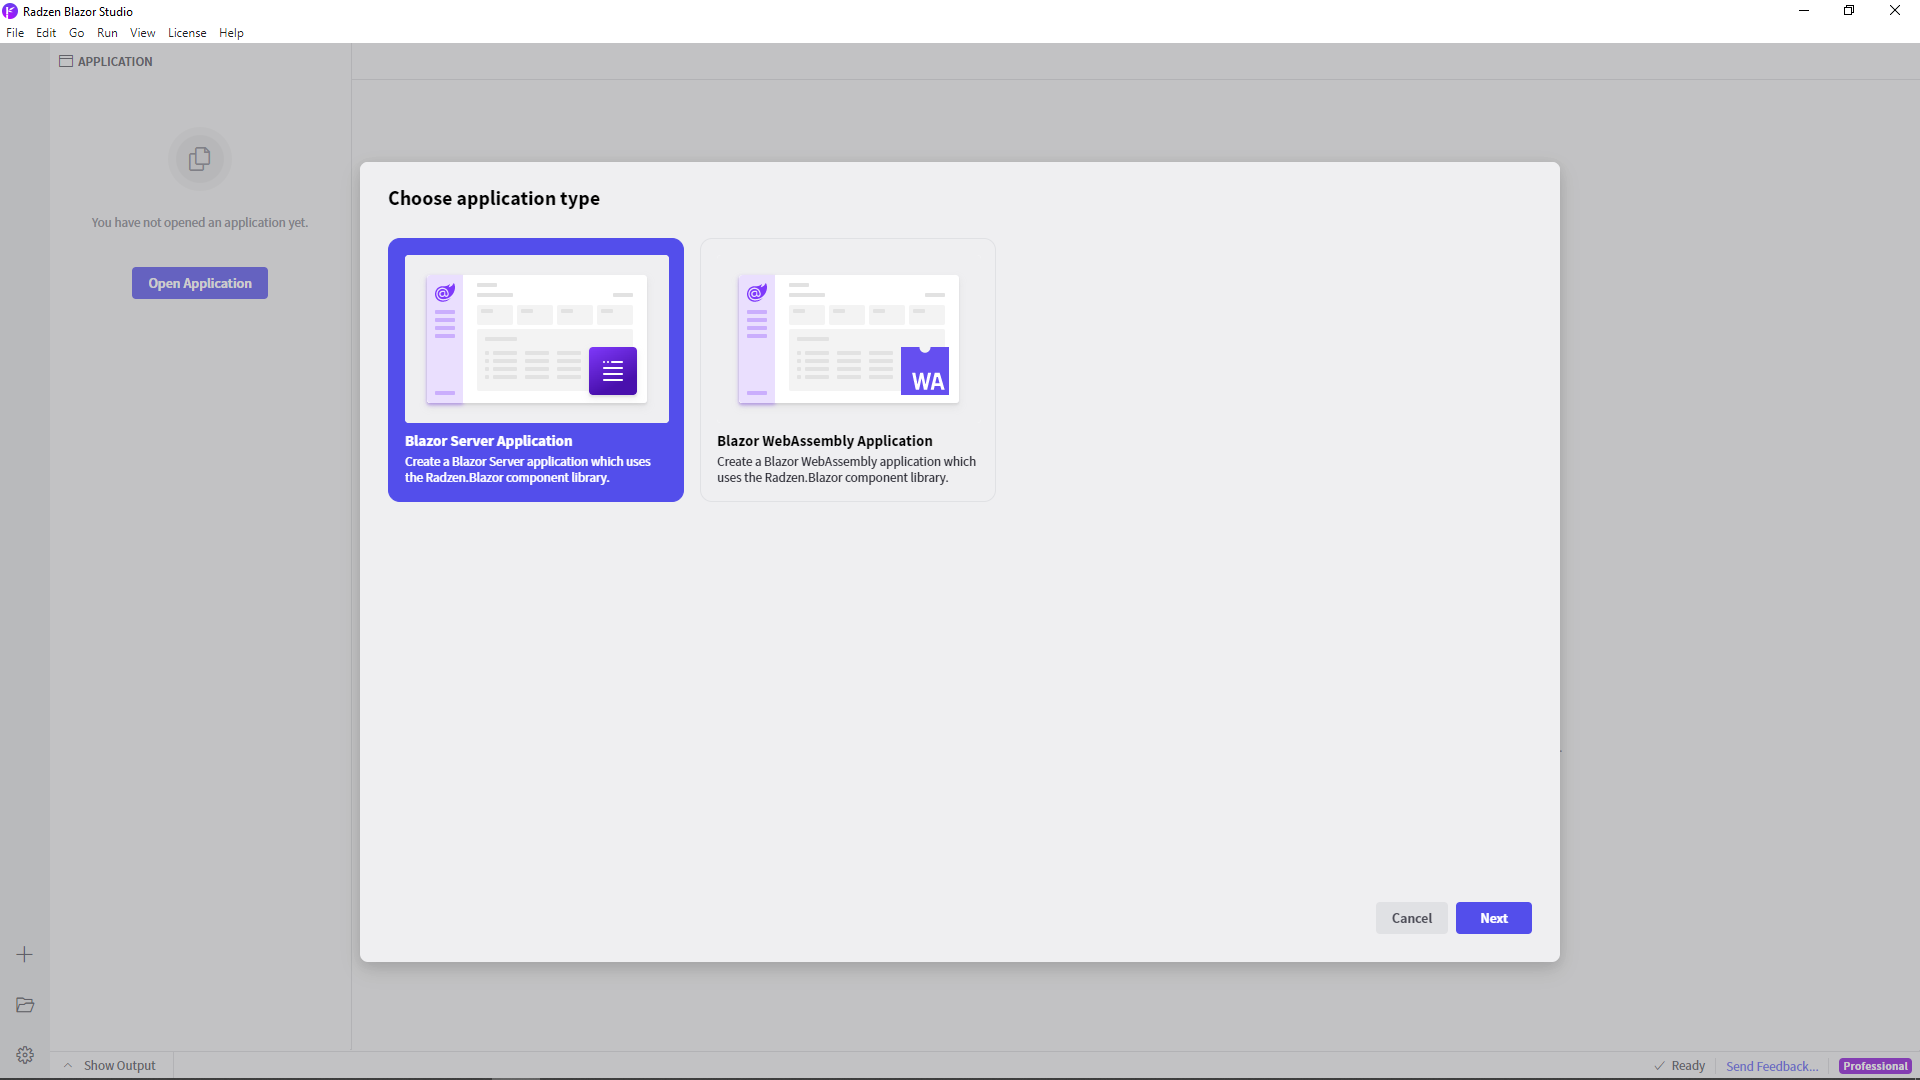
- Set the Application Type to Blazor Server and click Next.
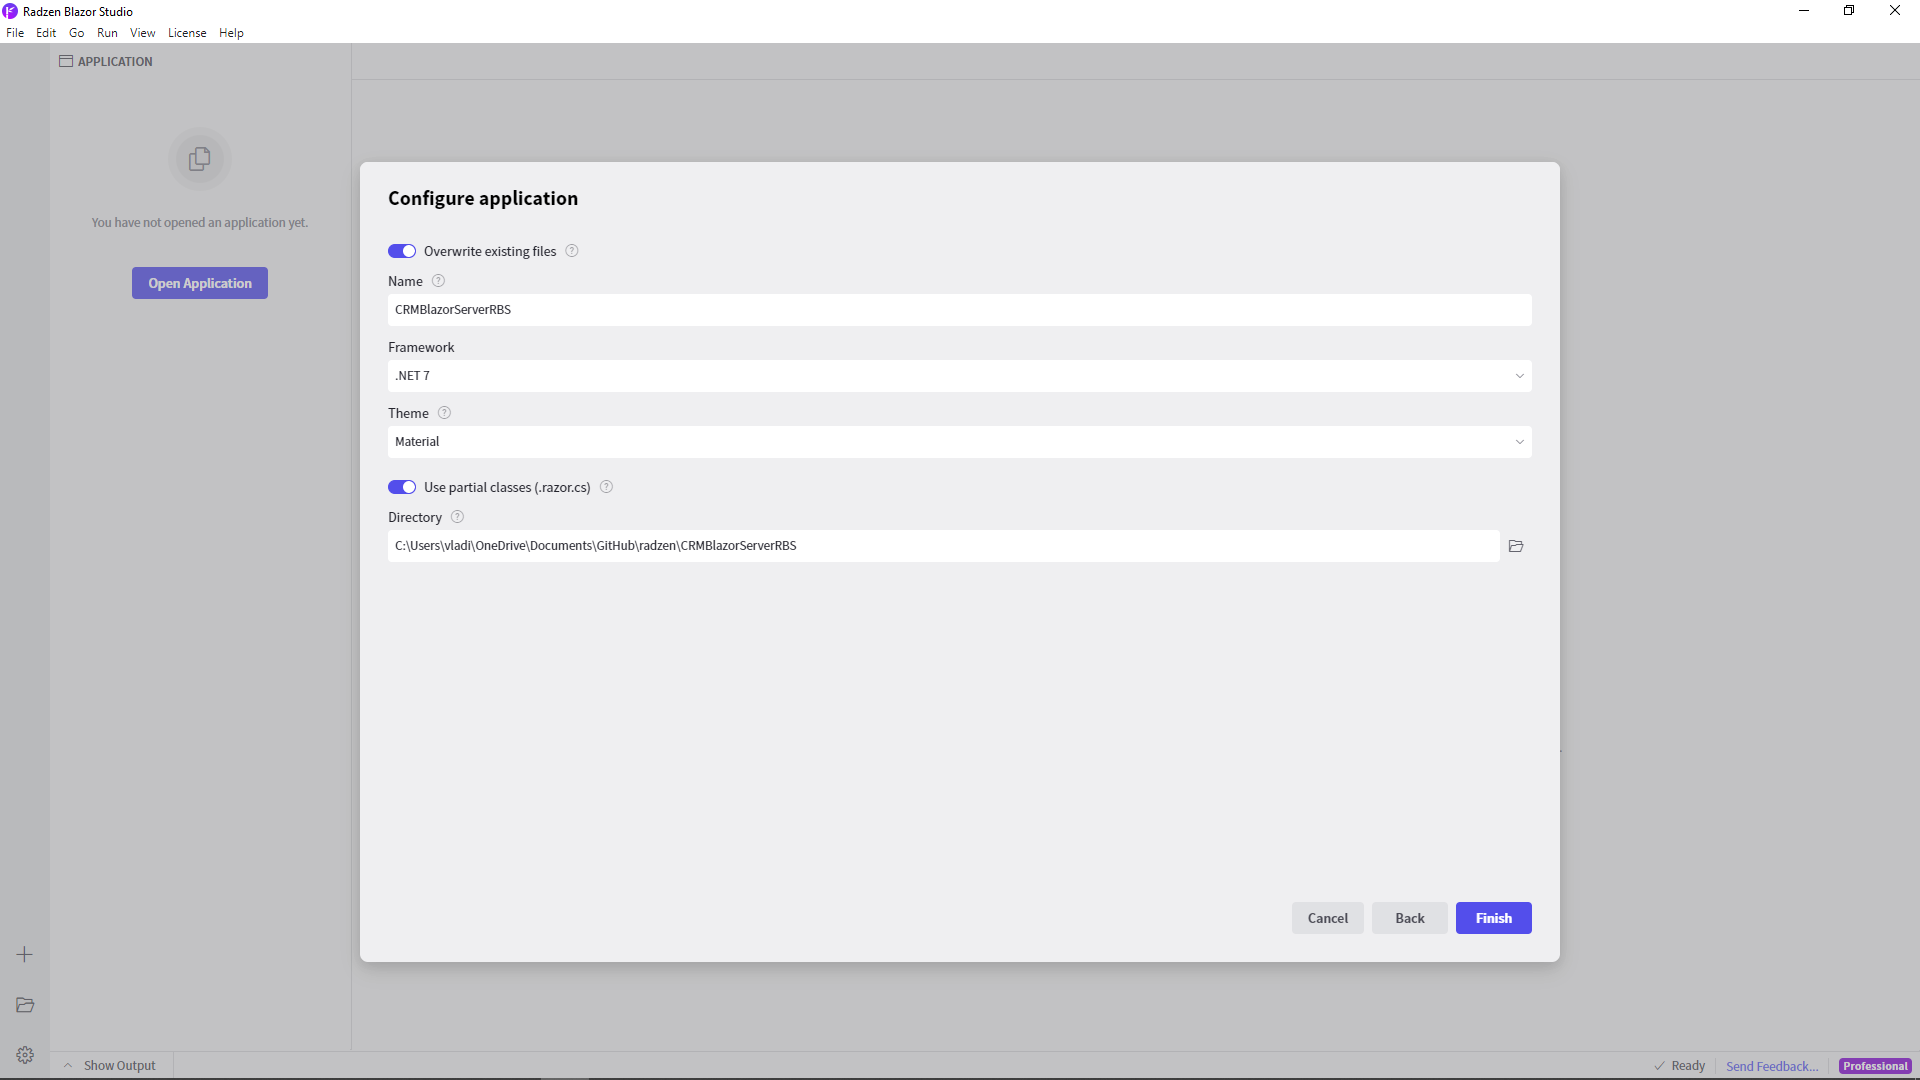
-
Set the application Name, pick a directory where the application files will reside and click Finish.
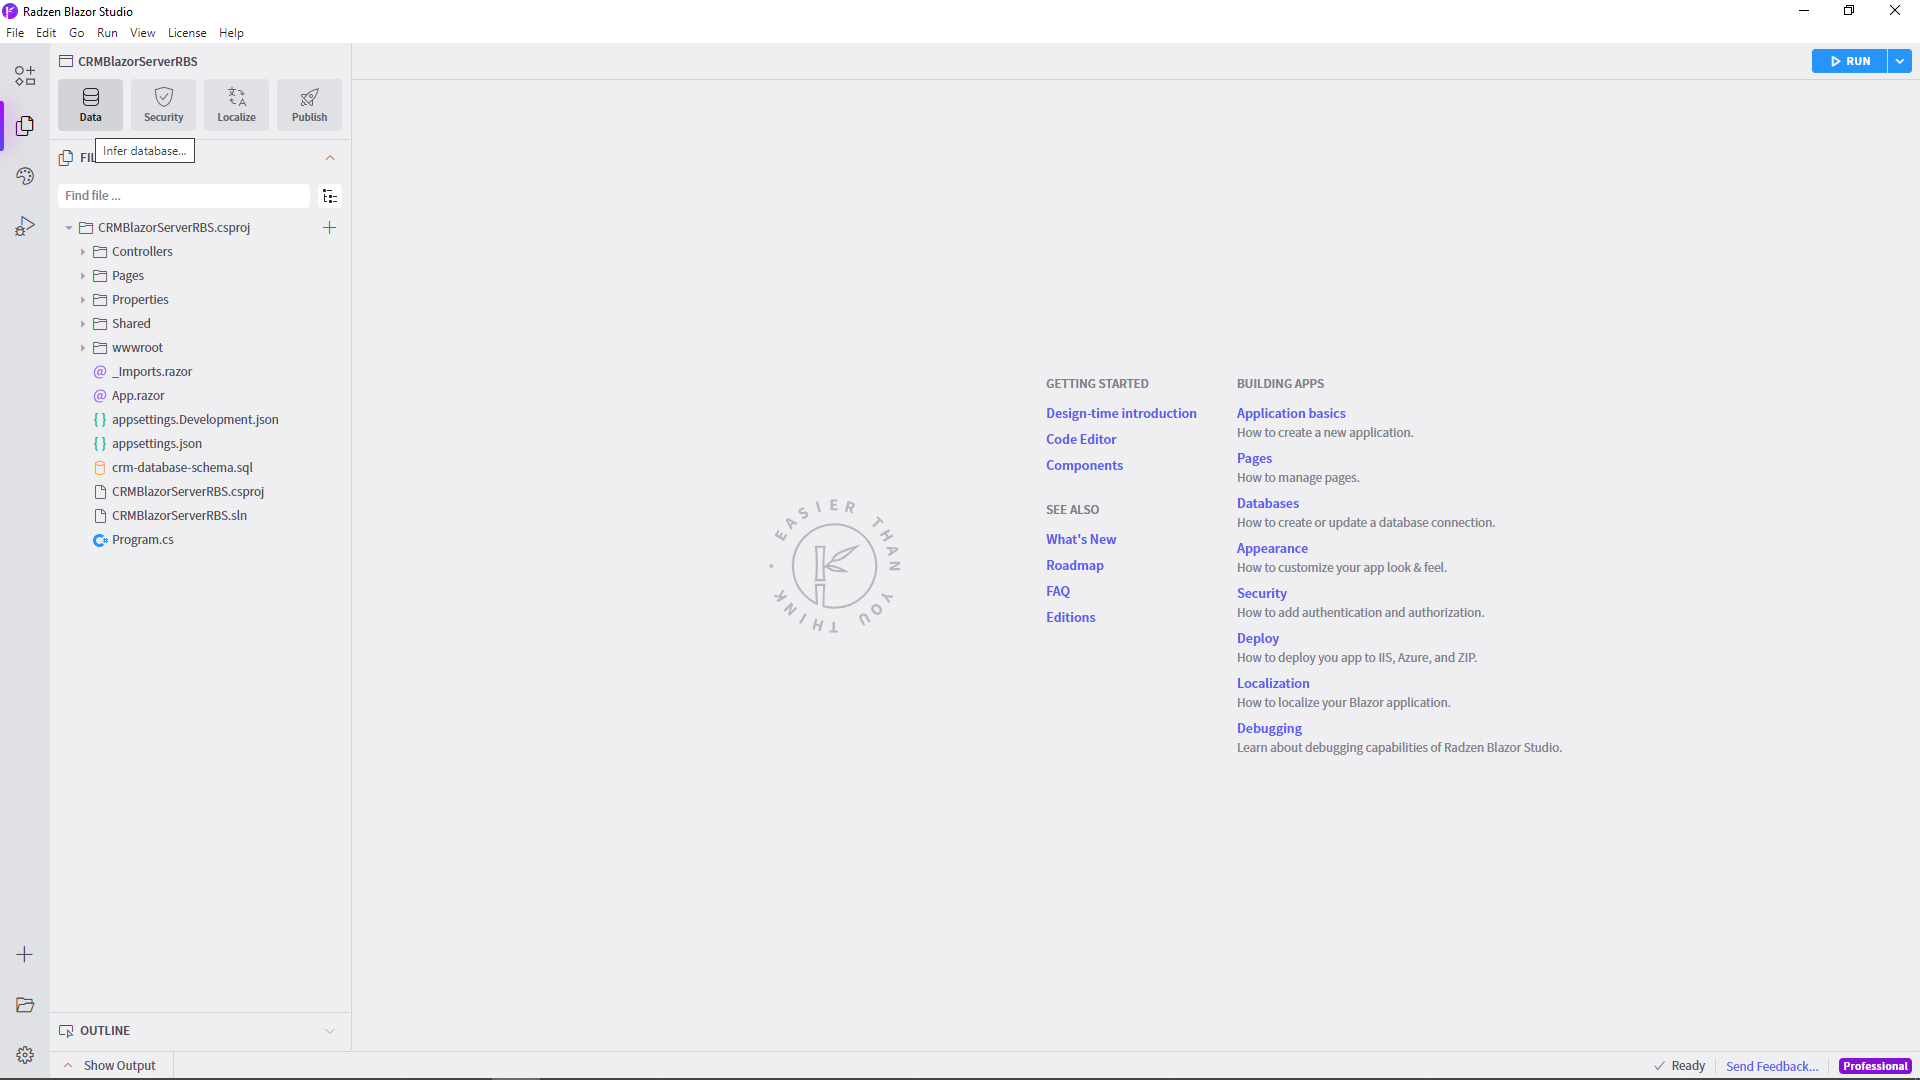
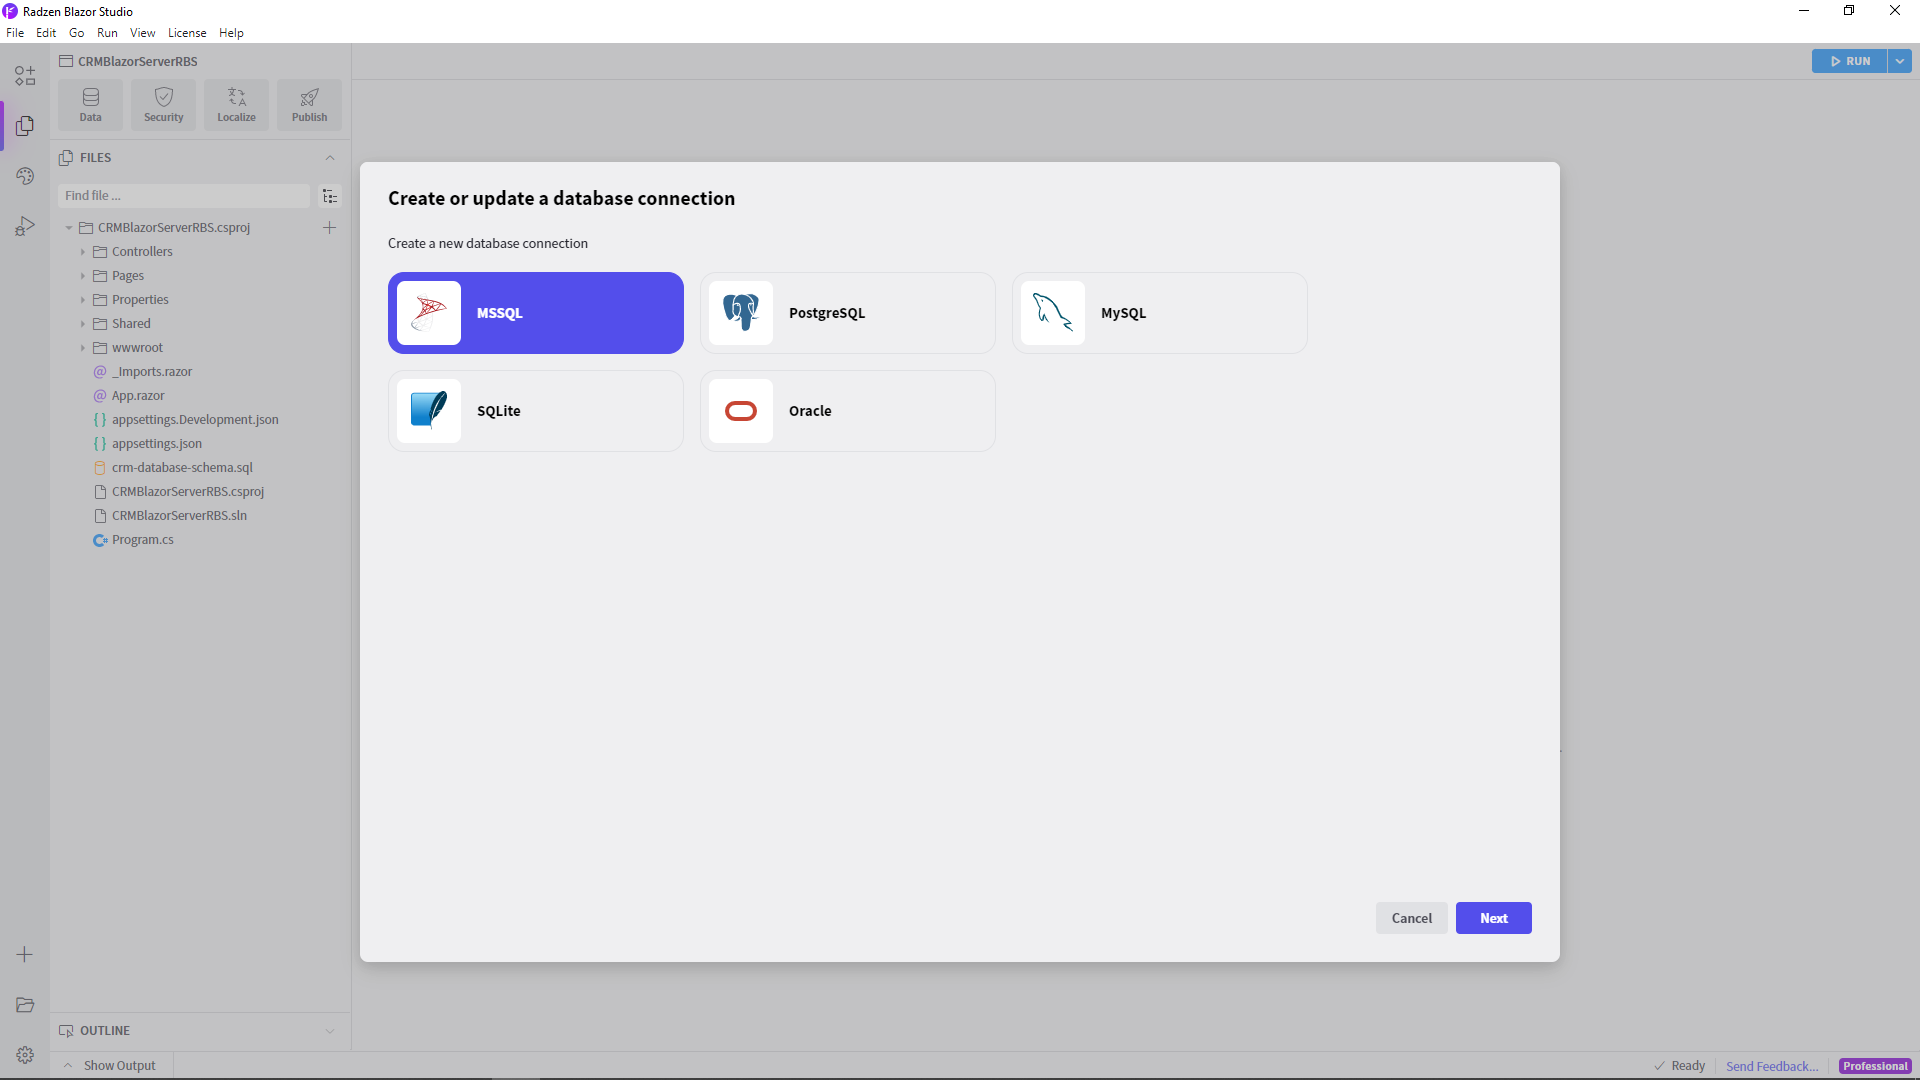
- Click the Data button that appears in the top left corner of Radzen Blazor Studio. Then add a new MS SQL Server data source.
 Enter the connection info - server name, user and password (if using SQL server authentication) and select
 RadzenCRMdatabase.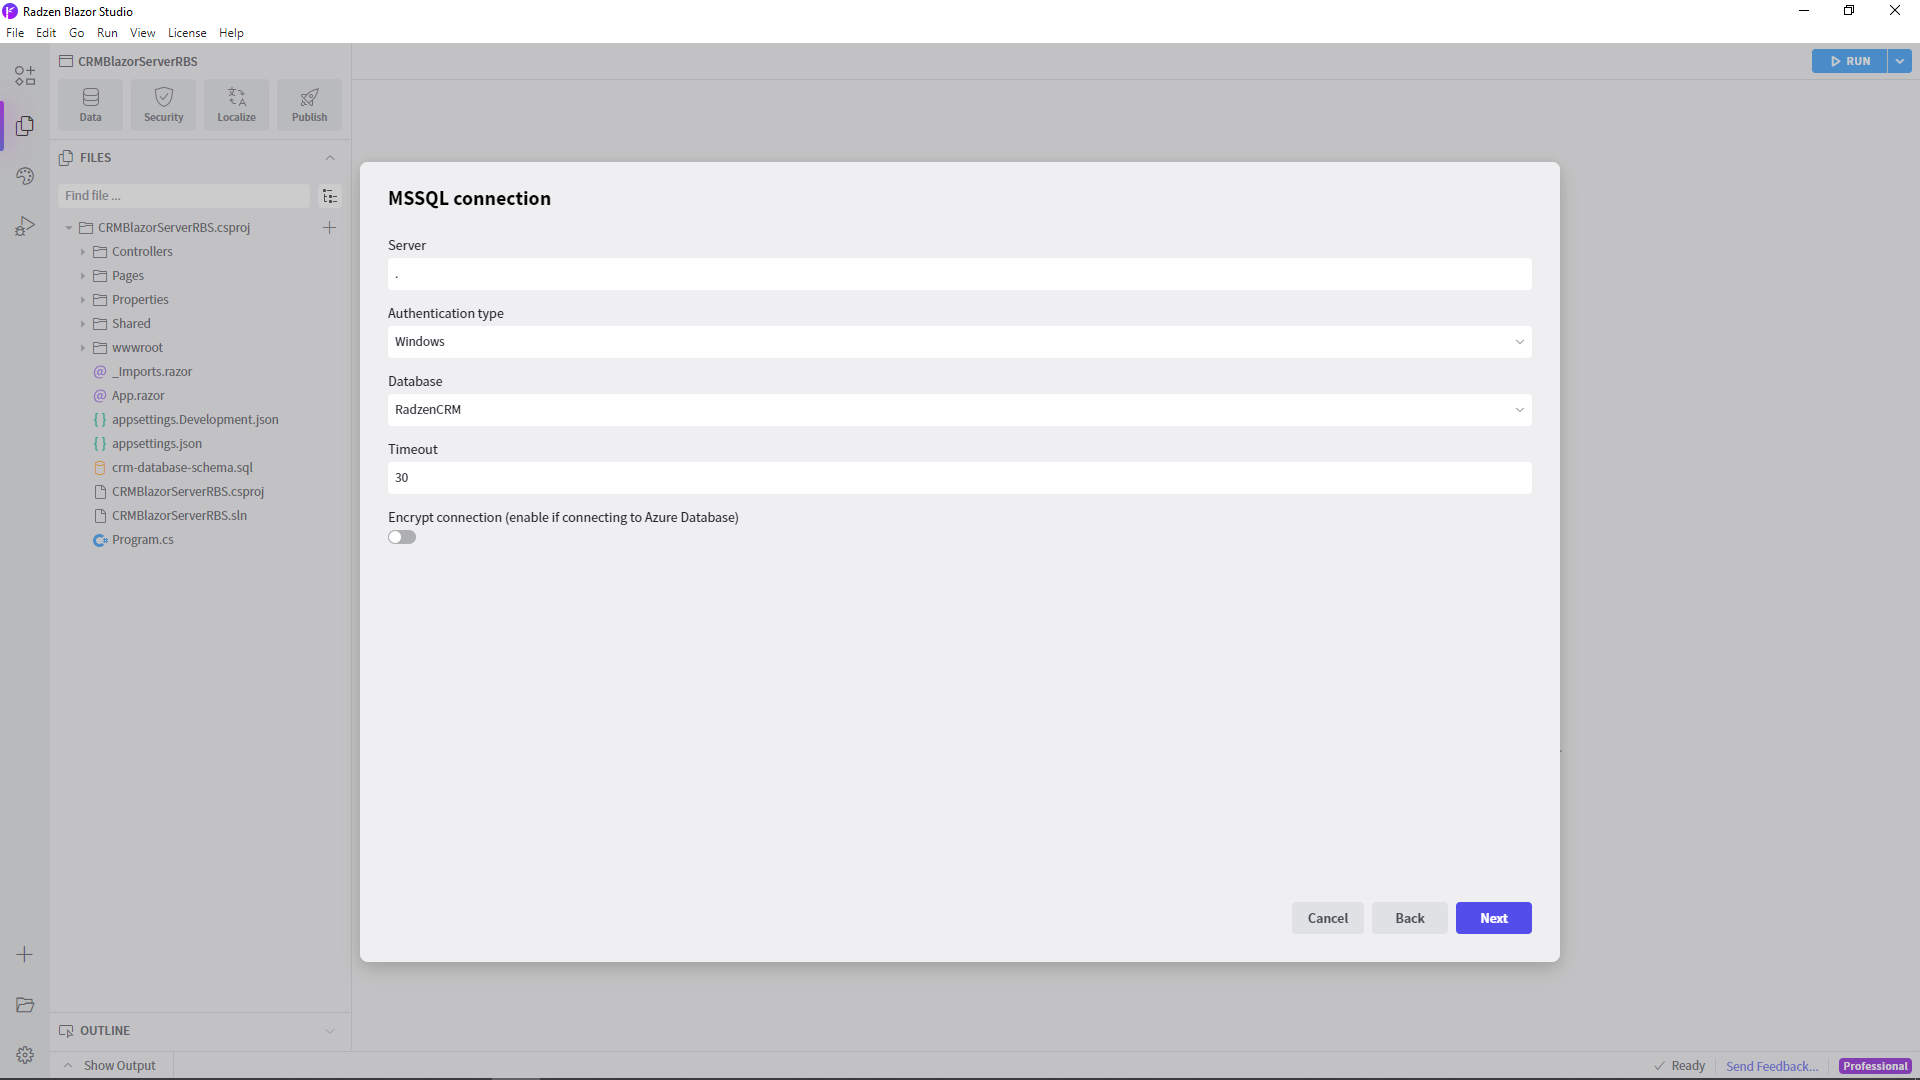
- Click the Infer schema button. Radzen Blazor Studio will connect to the
RadzenCRMdatabase and infer its schema - tables, views and stored procedures (if there are any).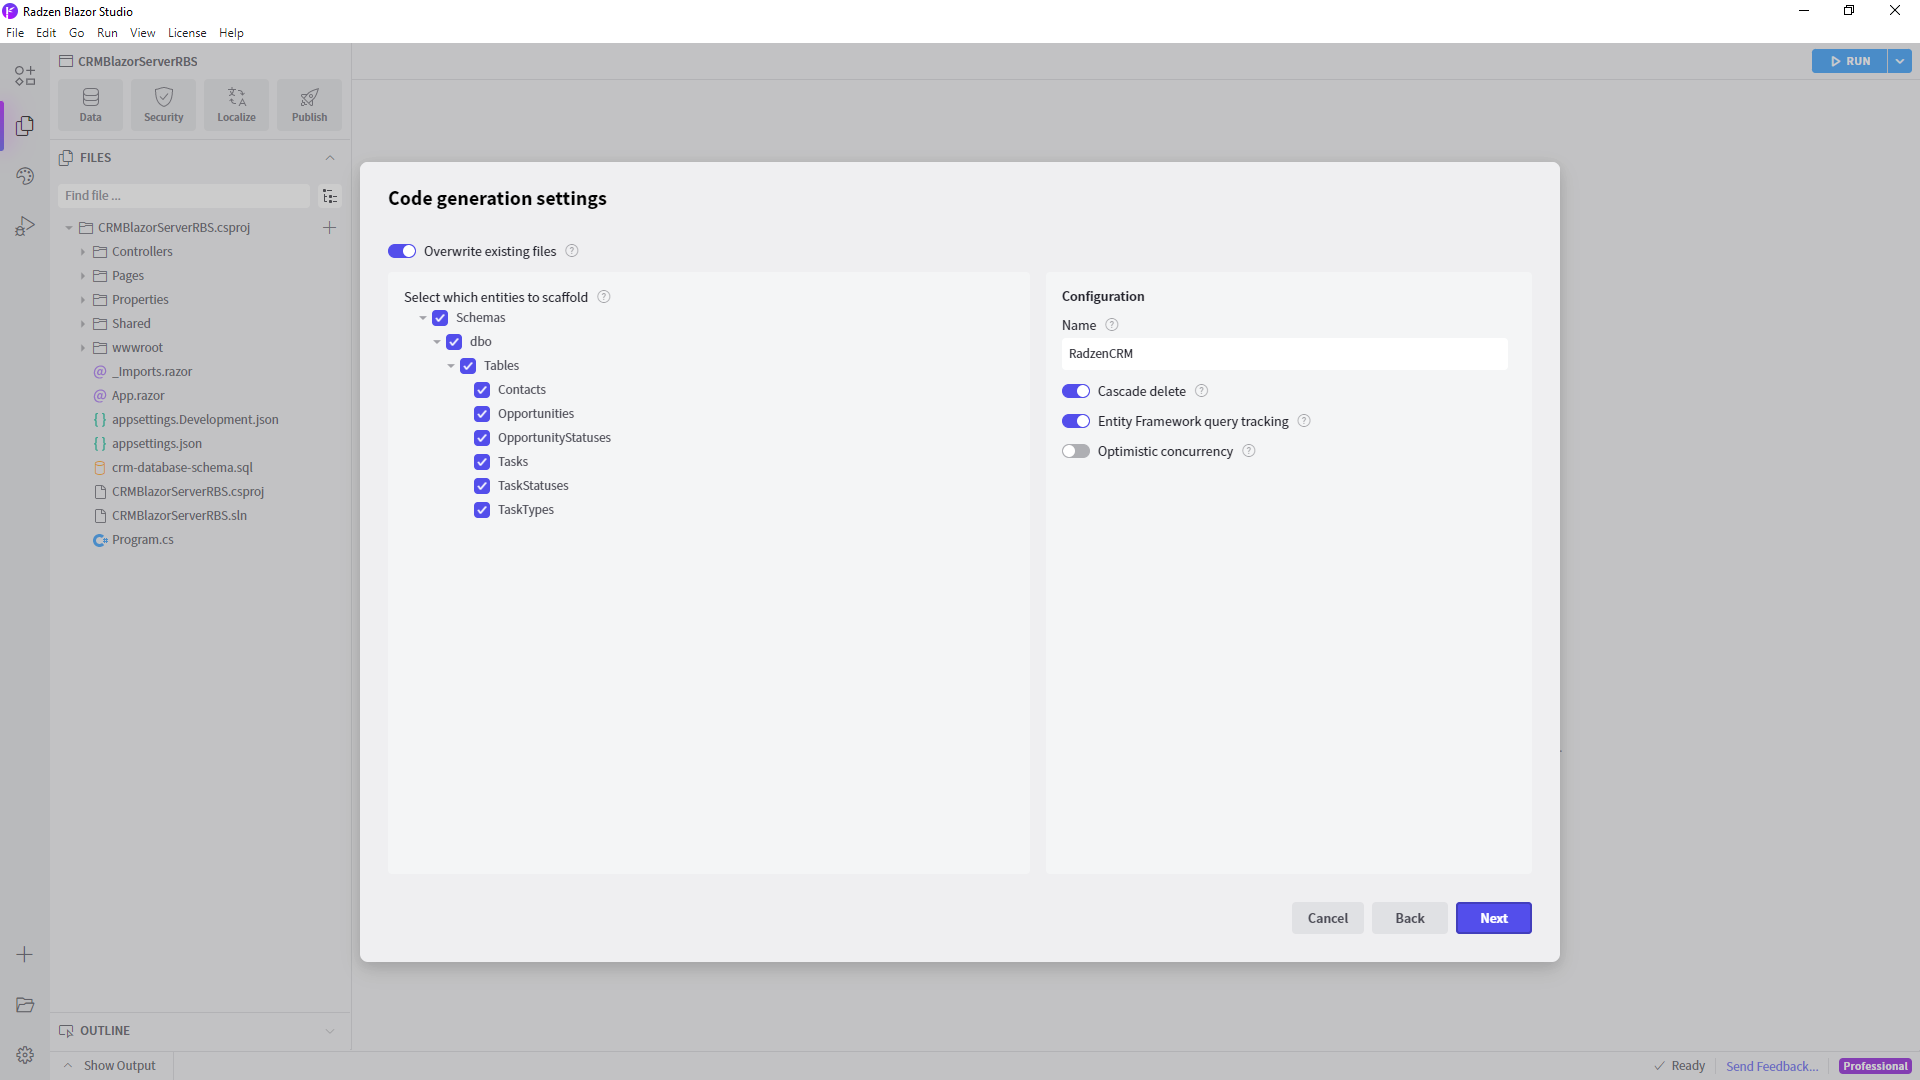
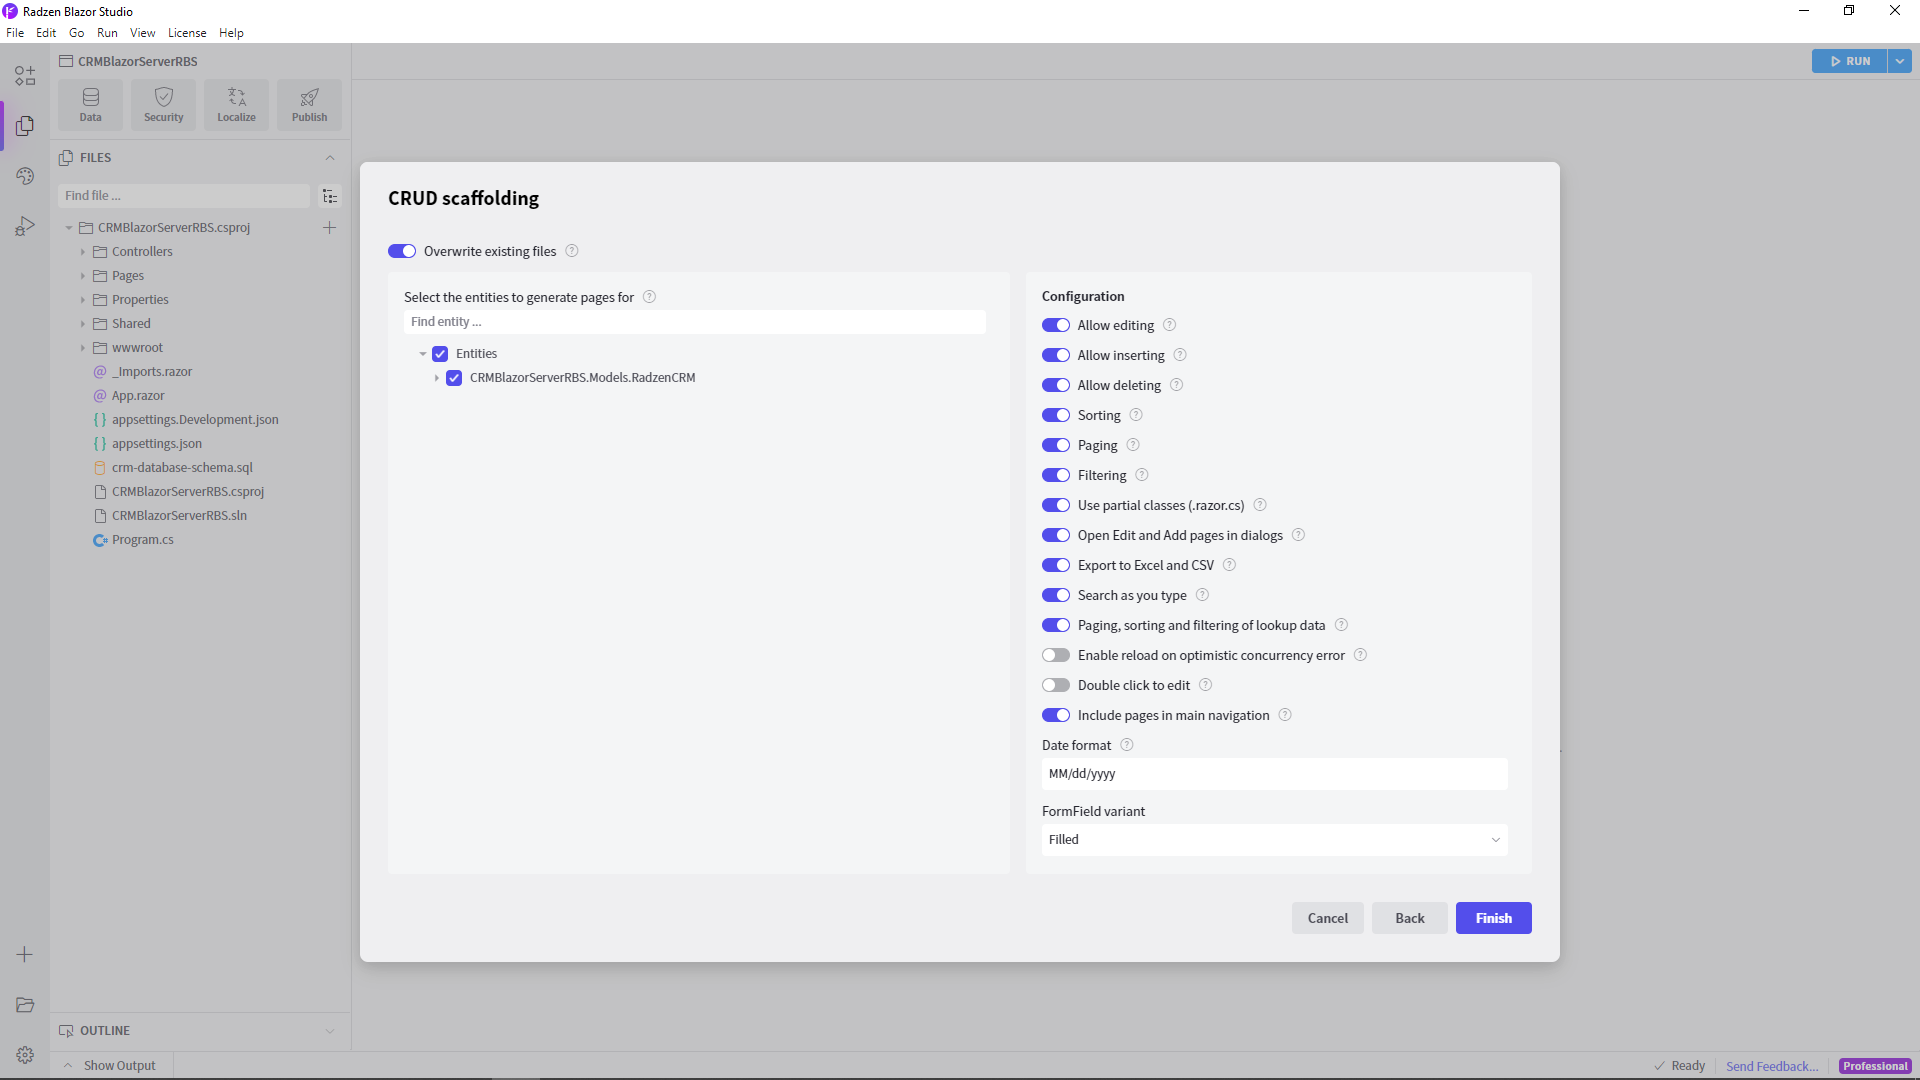
- Check Generate pages for CRUD operations, Export to Excel and CSV, Search as you type, Paging, sorting and filtering of lookup data and
Filledas FormField variant. Then click Finish. This will make Radzen Blazor Studio scaffold all checked tables as CRUD pages. This feature is only available in Radzen Blazor Studio Professional and Enterprise..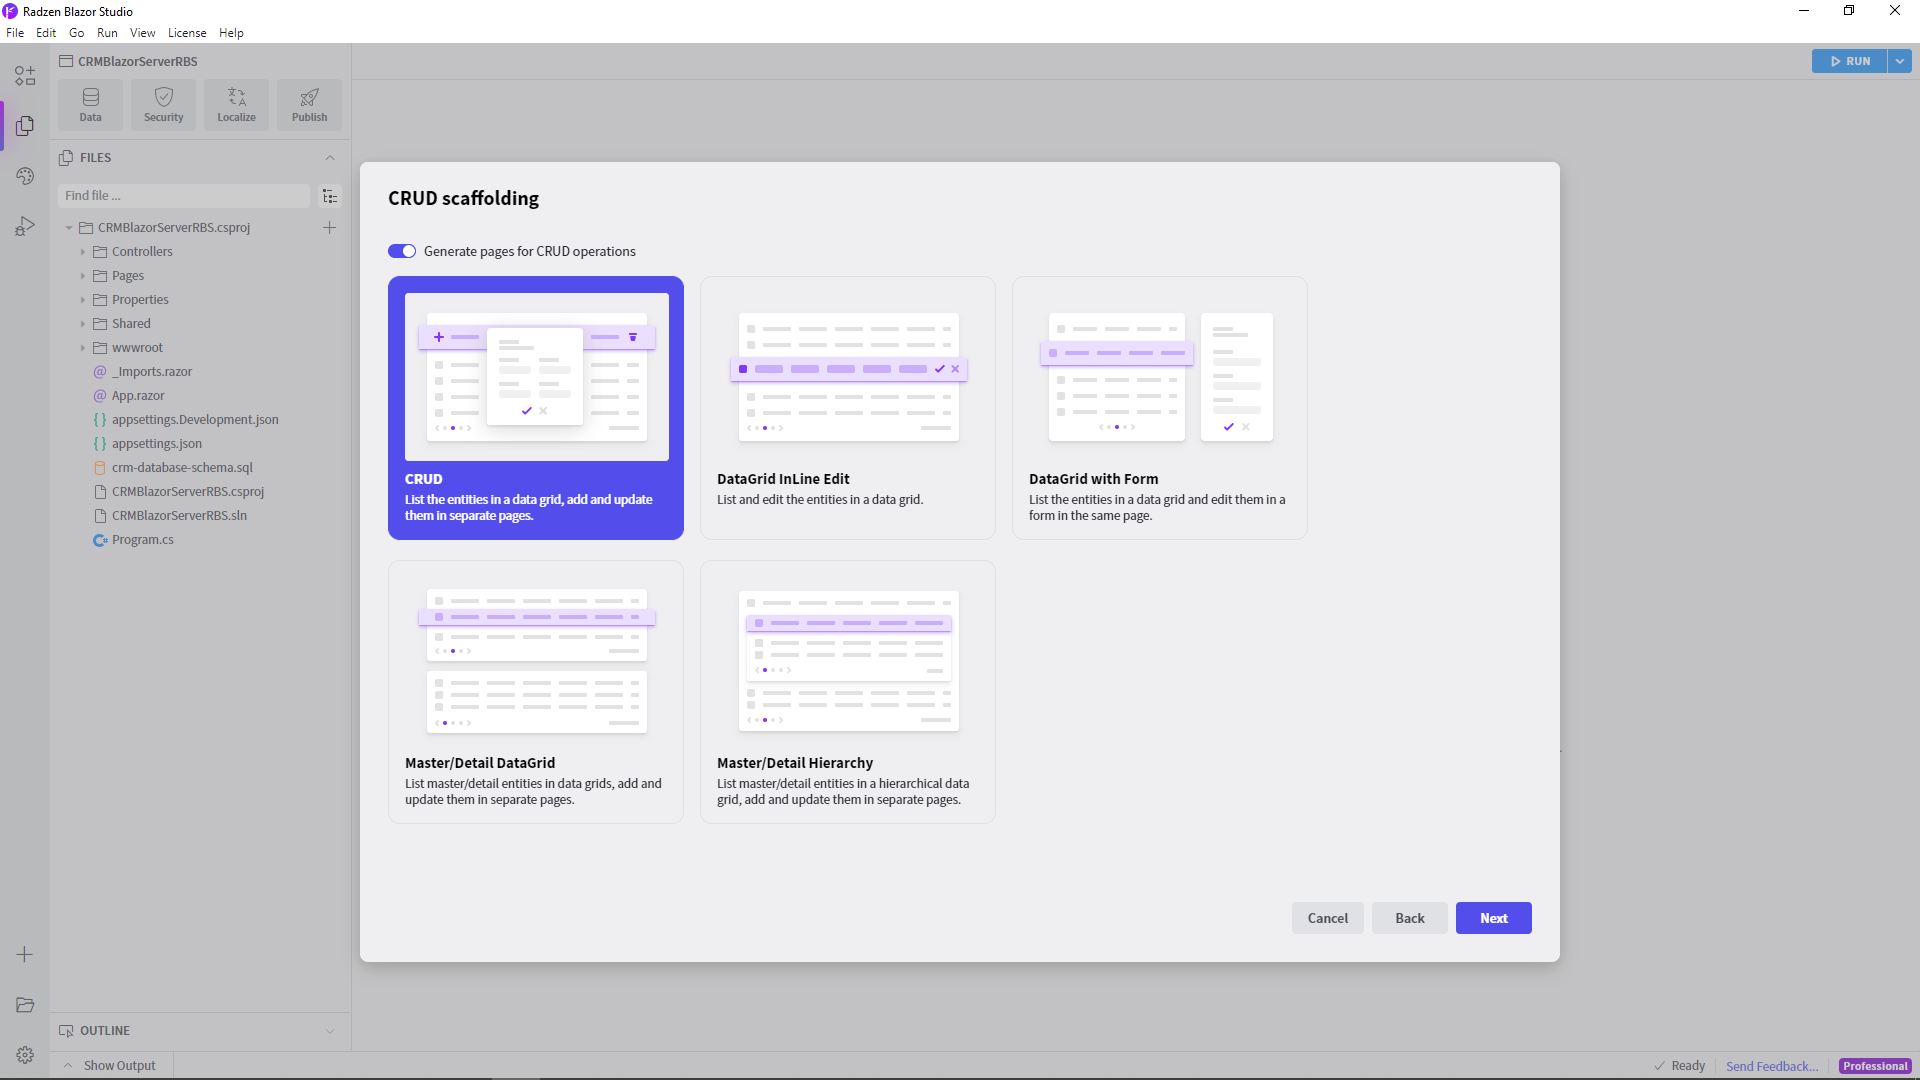
You now have a complete CRUD application which is ready for test. Click the Run button to see what you have created in your browser.
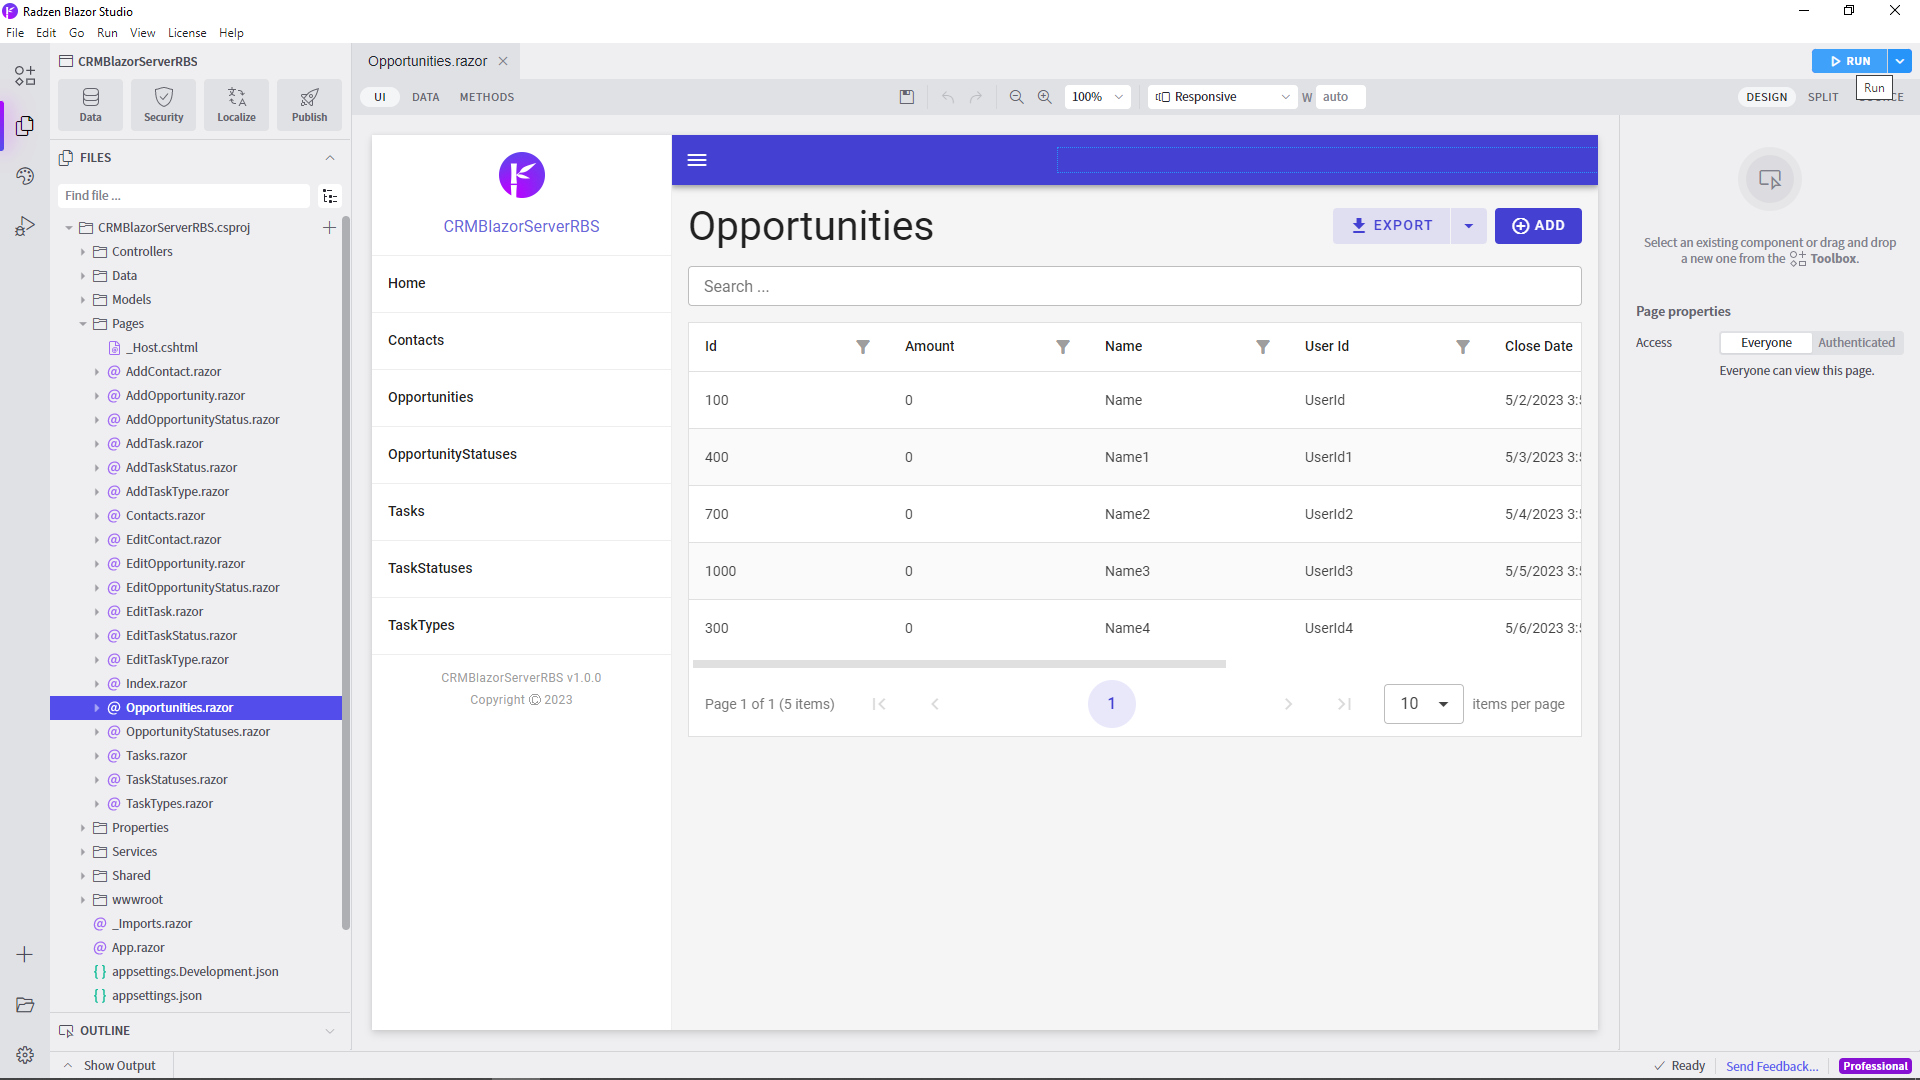
The application doesn’t show much at the moment because the database is still empty. Let’s add some data.
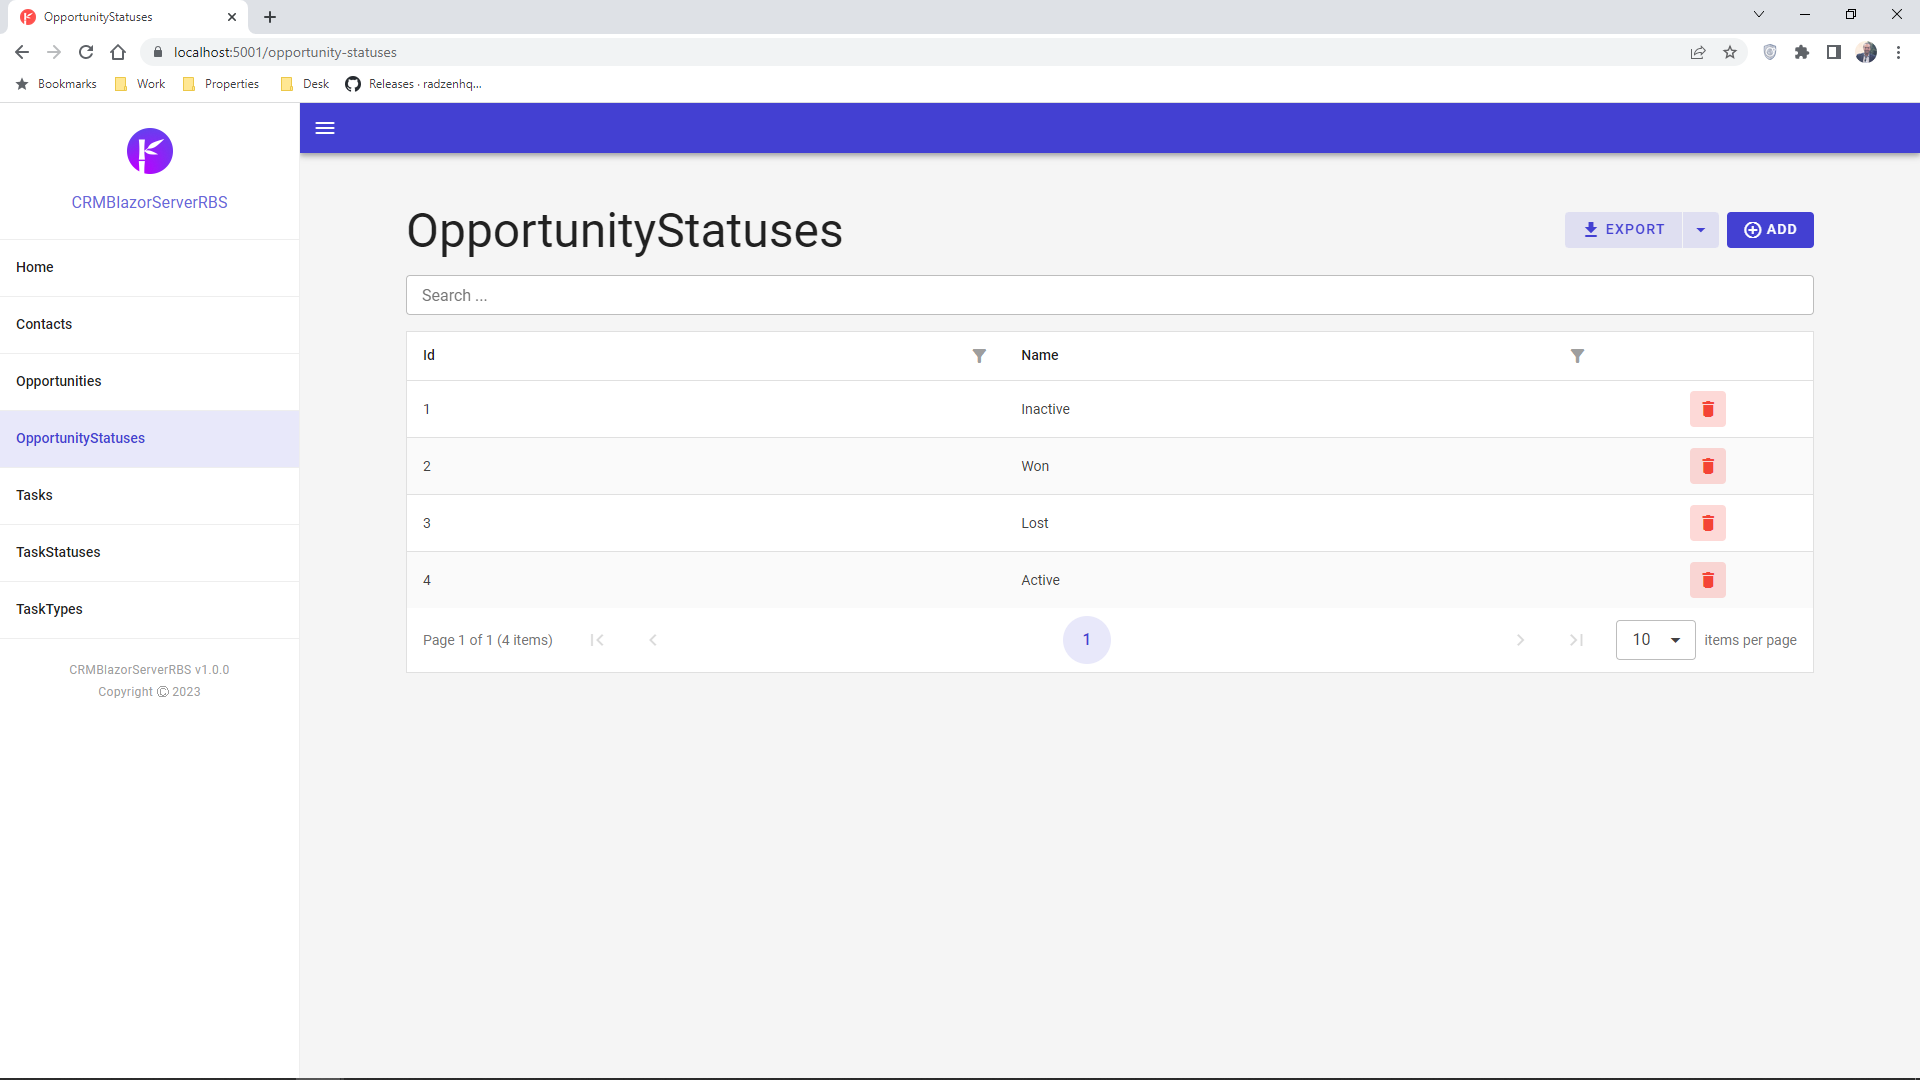
- Click Opportunity Statuses from the navigation menu. This loads the Opportunity Statuses page that displays all records from the OpportunityStatuses table (which is still empty by the way).
- Click the Add button above the DataGrid to add some records to the OpportunityStatuses table. In the Add Opportunity Status dialog enter Name then click Save.
- Add the following statuses:
Inactive,Won,Lost,Active. Those represent the state a CRM opportunity could be in.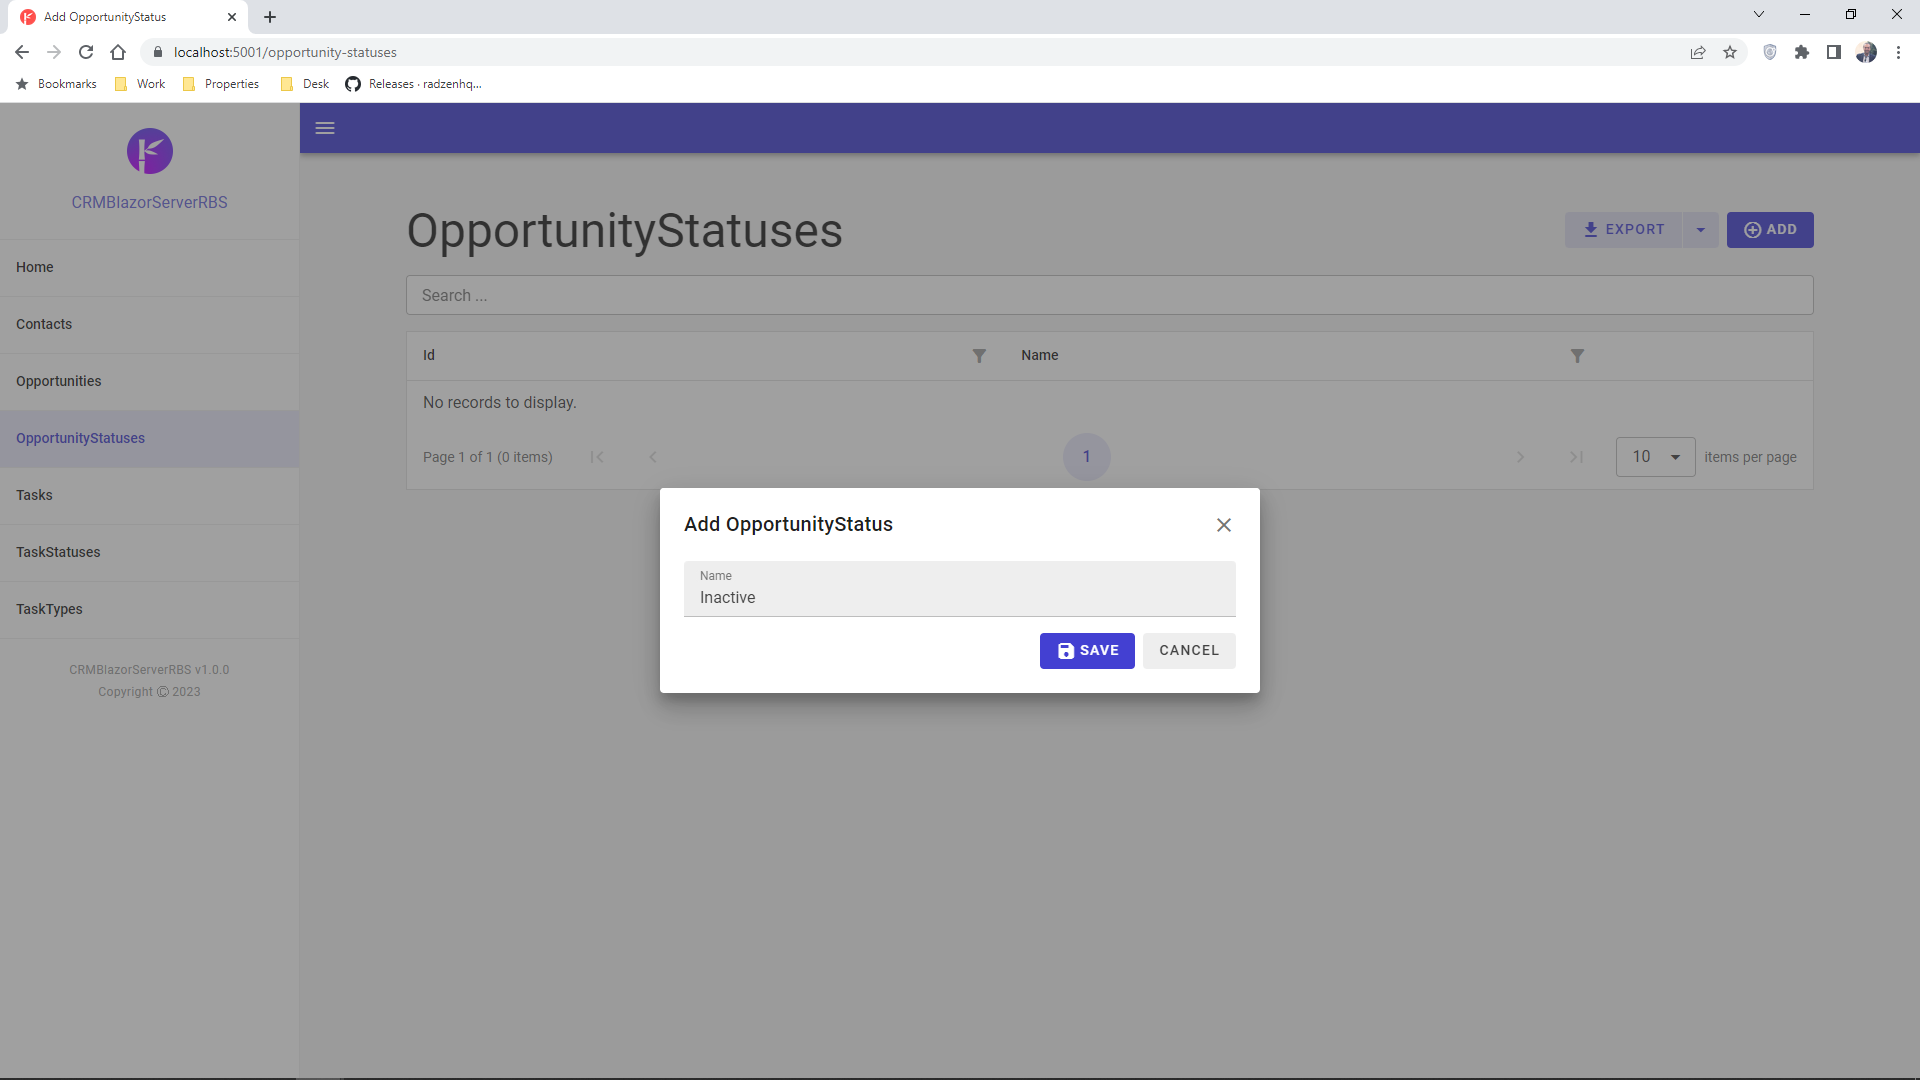
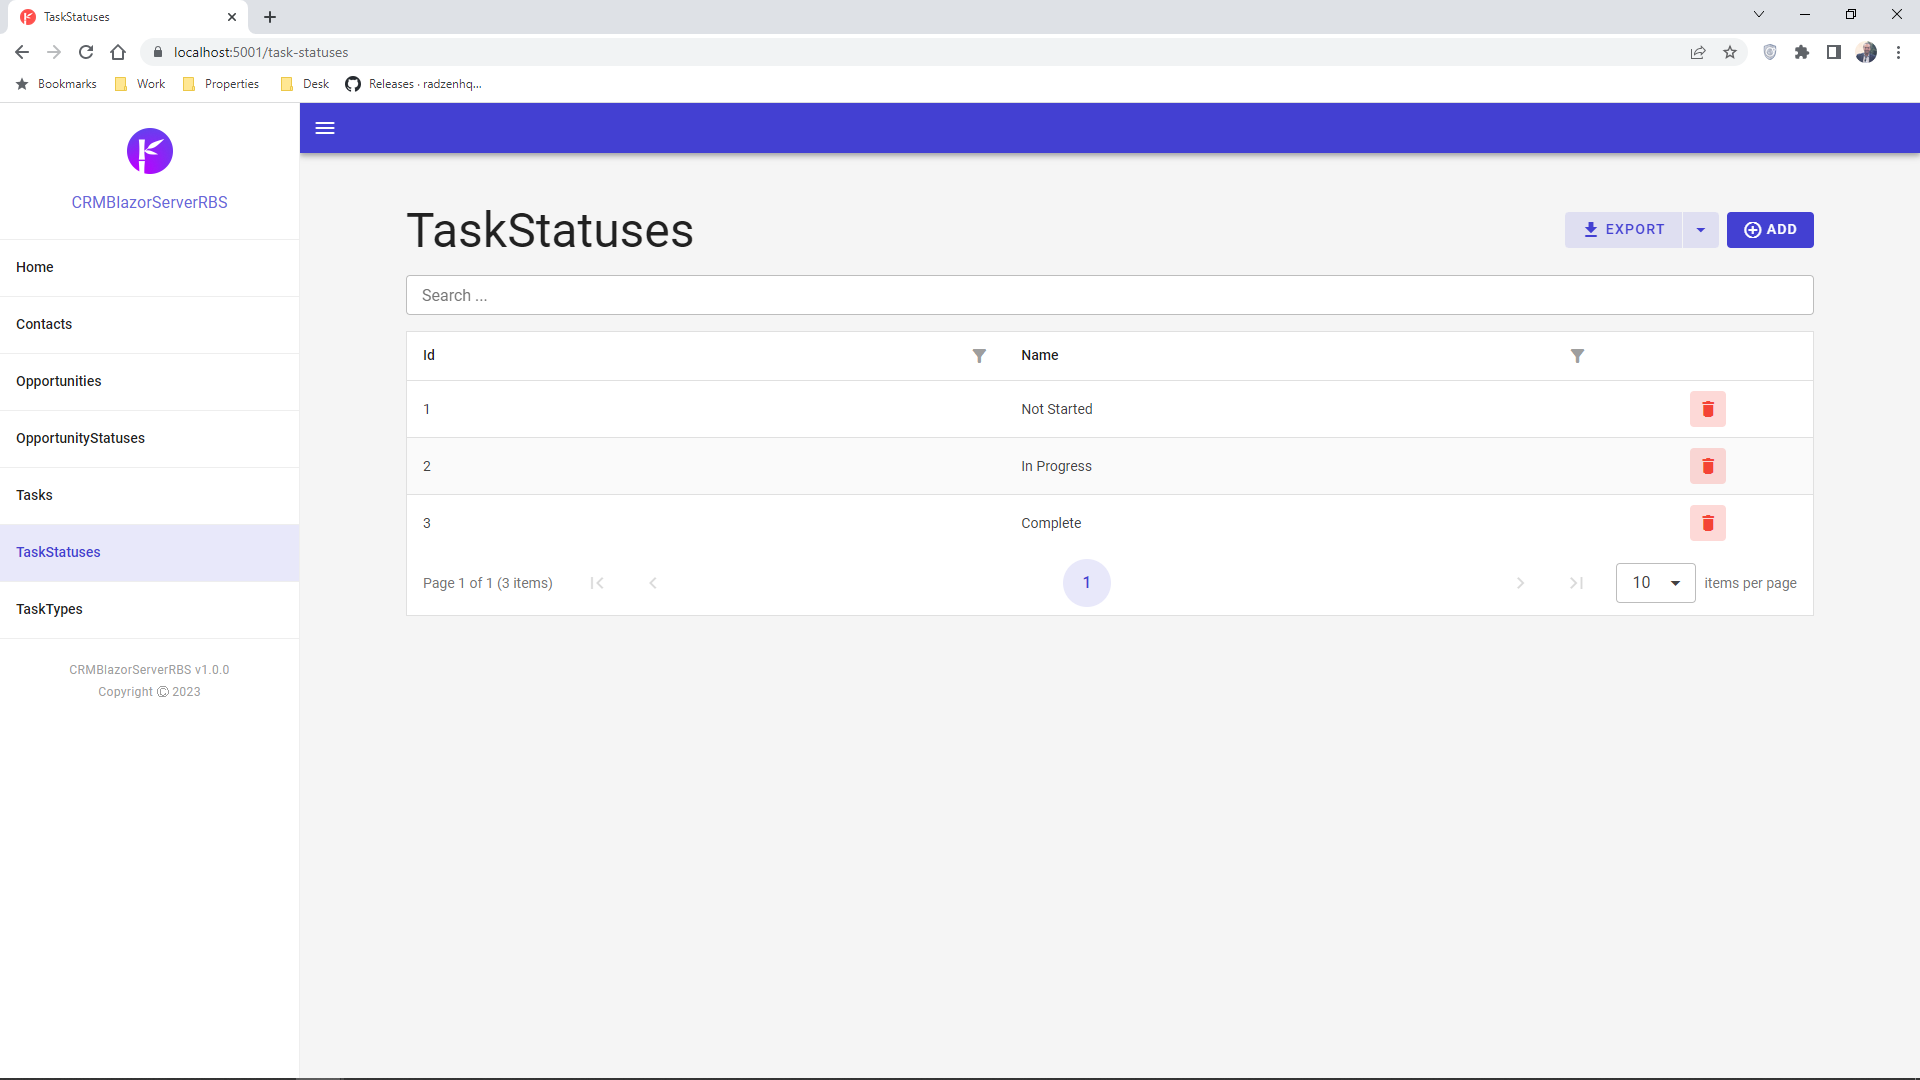
Then go to the Task Statuses page and add the following statuses: Not Started, In Progress, Complete. Those represent the state a CRM task could be in.
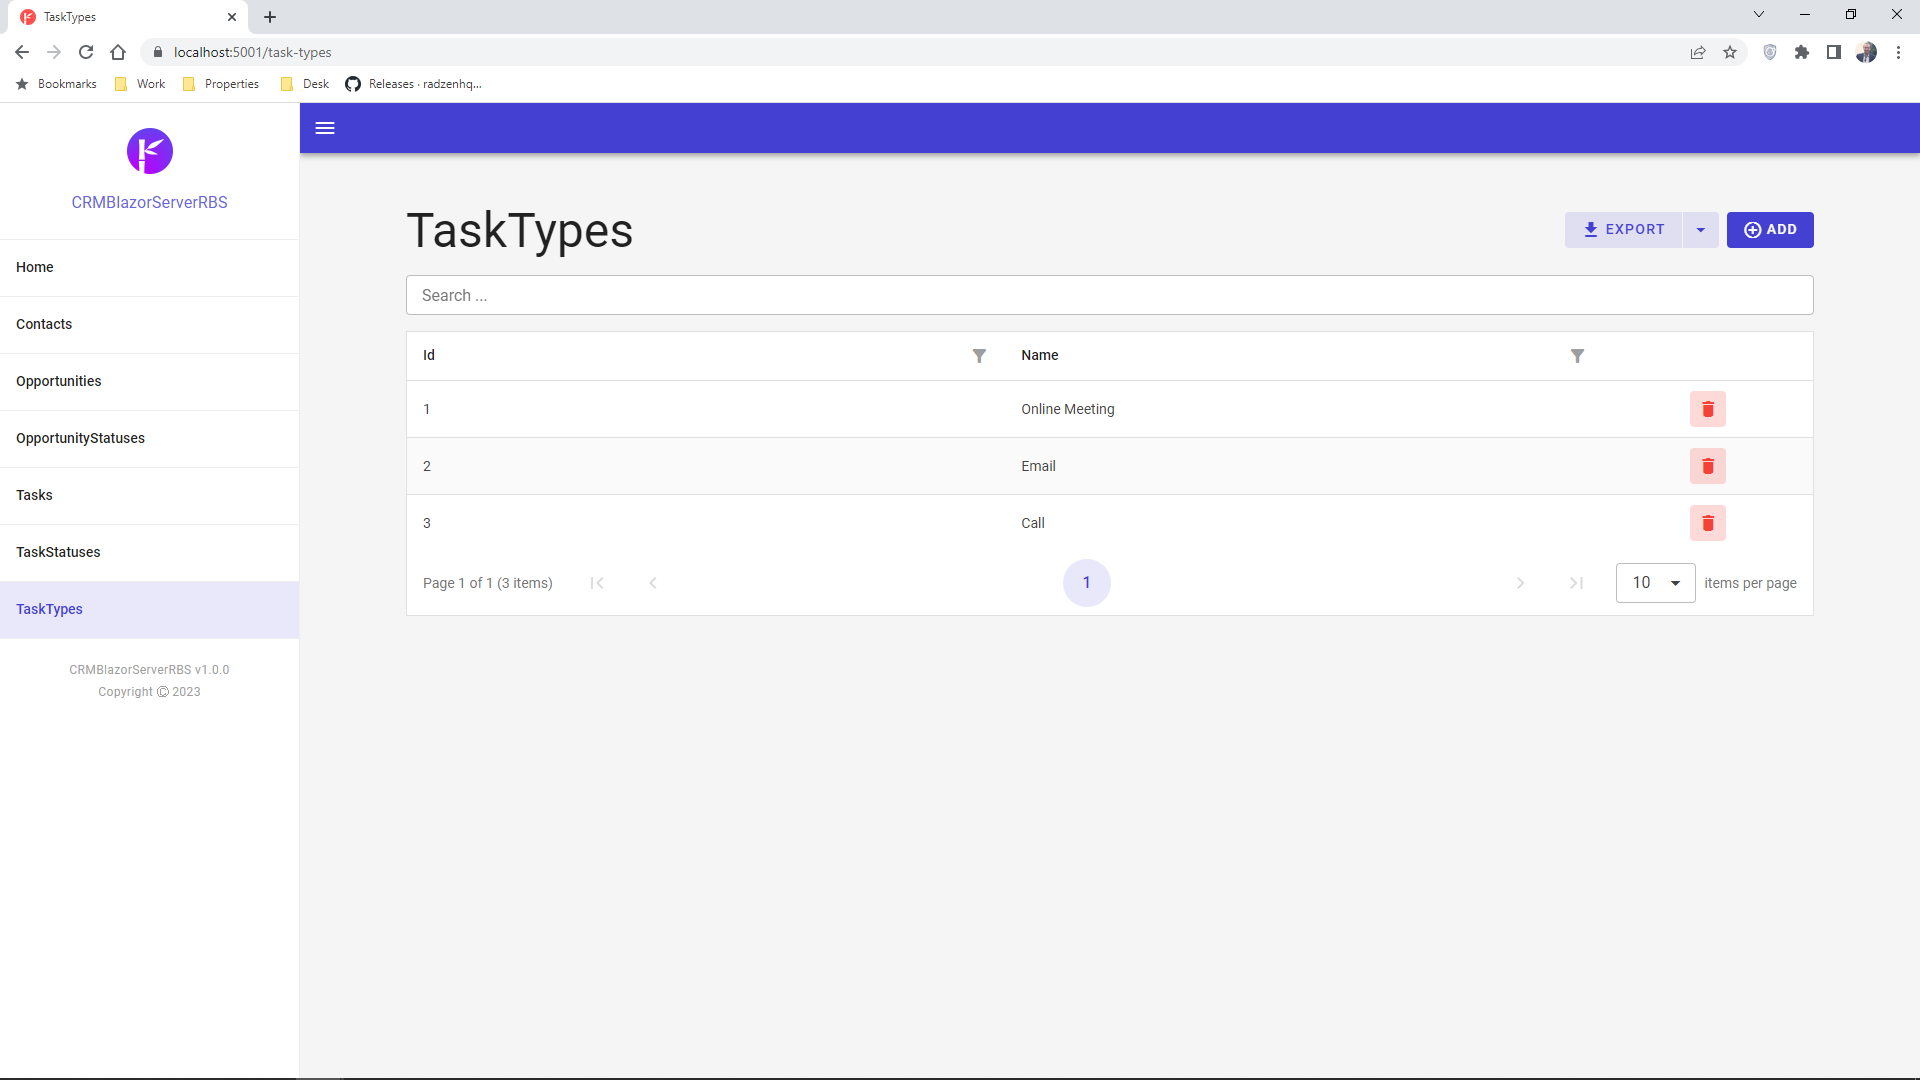
Finally go to the Task Types page and add the following task types: Online Meeting, Email, Call.
Enable security
The typical web application has users that can log in and do certain things based on their role. Our RadzenCRM application is no exception!
Let’s enable security and see how this affects the RadzenCRM database.
- Go back to Radzen Blazor Studio and click the Stop button. This stops the running application.
- Click the Security button in the top left corner of Radzen Blazor Studio. It displays the application security configuration page.
- Choose ASP.NET Core Identity security type.
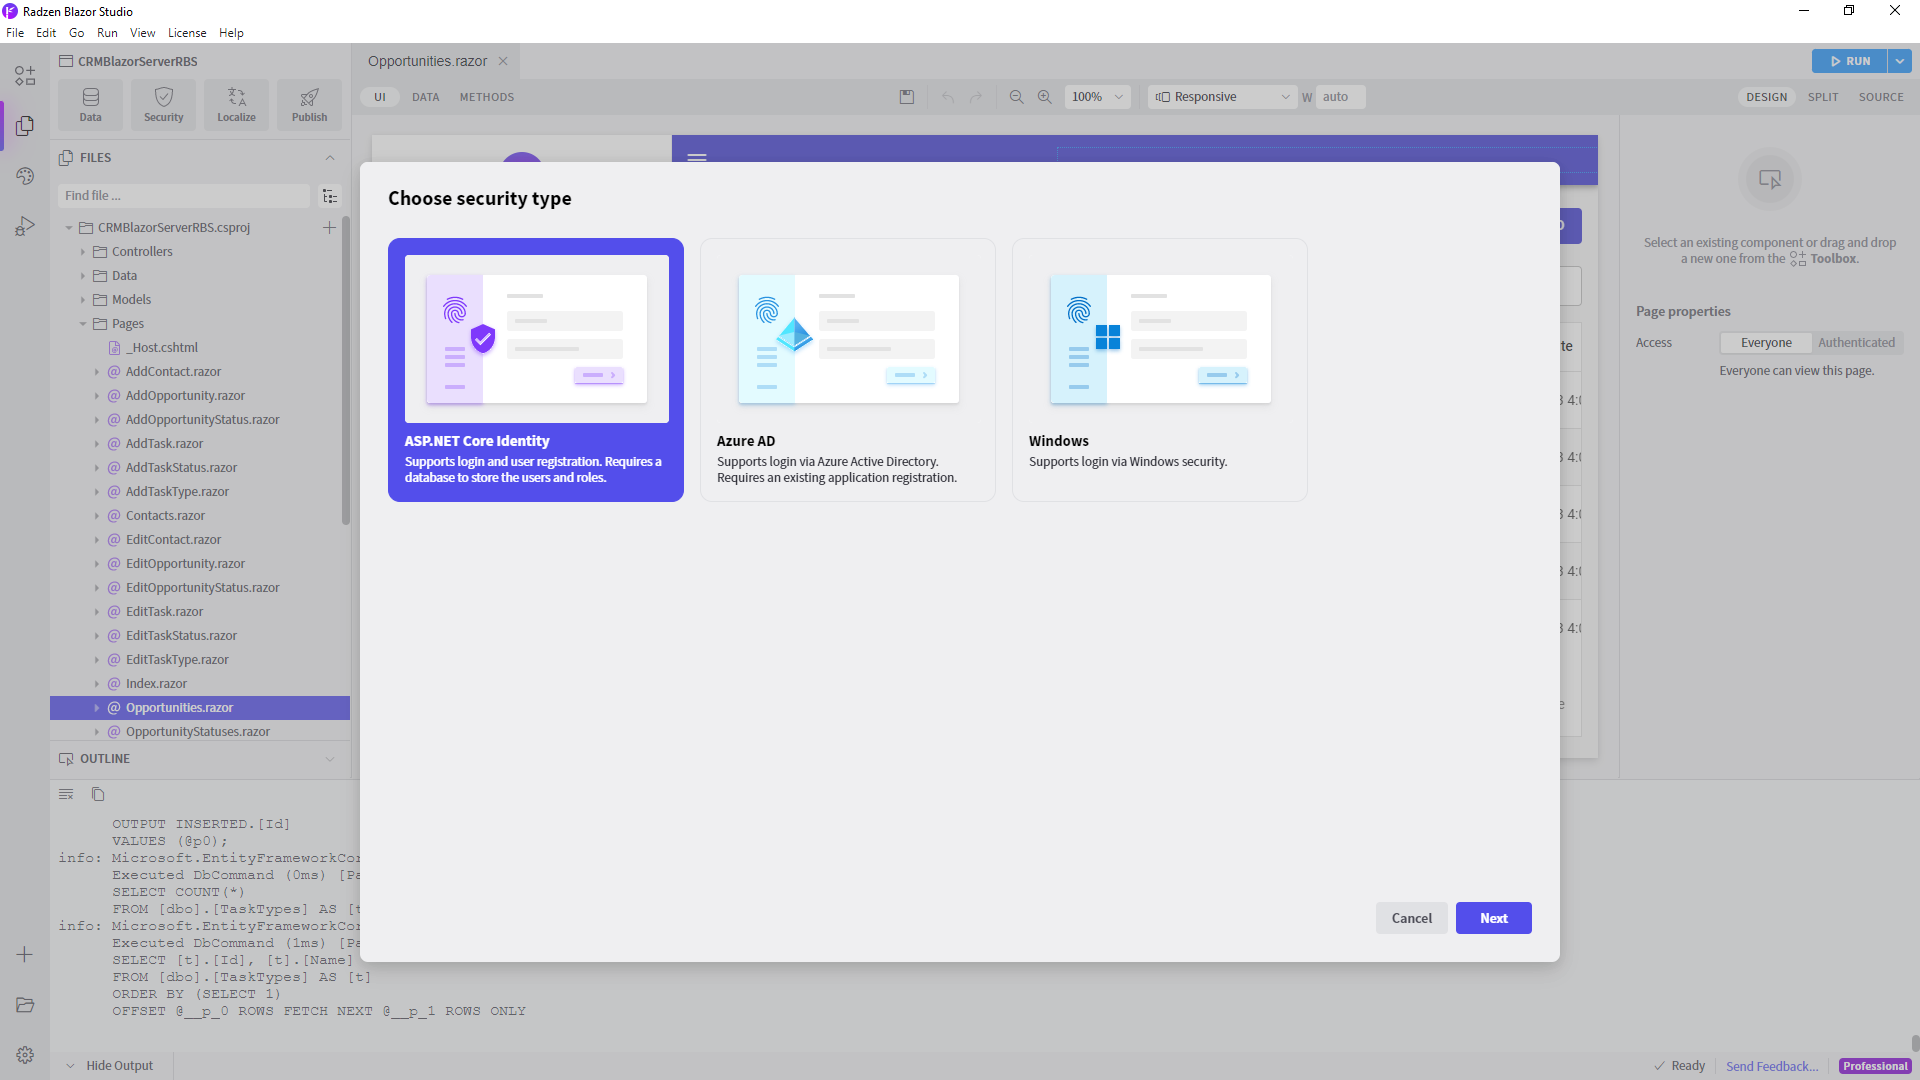 Then select
 RadzenCRMfrom the Data Source dropdown. This tells Radzen Blazor Studio what database to use to persist the users and roles. Check Auto generate pages for user and role management.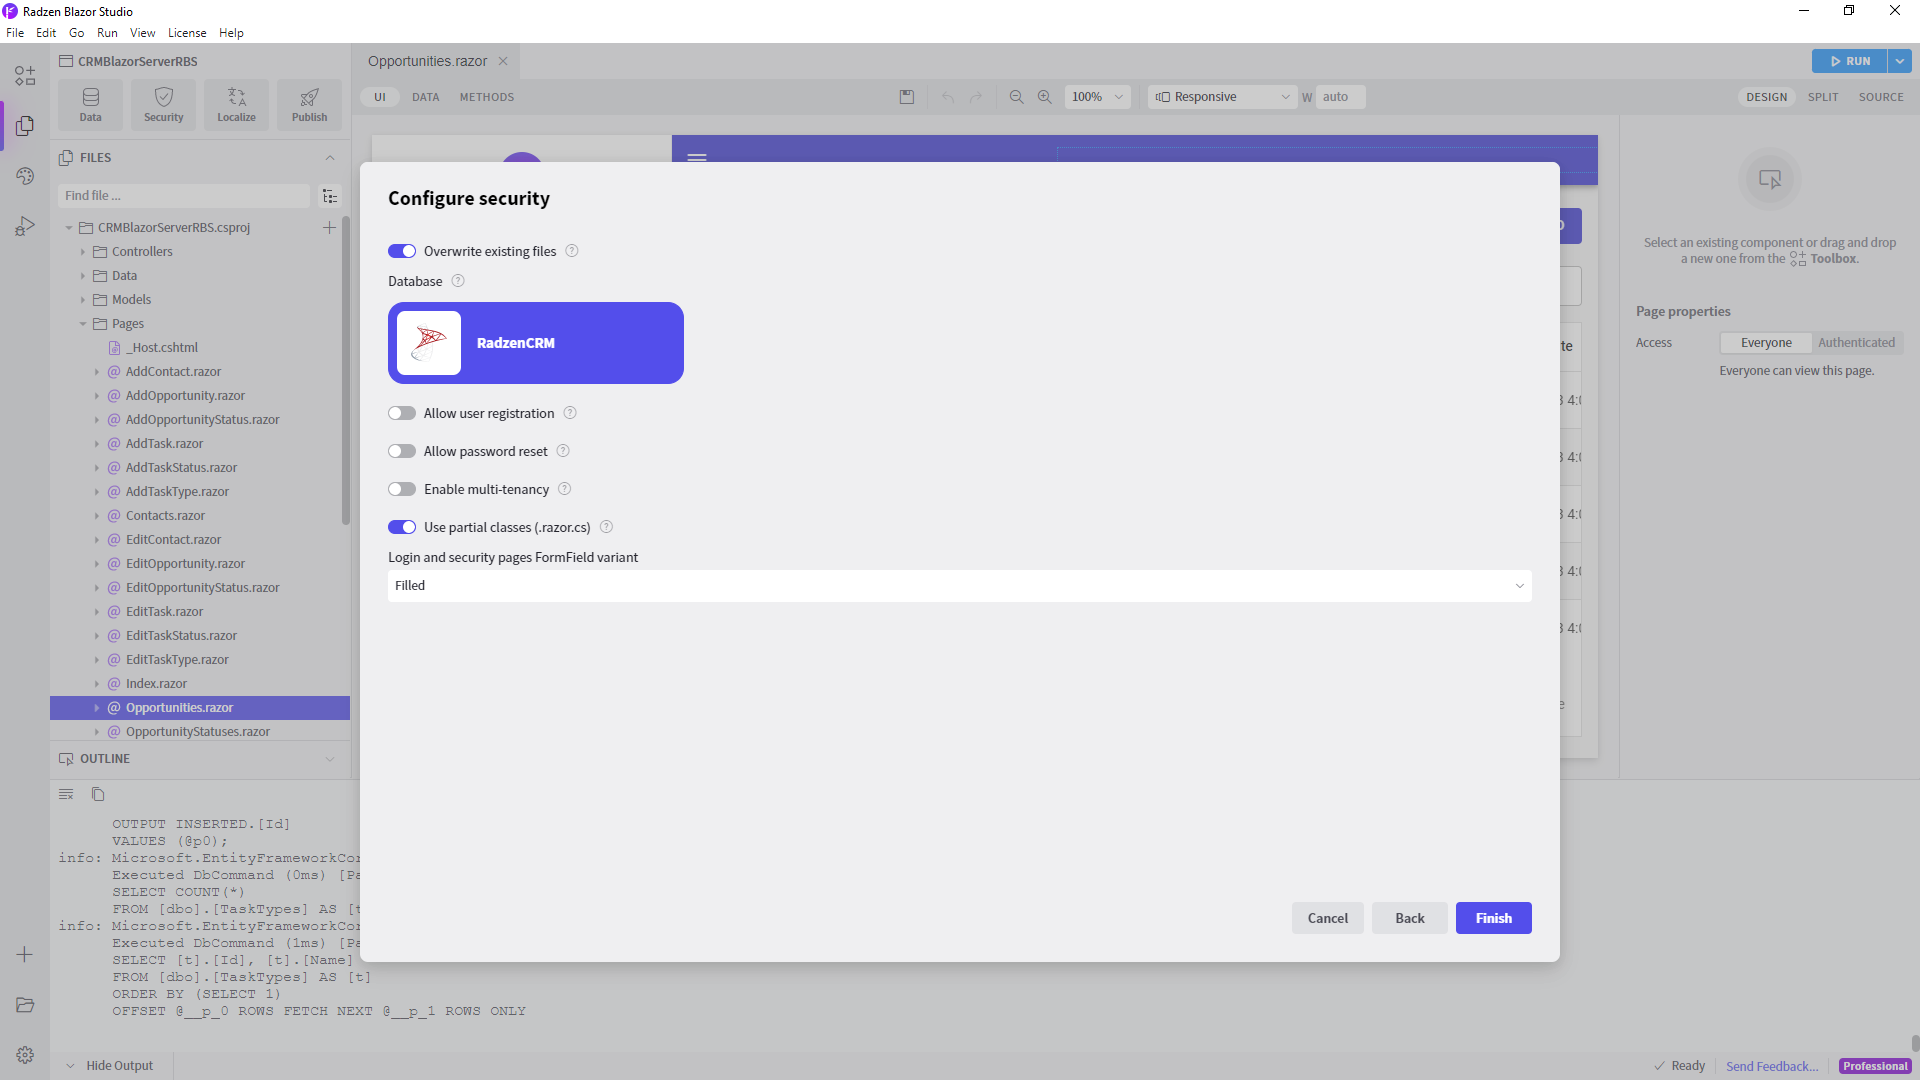
- Select
Filledas Login and security pages FormField variant, click save and run the application again.
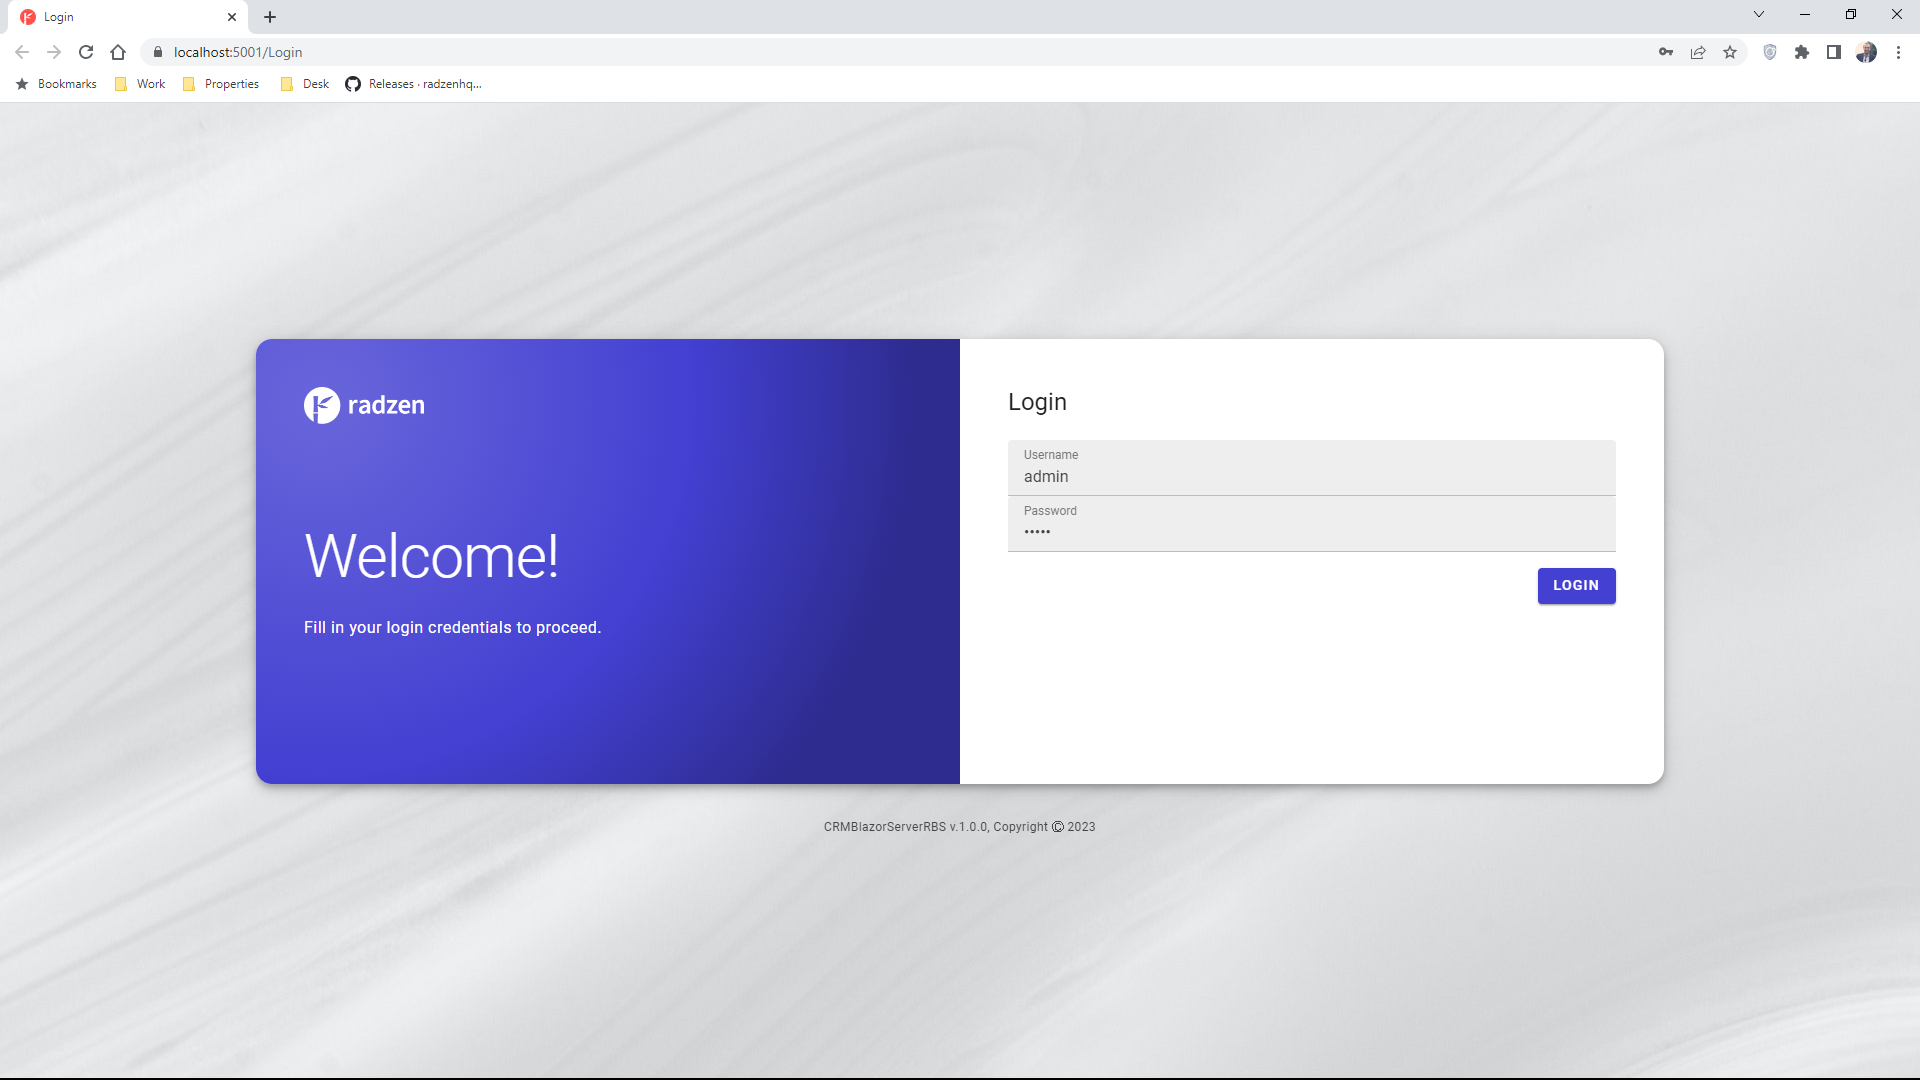
The application will start with the Login page. You can login with the test credentials admin/admin (available only during development).
When this happens the application will add a few more tables to the RadzenCRM database (all starting with Asp).
Create a foreign key
The final step is to create a foreign key relationship between the Opportunities table and the AspNetUsers table. We need this to associate users with opportunities in our CRM application.
This step is done in SQL Management Studio and your favorite code editor (Visual Studio Code, Visual Studio Professional or anything else really).
- Open SQL Management Studio or your favorite database management tool capable of running a SQL script.
-
Add a foreign key between the Opportunities and AspNetUsers table (Opportunities.UserID -> AspNetUsers.Id). You can run this SQL script:
USE [RadzenCRM]
GO

ALTER TABLE [dbo].[Opportunities] WITH CHECK
ADD CONSTRAINT [FK_Opportunities_AspNetUsers] FOREIGN KEY([UserId])
REFERENCES [dbo].[AspNetUsers] ([Id])
GO

ALTER TABLE [dbo].[Opportunities] CHECK CONSTRAINT [FK_Opportunities_AspNetUsers]
GO
Server-side Blazor
-
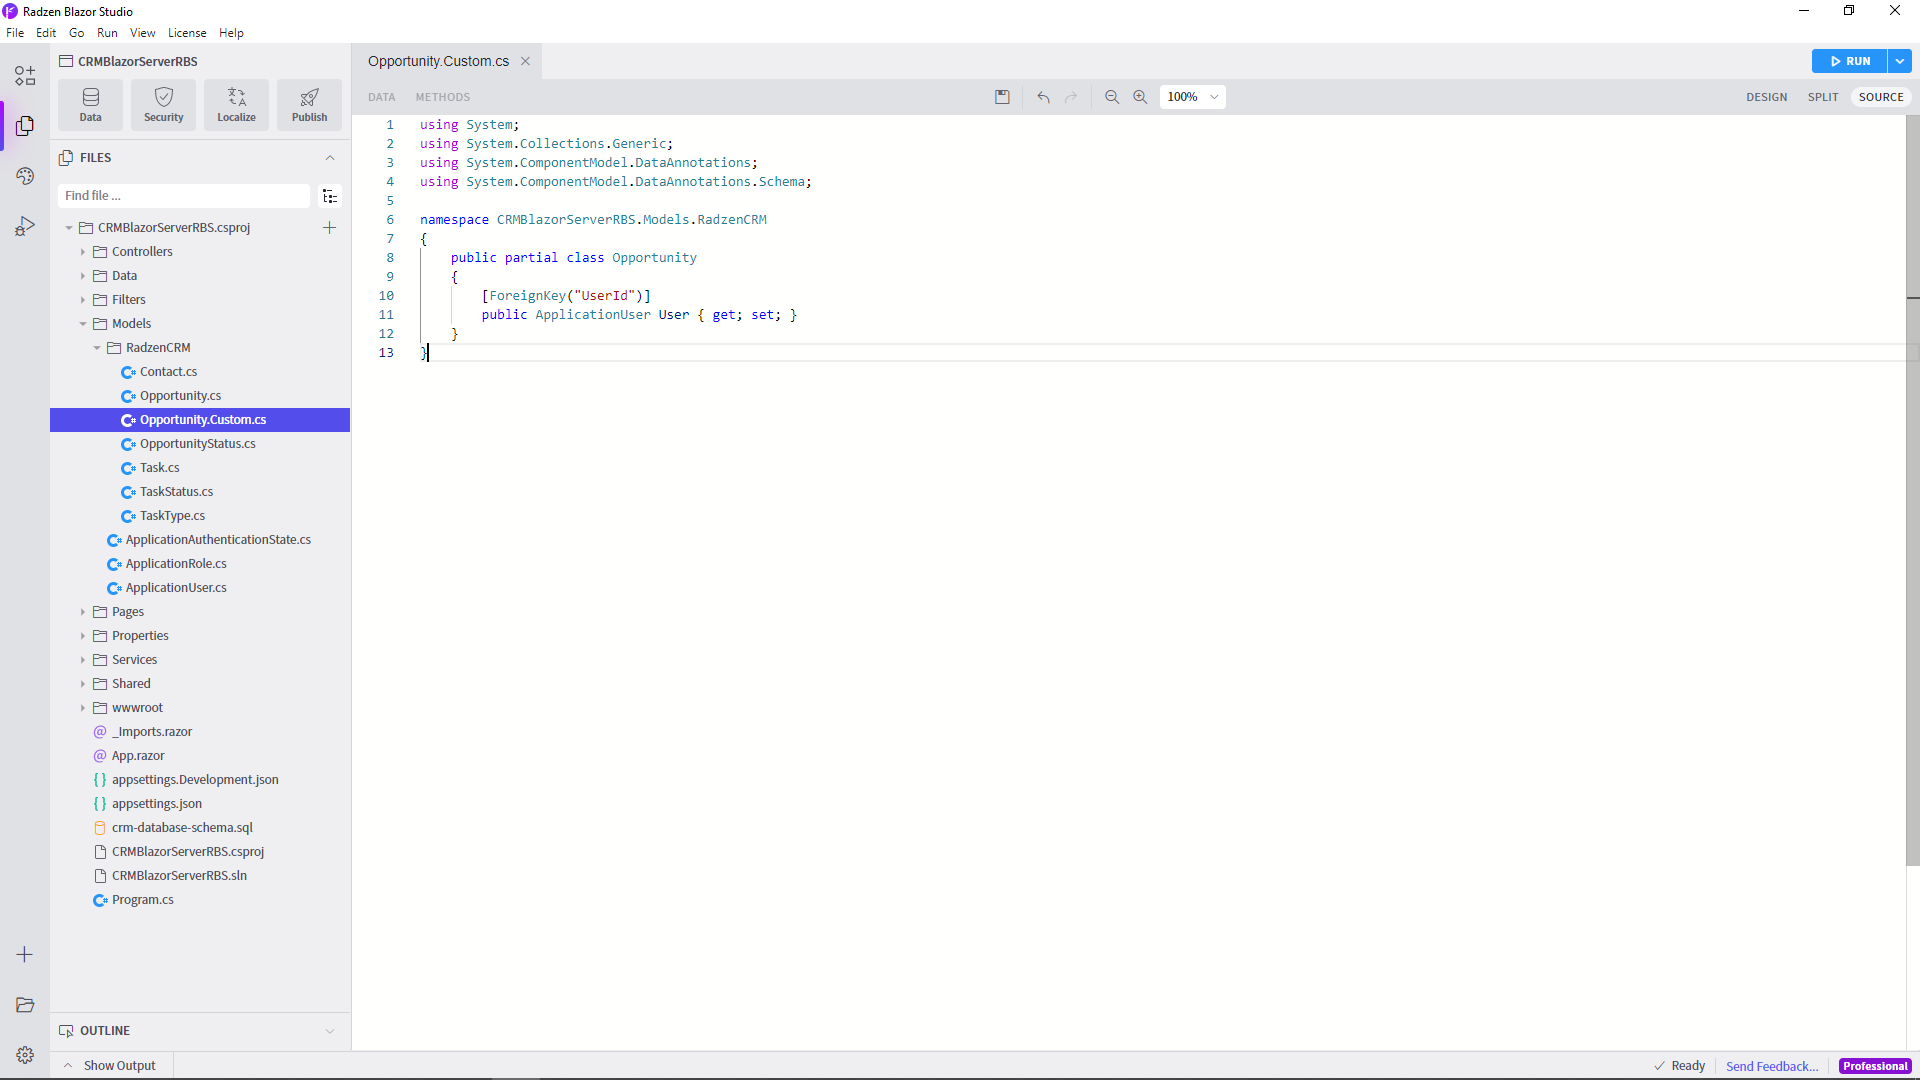
Add a new file
Models\RadzenCRM\Opportunity.Custom.cswith the following content.using System; using System.Collections.Generic; using System.ComponentModel.DataAnnotations; using System.ComponentModel.DataAnnotations.Schema; namespace CRMBlazorServerRBS.Models.RadzenCRM { public partial class Opportunity { [ForeignKey("UserId")] public ApplicationUser User { get; set; } } }
Client-side WebAssembly Blazor
-
Add a new file
Server\Models\RadzenCRM\Opportunity.Custom.cswith the following content.using System; using System.Collections.Generic; using System.ComponentModel.DataAnnotations; using System.ComponentModel.DataAnnotations.Schema; namespace CRMBlazorWasmRBS.Server.Models.RadzenCRM { public partial class Opportunity { [ForeignKey("UserId")] public ApplicationUser User { get; set; } } }
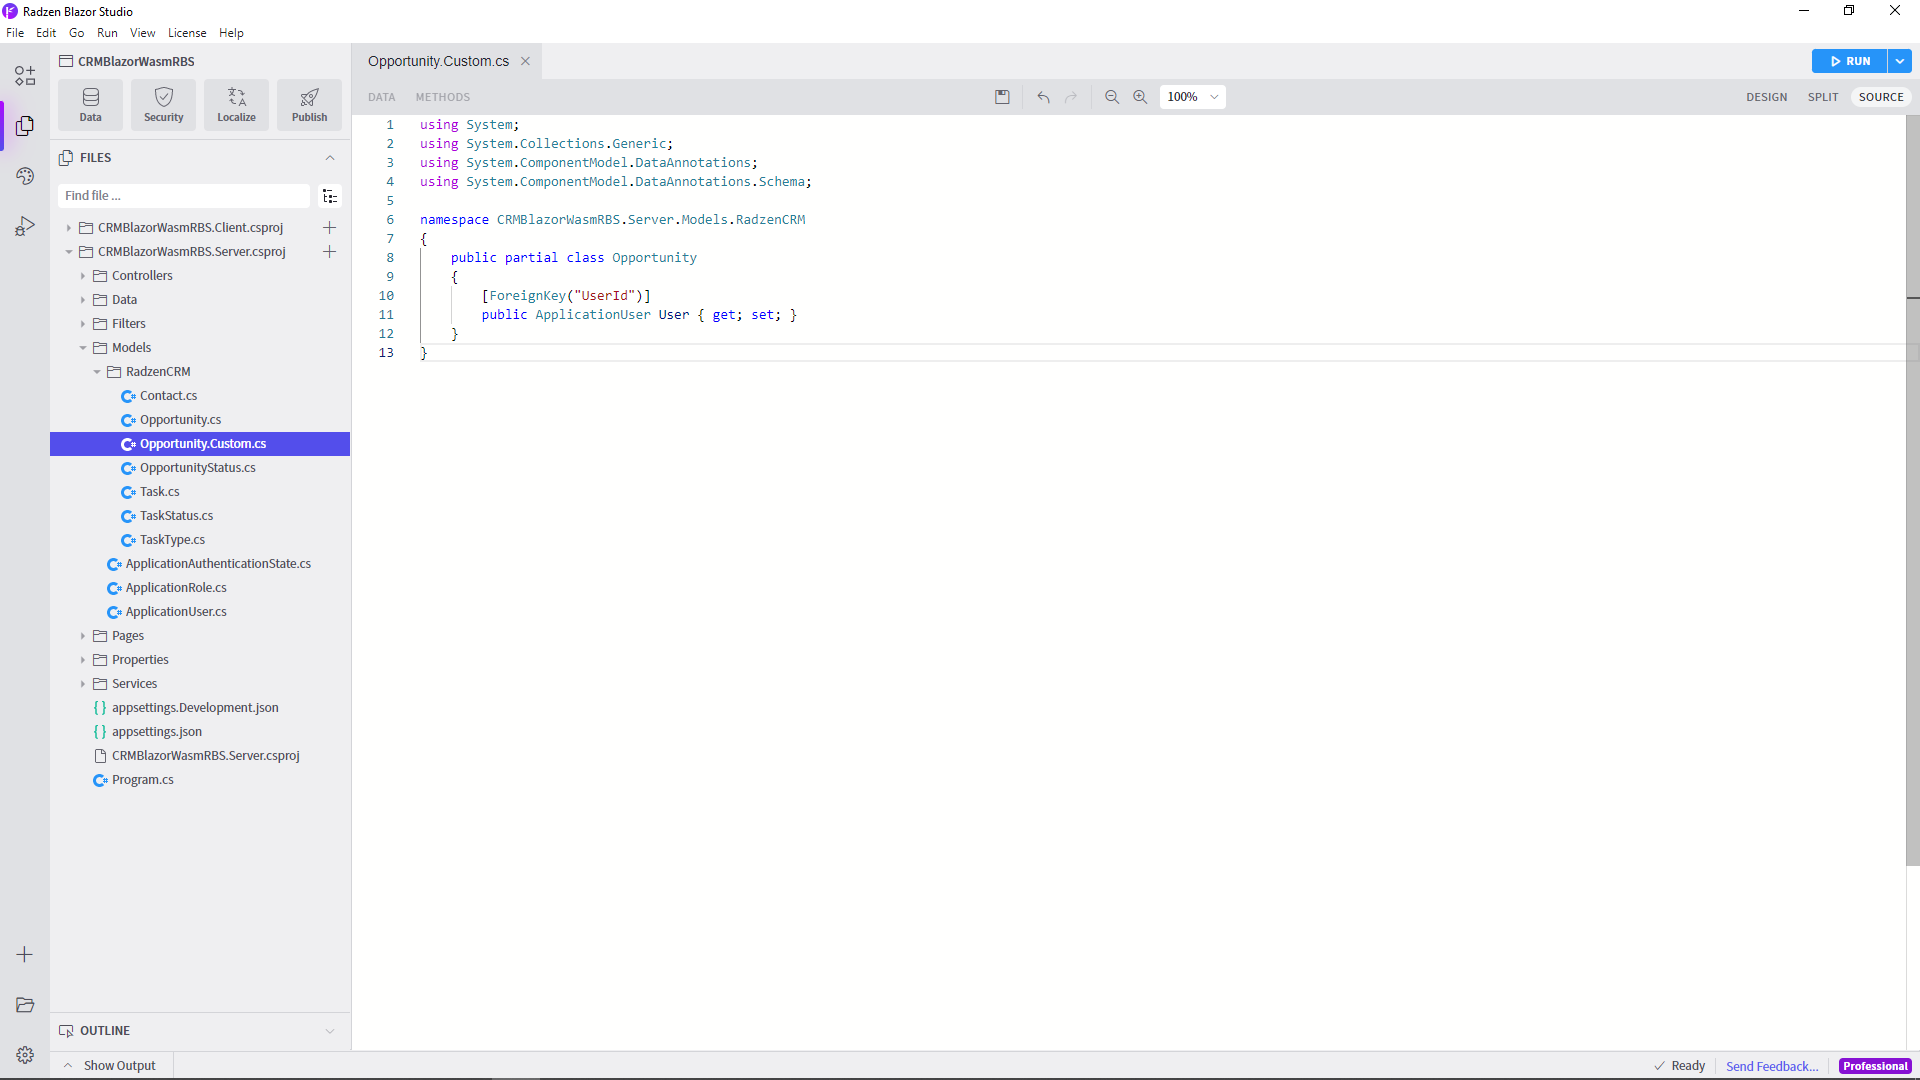
This extends the Opportunity model (a class which represents a record from the Opportunities table) with a new property User - the CRM application user it is related to.
Here is how the RadzenCRM database should look like after the last modification. 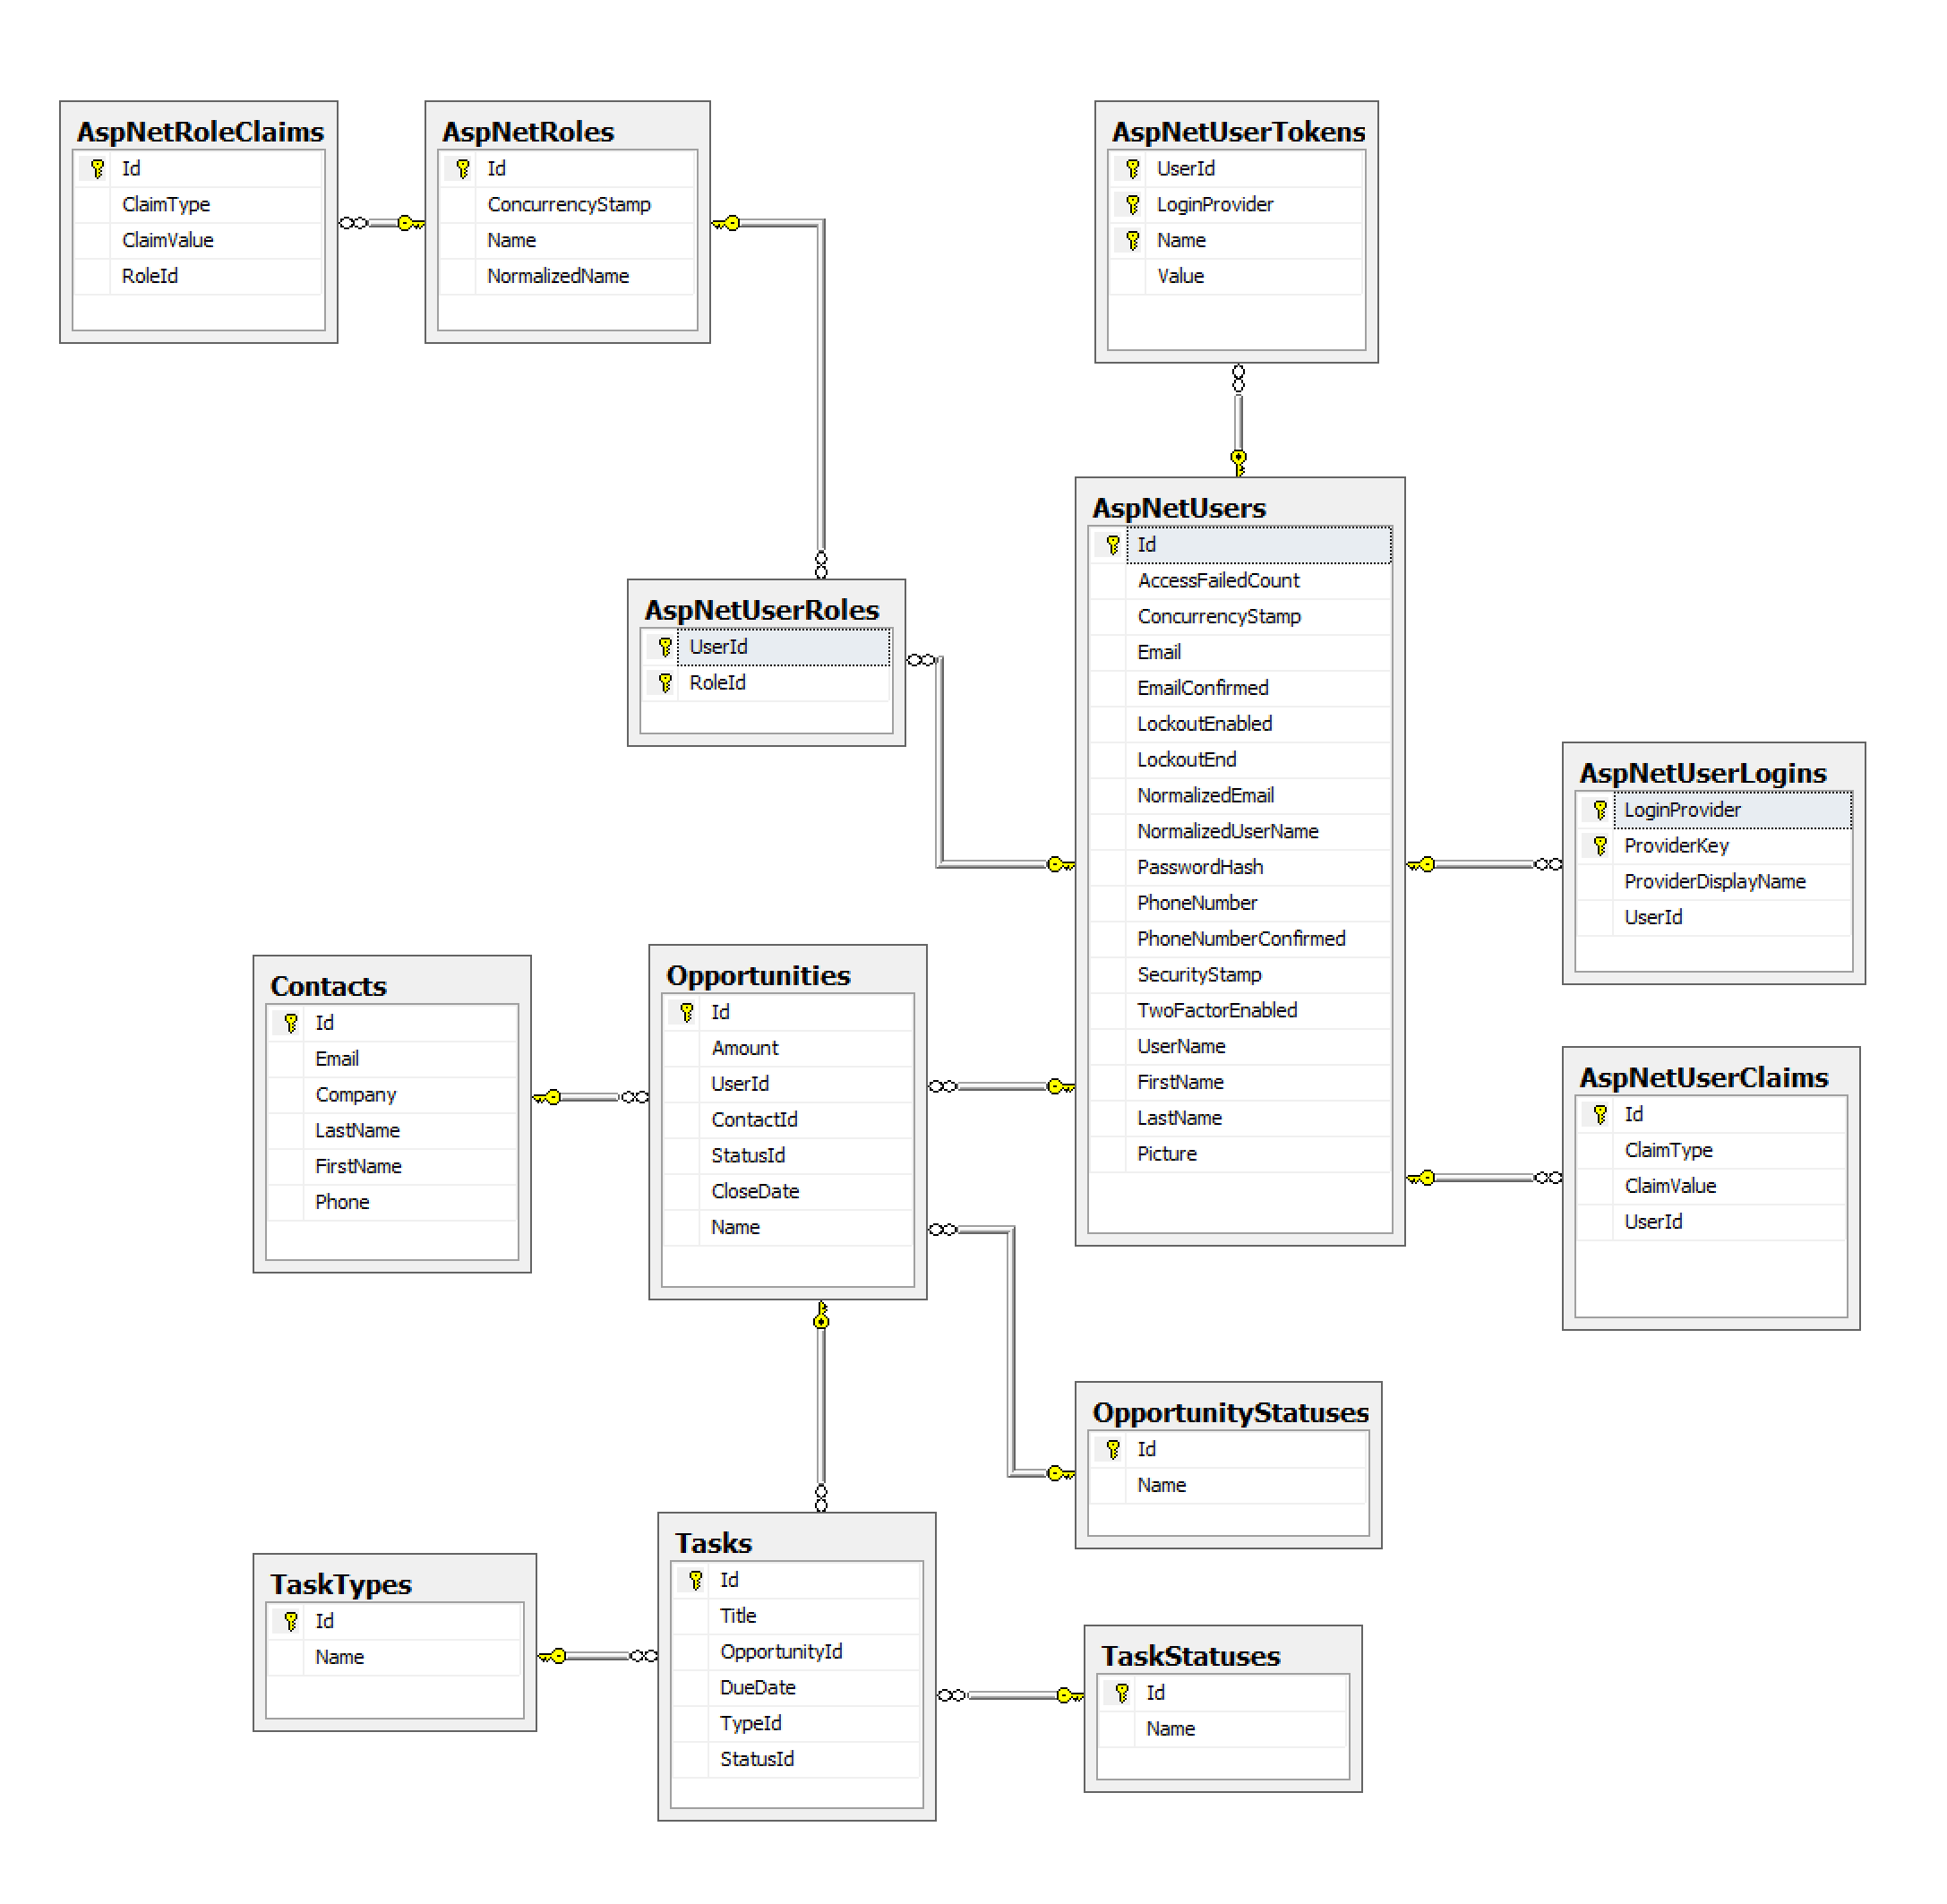
You are now ready to proceed to Customize security.