Customize security | Create a Blazor CRM application with Radzen Blazor Studio
In this step from the CRM Application tutorial we will customize the security settings:
- Add FirstName, LastName and Picture columns to the AspNetUsers table.
- Customize the user management pages - Add Application User, Application Users and optionally Edit Application User.
- Create some roles and add a couple of users.
- Set page permissions.
Extend the AspNetUsers table
Radzen Blazor Studio applications come with a built-in security feature which relies on ASP.NET Core Identity. ASP.NET Core Identity is backed up by a set of tables that are created via Entity Framework Core migrations automatically the first time you log in your Radzen Blazor Studio application.
Application users are stored in the AspNetUsers table which by default looks like this:
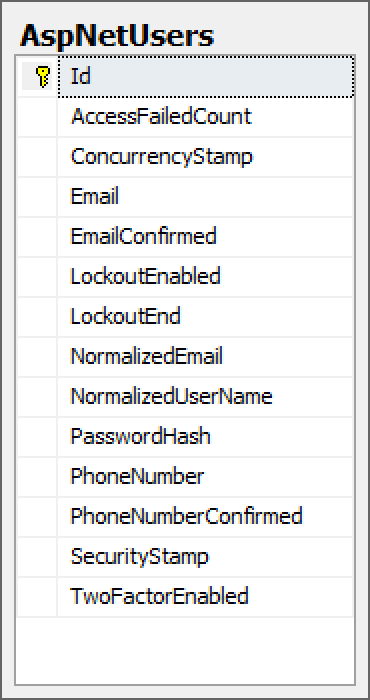
Yes, by default it has only the most basic info. Lets change that by adding FirstName, LastName and Picture columns. This time though we are not going to edit the database in SQL Server Management Studio or run SQL. Remember that ASP.NET Identity relies on Entity Framework Migrations which use code to create the underlying tables and columns.
- Add a new file
Models\ApplicationUser.Custom.cswith the following content.Server-side Blazor
using System;
using System.Collections.Generic;
using System.ComponentModel.DataAnnotations;
using System.ComponentModel.DataAnnotations.Schema;

namespace CRMBlazorServerRBS.Models
{
     public partial class ApplicationUser
     {
         public string FirstName { get; set; }
         public string LastName { get; set; }
         public string Picture { get; set; }
     }
}
Client-side WebAssembly Blazor
Add a new file
Server\Models\ApplicationUser.Custom.cswith the following content.using System; using System.Collections.Generic; using System.ComponentModel.DataAnnotations; using System.ComponentModel.DataAnnotations.Schema; namespace CRMBlazorWasmRBS.Server.Models { public partial class ApplicationUser { public string FirstName { get; set; } public string LastName { get; set; } public string Picture { get; set; } } }The
ApplicationUserclass represents a record from the AspNetUsers table and by adding those three properties we extend it. - Add a new file
Data\RadzenCRMContext.Custom.cswith the following content.Server-side Blazor
using Microsoft.EntityFrameworkCore;
using CRMBlazorServerRBS.Models.RadzenCRM;

namespace CRMBlazorServerRBS.Data
{
    public partial class RadzenCRMContext
    {
        partial void OnModelBuilding(ModelBuilder builder)
        {
            builder.Entity<ApplicationUser>().ToTable("AspNetUsers");
        }
    }
}
Client-side WebAssembly Blazor
Add a new file
Server\Data\RadzenCRMContext.Custom.cswith the following content.using Microsoft.EntityFrameworkCore; using CRMBlazorWasmRBS.Server.Models; namespace CRMBlazorWasmRBS.Server.Data { public partial class RadzenCRMContext { partial void OnModelBuilding(ModelBuilder builder) { builder.Entity<ApplicationUser>().ToTable("AspNetUsers"); } } } - Add a new file
Controllers\ApplicationUsersController.Custom.cswith the following content.Server-side Blazor
using System;
using System.Linq;
using CRMBlazorServerRBS.Models;

namespace CRMBlazorServerRBS.Controllers
{
     public partial class ApplicationUsersController
     {
         partial void OnUserUpdated(ApplicationUser user)
         {
             var item = context.Users.Where(u => u.Id == user.Id).FirstOrDefault();
             if(user != null)
             {
                 item.FirstName = user.FirstName;
                 item.LastName = user.LastName;
                 item.Picture = user.Picture;
             }
         }
     }
}
Client-side WebAssembly Blazor
Add a new file
Server\Controllers\ApplicationUsersController.Custom.cswith the following content.using System; using System.Linq; using CRMBlazorWasmRBS.Server.Models; namespace CRMBlazorWasmRBS.Server.Controllers { public partial class ApplicationUsersController { partial void OnUserUpdated(ApplicationUser user) { var item = context.Users.Where(u => u.Id == user.Id).FirstOrDefault(); if(user != null) { item.FirstName = user.FirstName; item.LastName = user.LastName; item.Picture = user.Picture; } } } } - Open a command prompt window and go to the directory (or Server directory in case of WebAssembly) of the CRM application.
- Run the following command (it will take some time to complete):
dotnet ef migrations add ExtendApplicationUser -c ApplicationIdentityDbContextThis command uses the Entity Framework Core tooling to add the
FirstName,LastNameandPicturecolumns to the AspNetUsers table. - Open the generated migration class in
Data/Migrations/XXX_ExtendApplicationUser.csto check if newly added properties are there.If you haven’t installed the EF Core tools before that command will fail. Run
dotnet tool install --global dotnet-efto install them.
Now that we have added three new columns it is time to update the Add and Edit Application User pages.
Update the user management pages
Radzen Blazor Studio has scaffolded pages for managing application users. We will now update those pages to allow setting the new database columns.
We will start from the Add Application User page.
- Open the Add Application User page in Radzen Blazor Studio.
- Duplicate the “Email” FormField from the page.
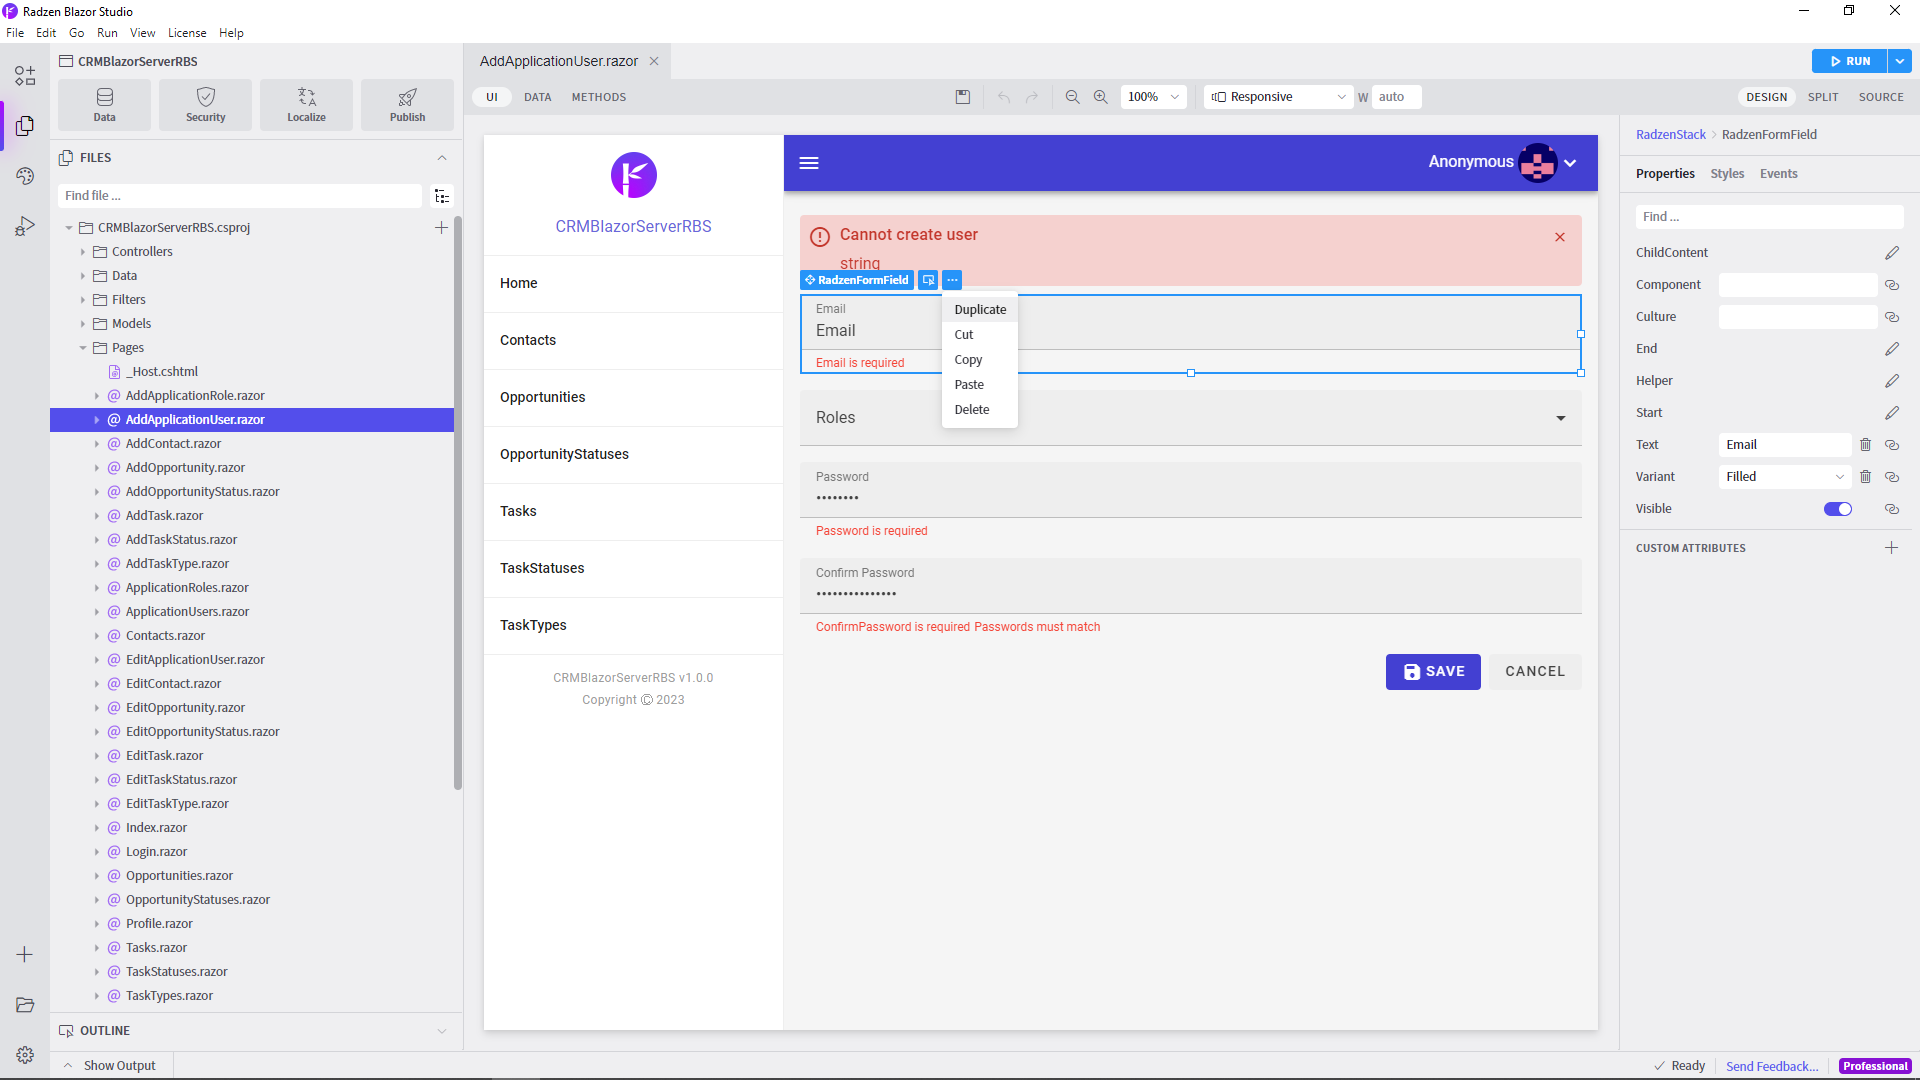
- Select the TextBox and set its Value property to
@user.FirstName. This will data-bind the text box to theFirstNameproperty of theApplicationUserclass (which we added in the previous step). - Select the FormField and set its Text property to
First Name. -
Finally select the RequiredValidatorComponent below the text box. Set its Text to
First Name is required. Set its Component property toFirstName.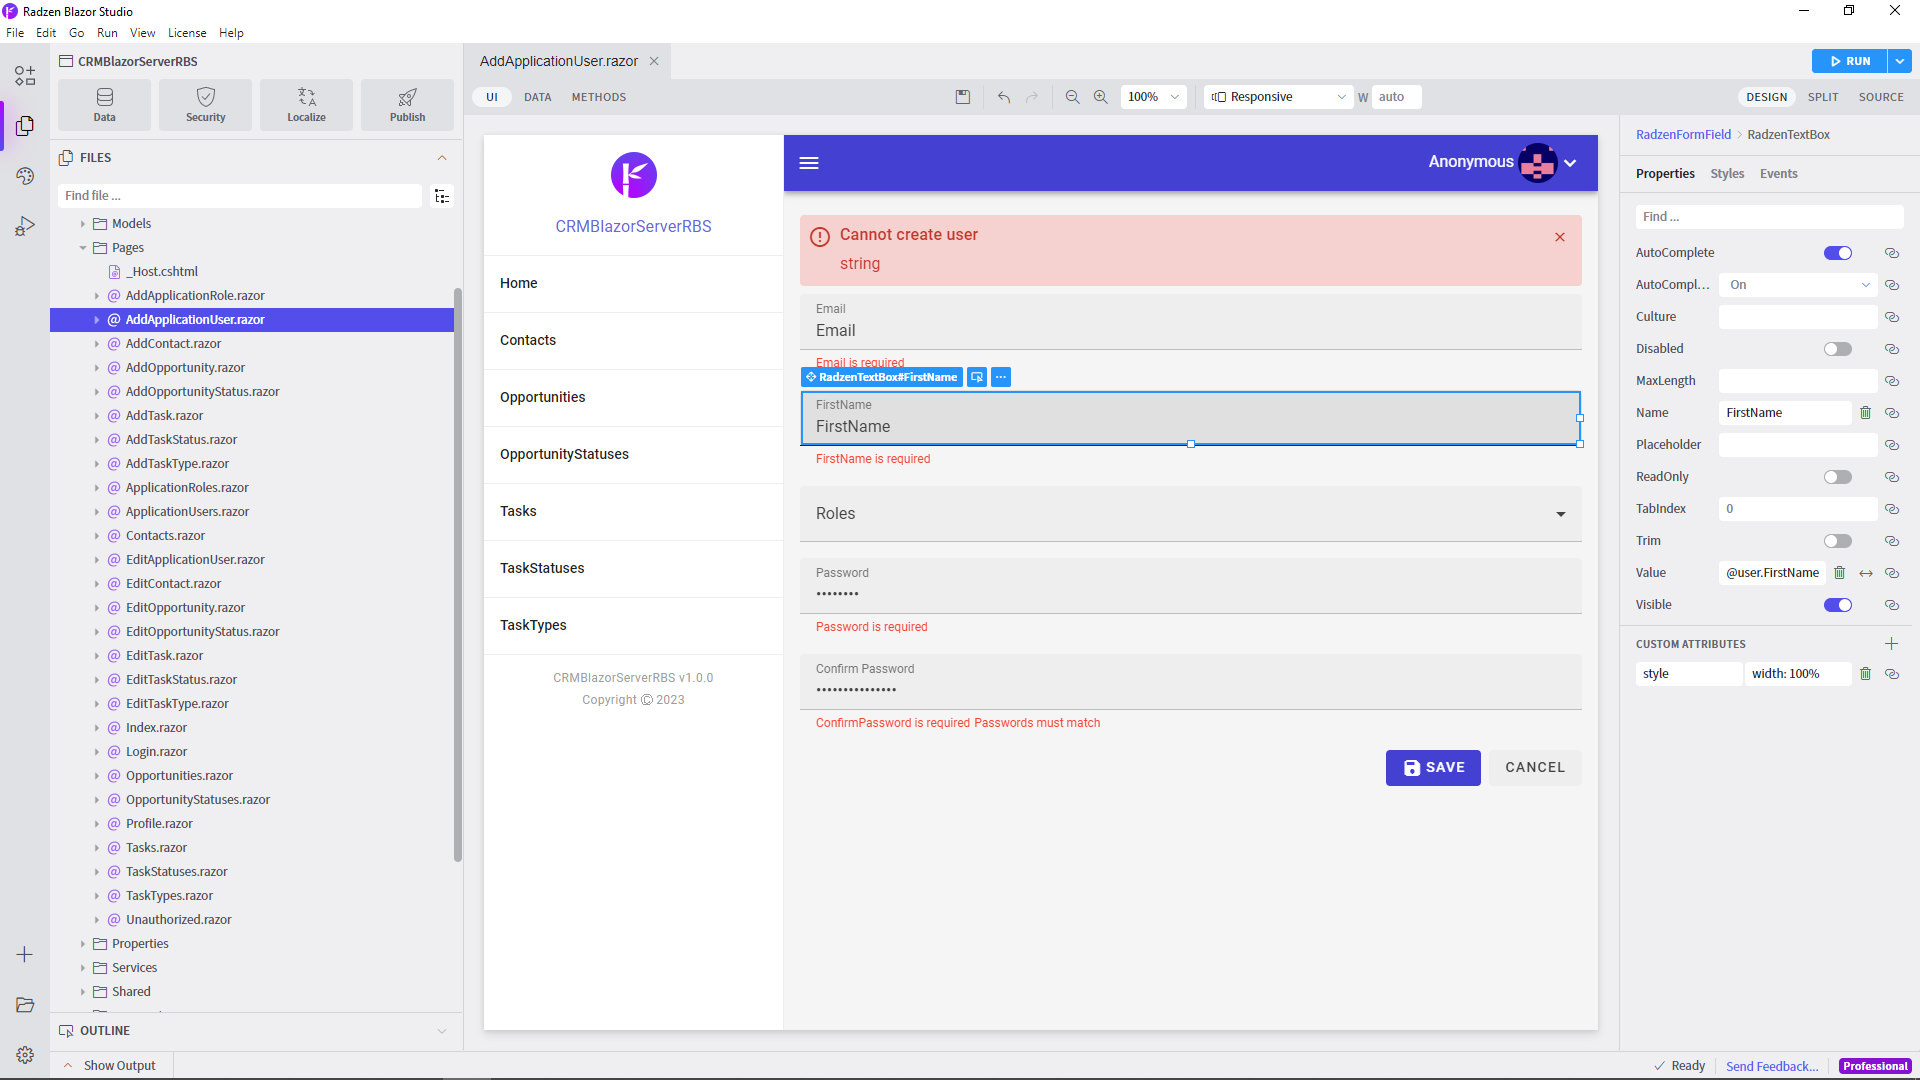
- Perform steps 1 - 5 for the
LastNameproperty. - Duplicate a form row once again. Delete the TextBox component. Drag-and-drop a FileInput component.
Set its Value property to
@user.Picture. It will allow the user to upload a picture which will be saved in theAspNetUserstable (in thePicturecolumn). - Change the Label text to
Picture. - Set the Text of the RequiredValidator to
Picture is required. Set its Component property toPicture. - Set TemplateForm
Visible="@(user != null)"to avoid errors when the user is still not loaded.
Optionally you can perform those above steps to add FirstName, LastName and Picture to the Edit Application User page.
Let’s now update the Application Users page to show FirstName, LastName and Picture in the DataGrid.
- Open the Application Users page in Radzen Blazor Studio.
- Select the DataGrid component.
- Add a new data grid column by clicking the + button next to the Columns label in the property grid. The new column goes last. Scroll to the bottom of the property grid.
- Pick
FirstNamefrom the Property dropdown. This specifies what property (database column) this column will display. - Now perform steps 1-4 for the
LastNamecolumn.
We now need to add a data grid column to display the Picture column of the AspNetUsers table.
- Add a column for the
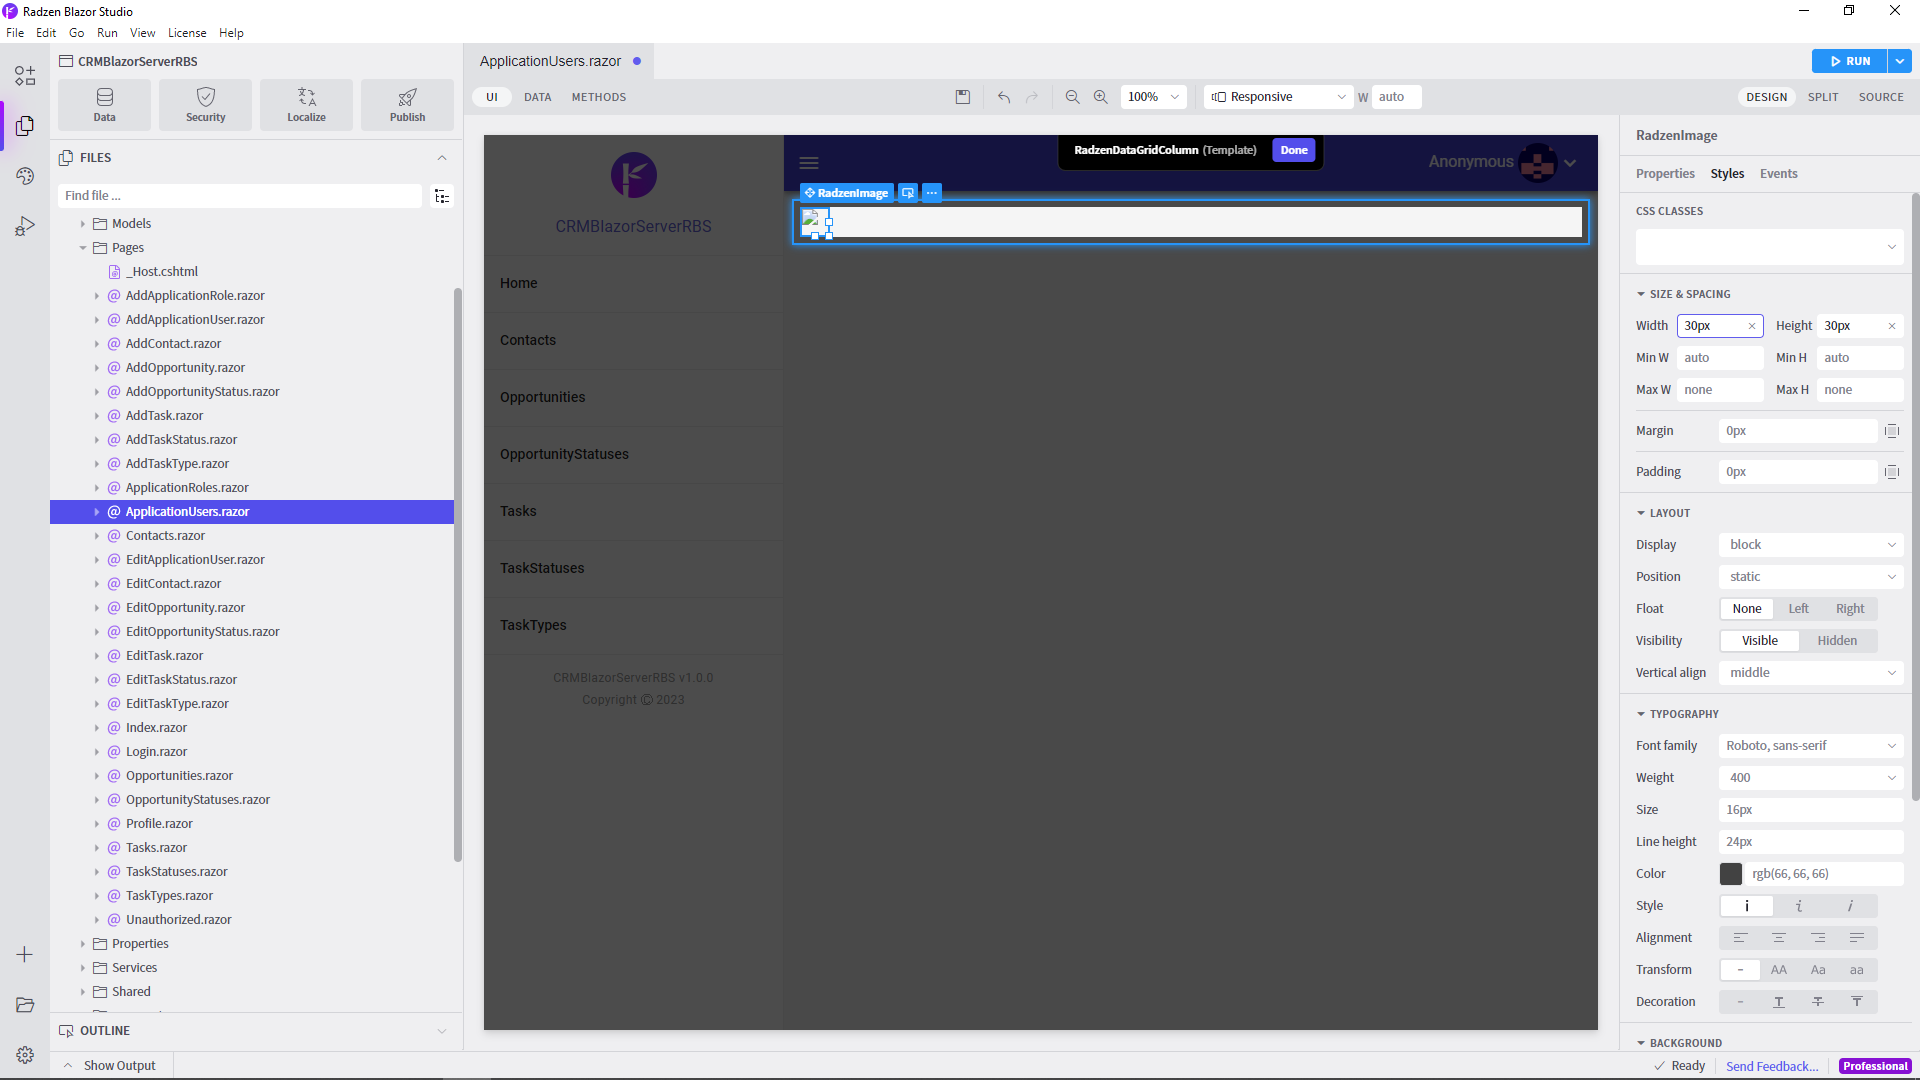
Pictureproperty by following the steps above. Then click the Edit button next to Template. We need to add an Image component in this column to display the user picture stored in the database. - Drag and drop an Image component from the Radzen Blazor Studio toolbox. Set its Path property to
@user.Picture.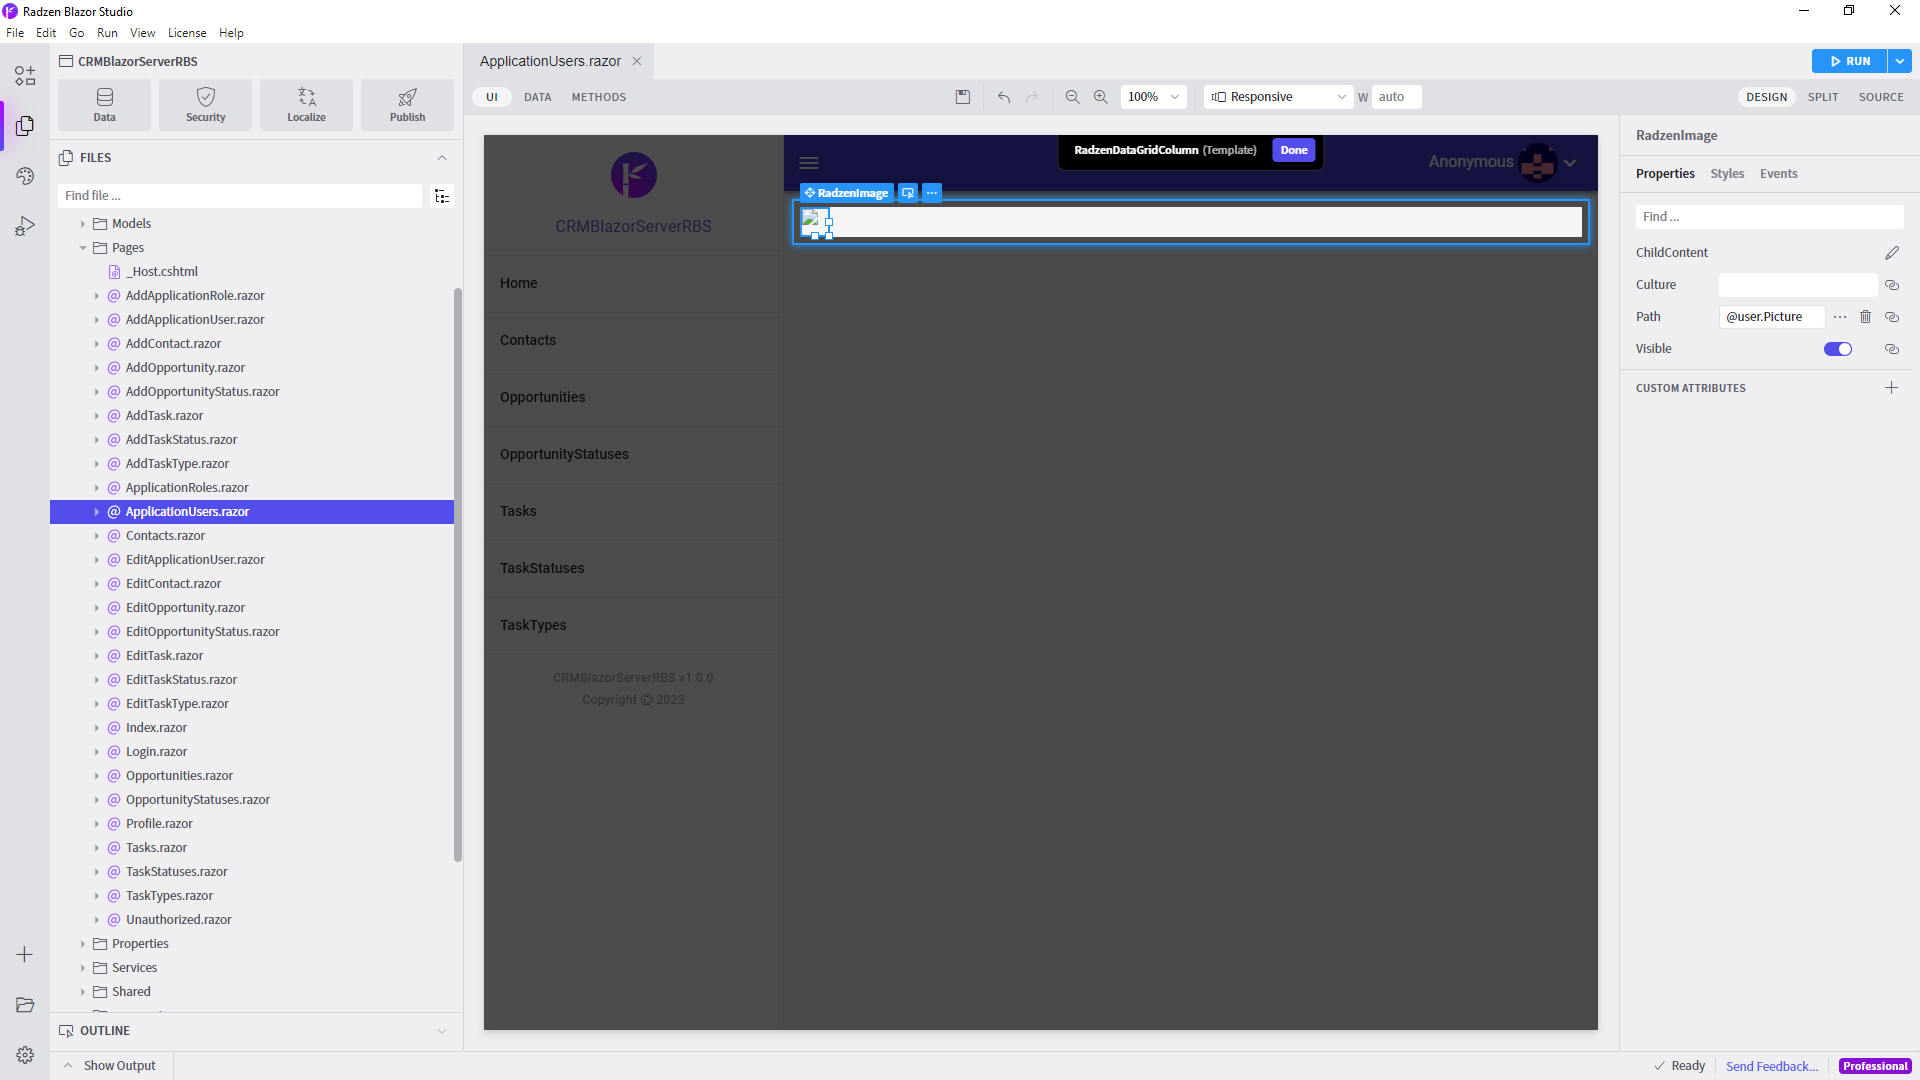
- Go to the Style tab of the property grid. It allows you to specify various visual component settings. Set Width to
30pxand Height to30px. - Click End template editing.
Create roles and users
Now that we have customized the security pages it is time to add roles and users.
Add the roles
- Run the application in Radzen Blazor Studio and log in with
admin/admin. - In your browser go to the application menu in the top right corner.
- Click Roles. This loads the role management pages.
- Add two roles:
Sales ManagerandSales Representative.

Add the users
- In your browser go to the application menu in the top right corner.
- Click Users. This loads the user management pages.
- Add a new user with the following attributes:
- Email:
salesmanager@demo.radzen.com - First Name:
Jane - Last Name:
Smith - Roles: check
Sales Manager - Upload some photo for the Picture (we will use this)
- Password and Confirm password:
SalesManager1@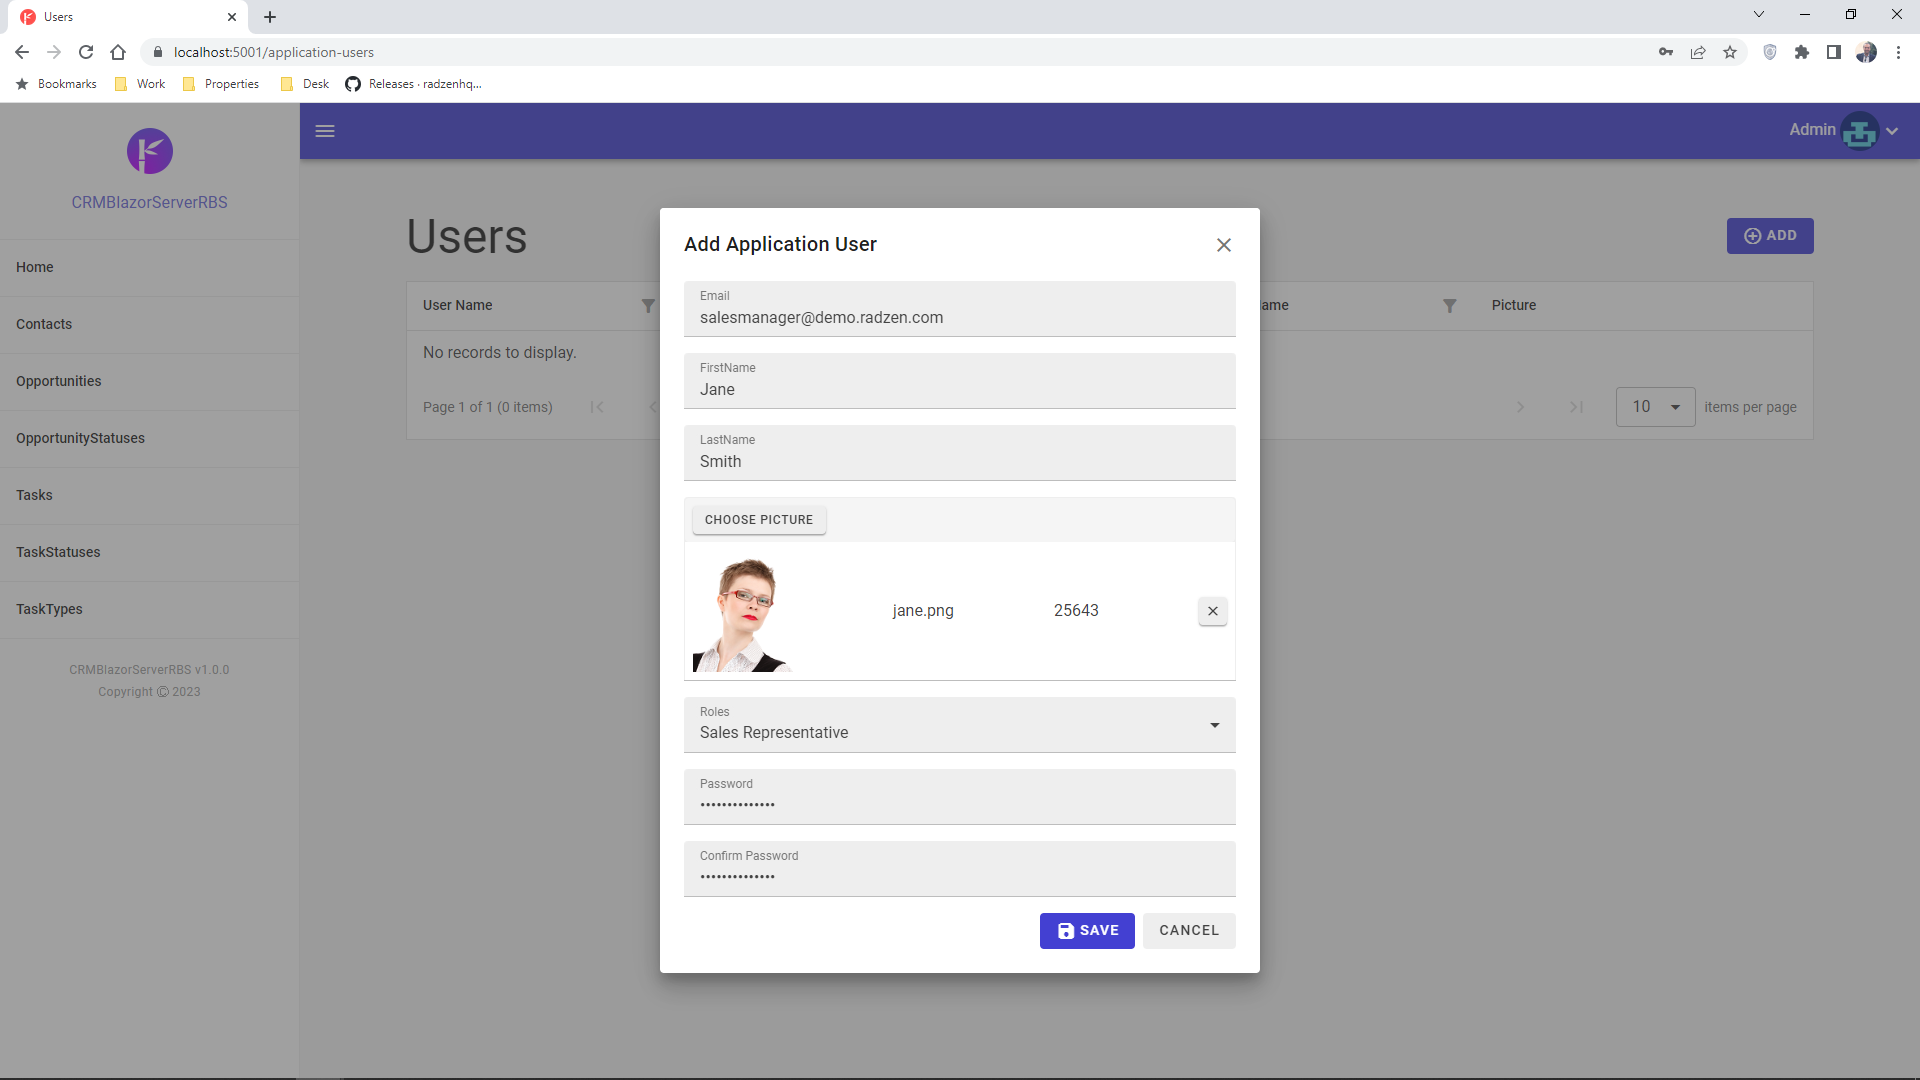
- Email:
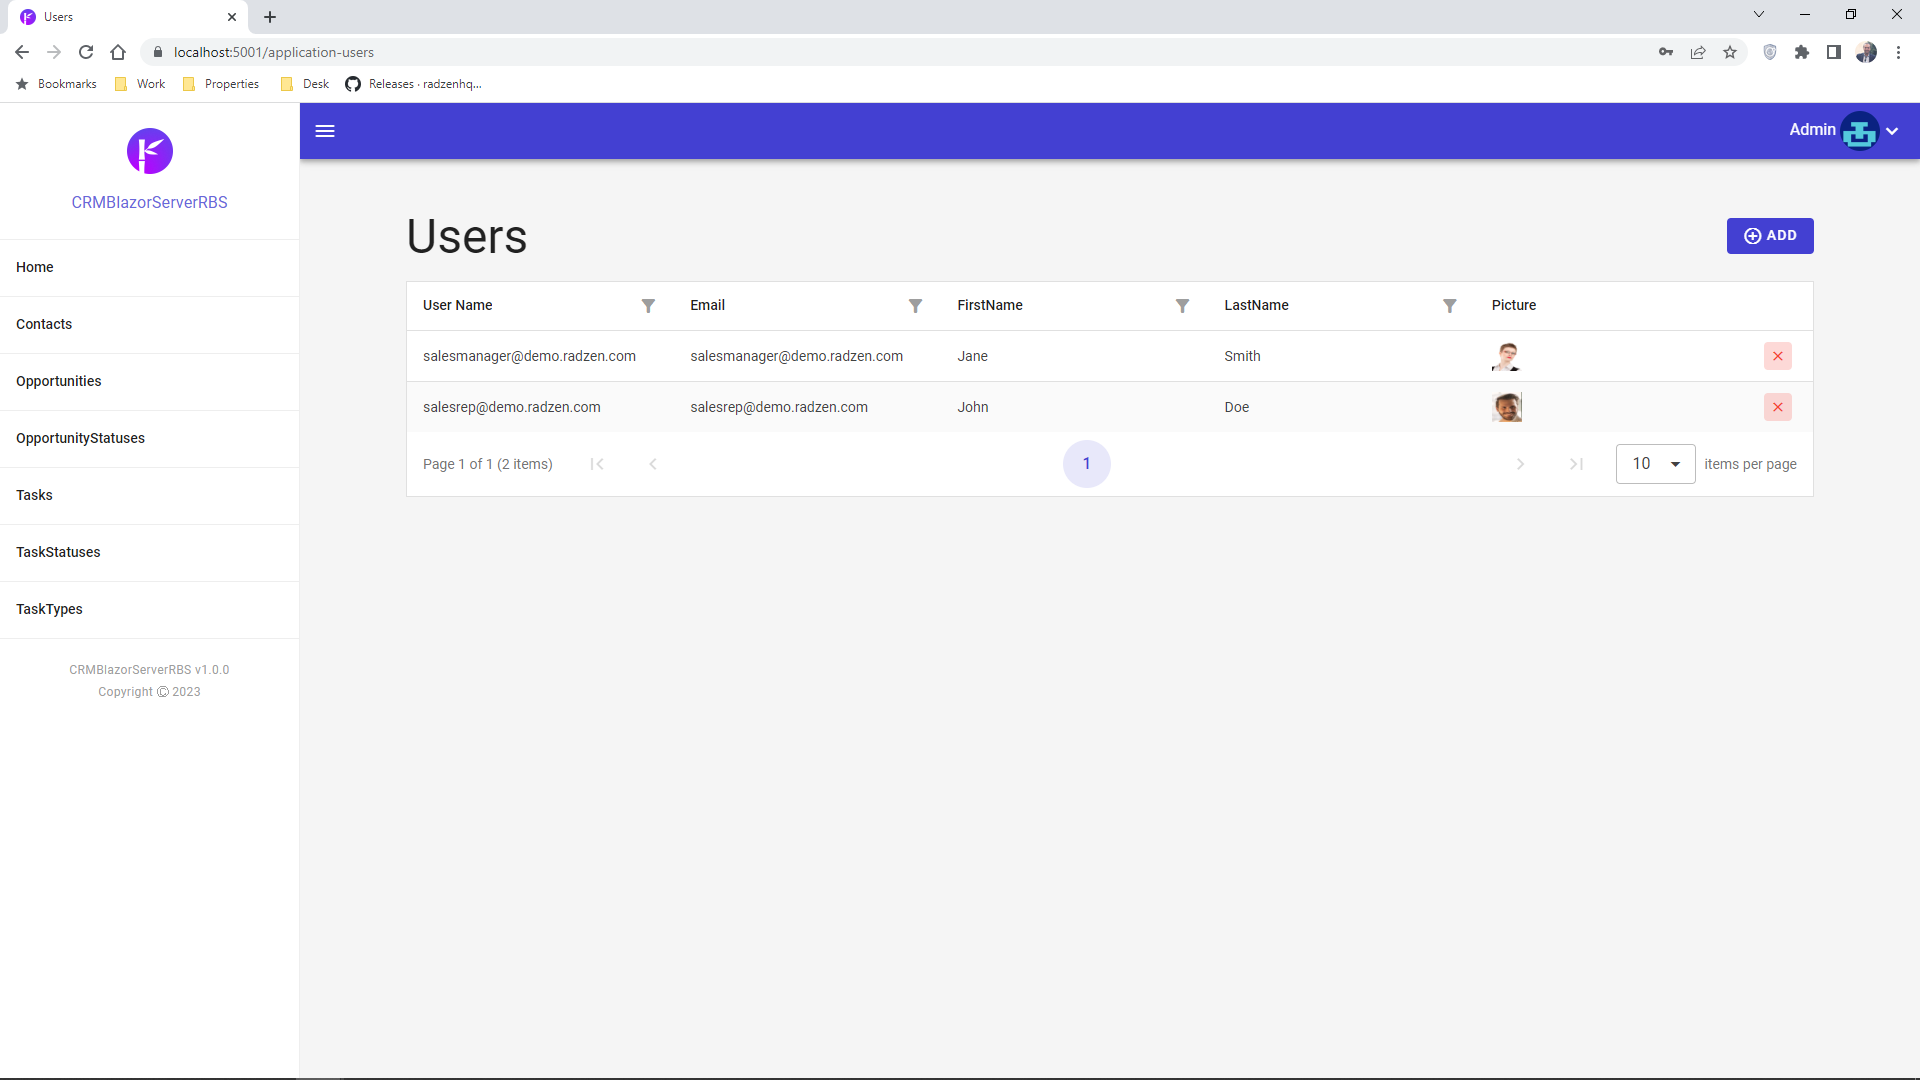
- Add a second user with the following attributes:
- Email:
salesrep@demo.radzen.com - First Name:
John - Last Name:
Doe - Roles: check
Sales Representative - Upload some photo for the Picture (we will use this)
- Password and Confirm password:
SalesRep1@
- Email:
And we are done with the users!
Set page permissions
We would now allow only the members of the Sales Manager role to create new users and roles as well as opportunity statuses, task types and task statuses.
- Go back to Radzen Blazor Studio and stop the running application.
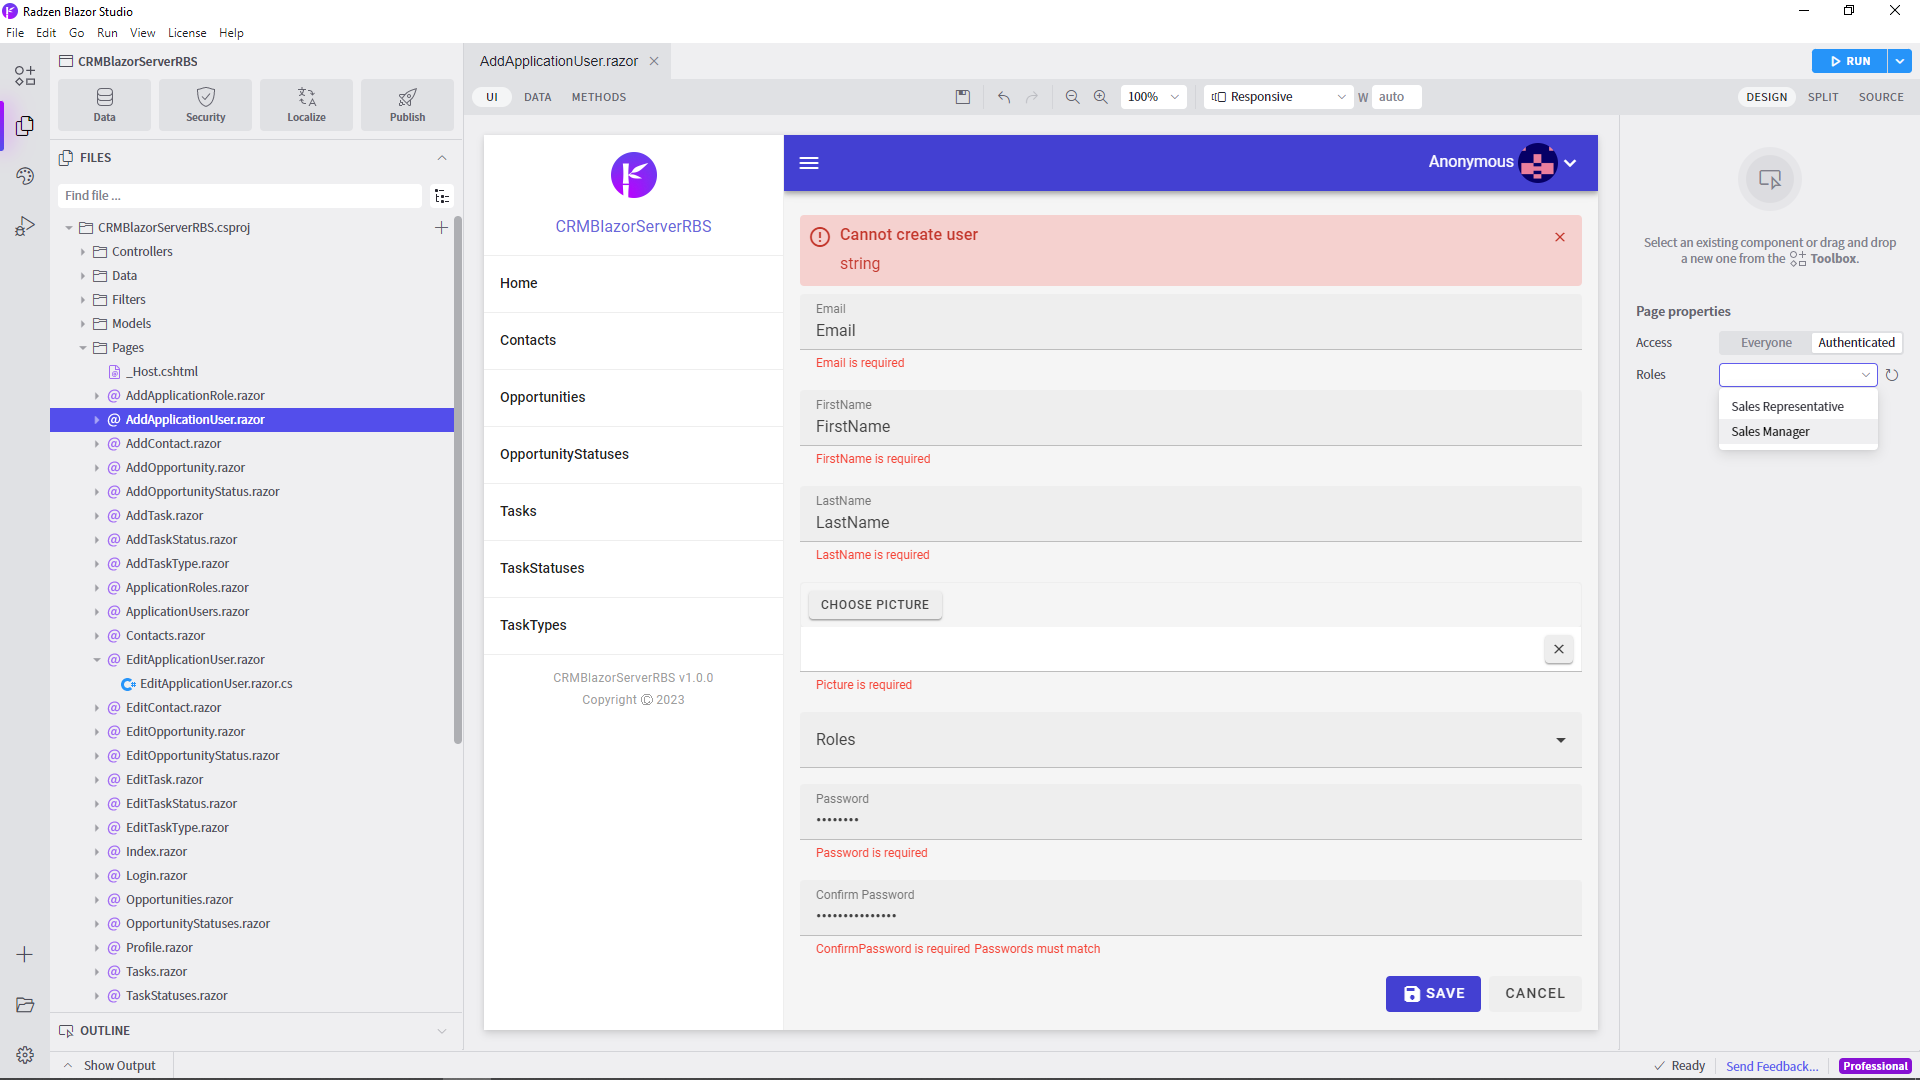
- Open the Add Application User page, clear the existing Access from the property grid and select only Sales Manager role. This will make the Add Application User page available only to members of the Sales Manager role.
![]()
- Repeat steps 2 and 3 for Application Users, Application Roles, Edit Application User, Add Application Role, etc.
We are now ready to Customize the CRUD pages.